Central Park Photo Shoot Details
The feedback on the family photos in Central Park has been wonderful. Thank you! I promised a followup post with more details and I’m ready to deliver.
How it Came About
Candice Stringham (the Brooklyn-based photographer) contacted me a few weeks ago. She teaches online photography classes and wanted to build her family photo portfolio for an upcoming class. So she offered to take photos of my family in Central Park. I took a peek at the work on her blog, thought it was fantastic and said: yes, please.
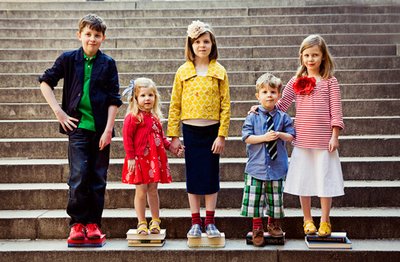
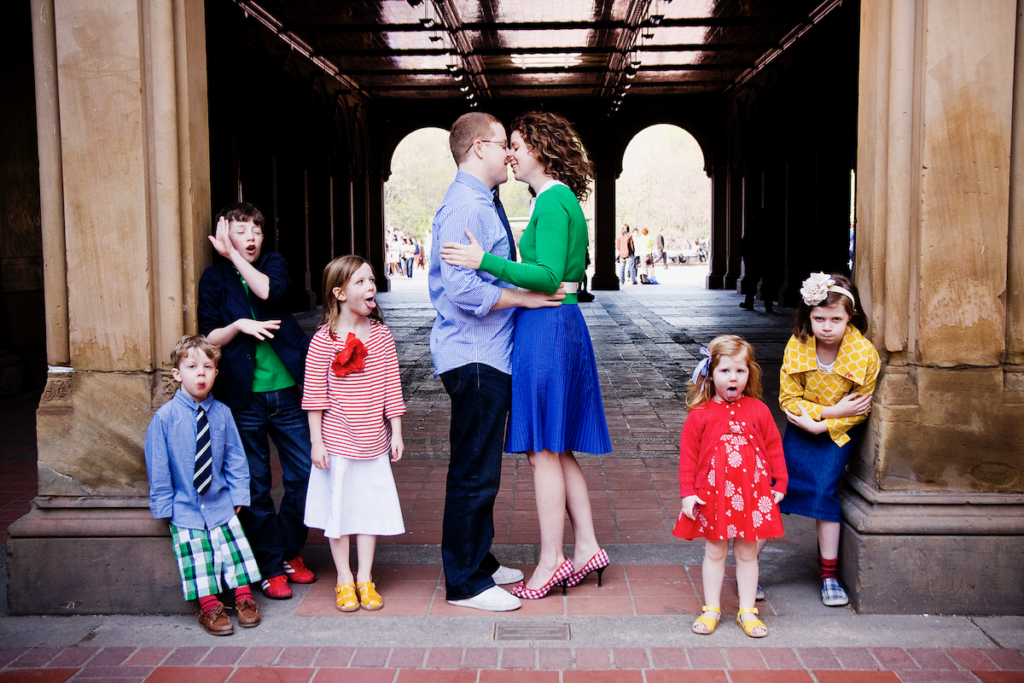
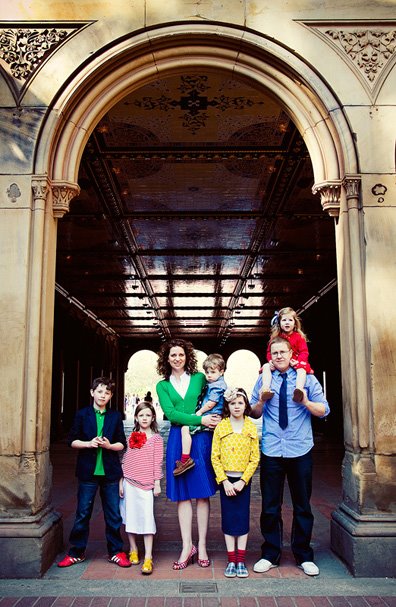
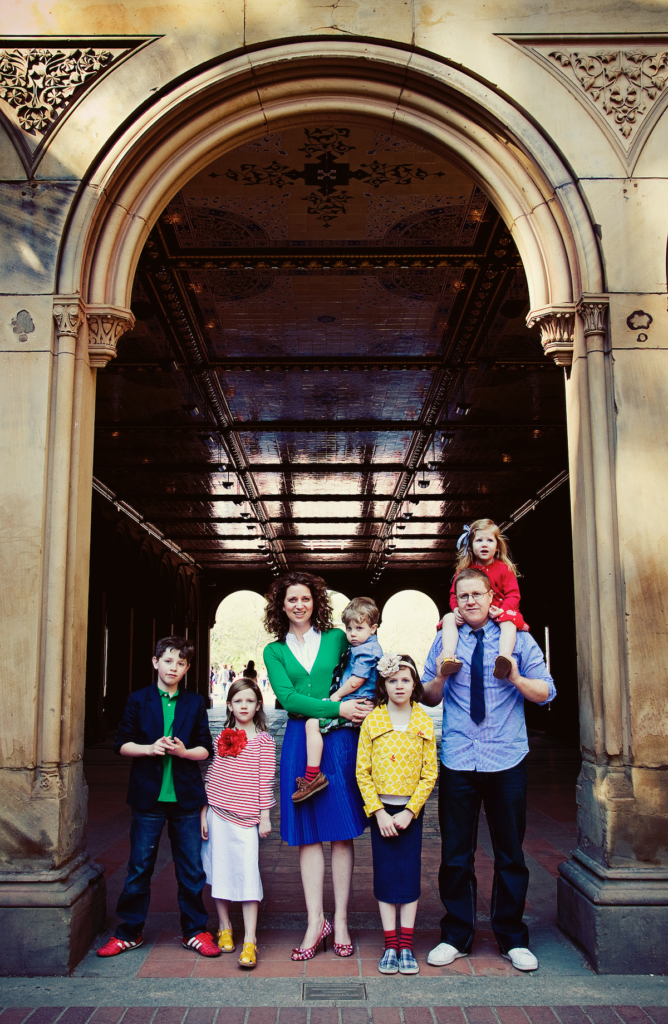
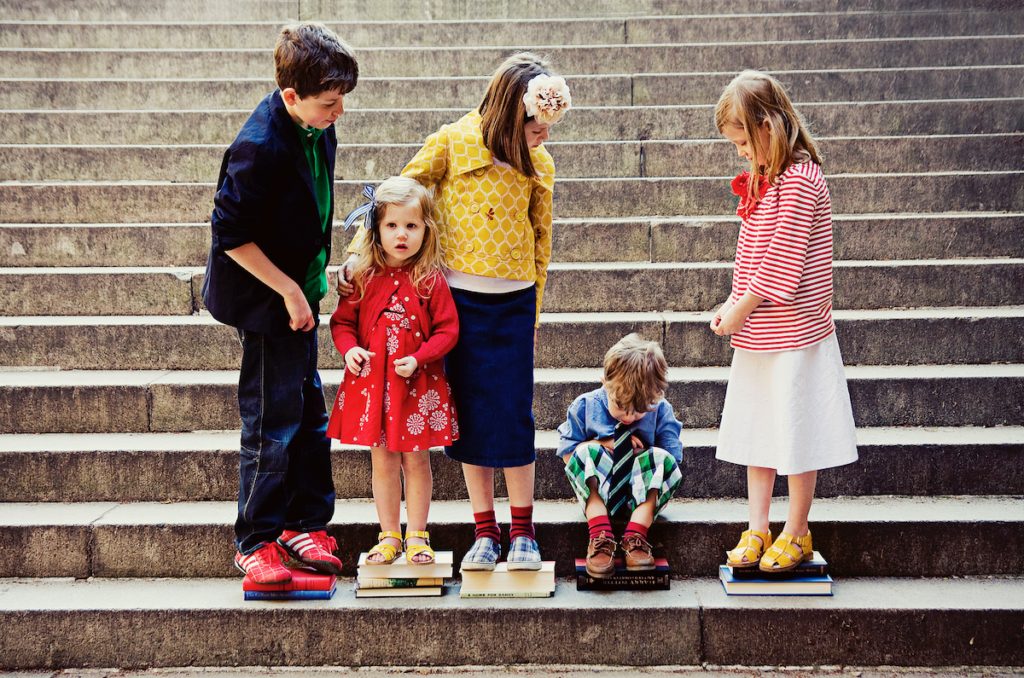
Candice liked the idea of doing either a pastel English tea inspired color scheme, or a more colorful Kate Spade/Crewcuts inspired color scheme. She pulled Brenda Barrett Taylor on to be the prop stylist and they decided to go with Kate Spade/Crewcuts. My assignment was to come up with outfits in this color palette: navy blue, crisp white, grass green, cherry red and mustard yellow. I didn’t keep to the palette in every case (my skirt is royal blue, for example), but I did my best to keep to their vision.

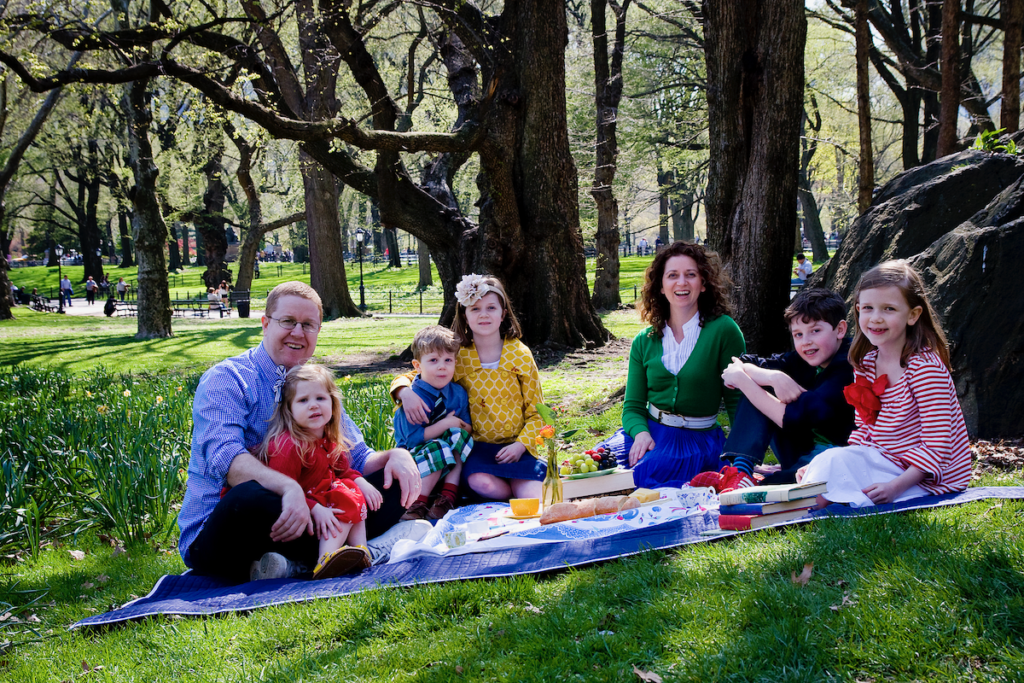
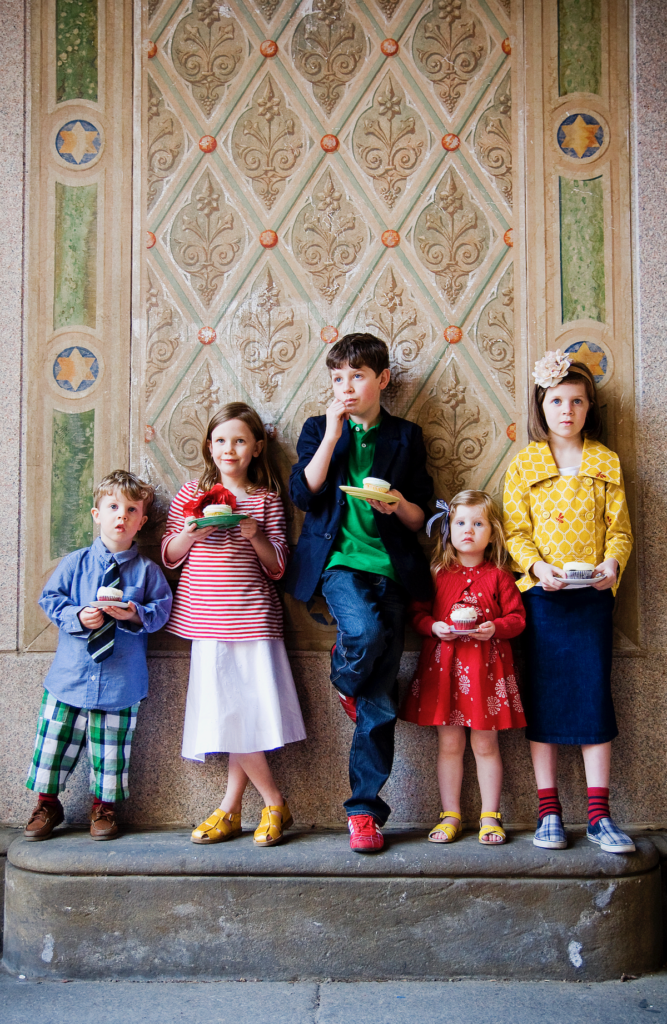
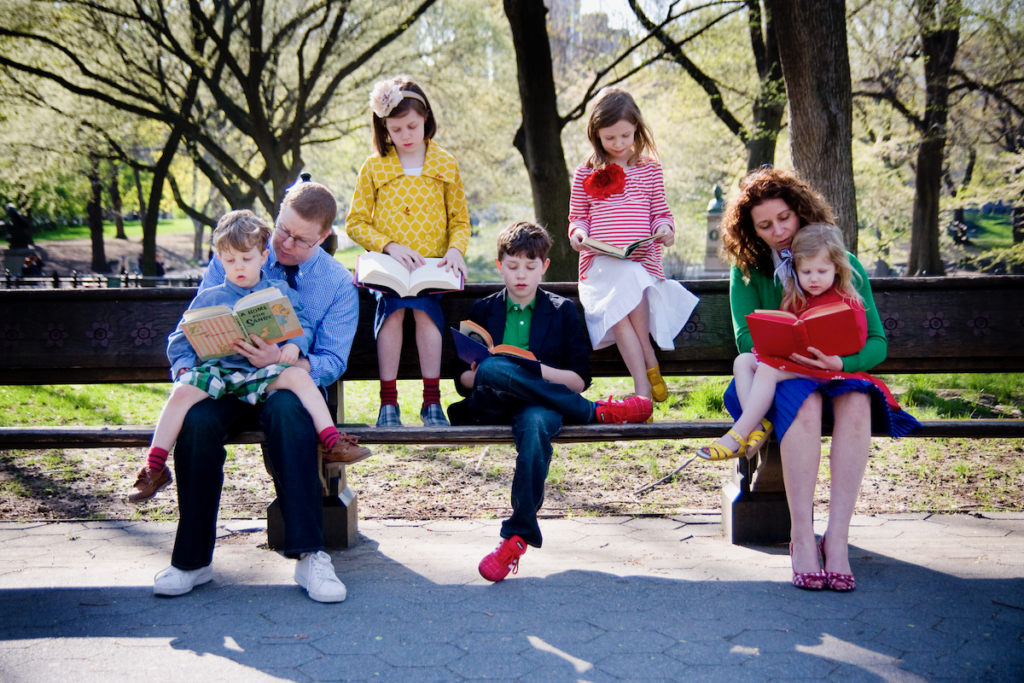
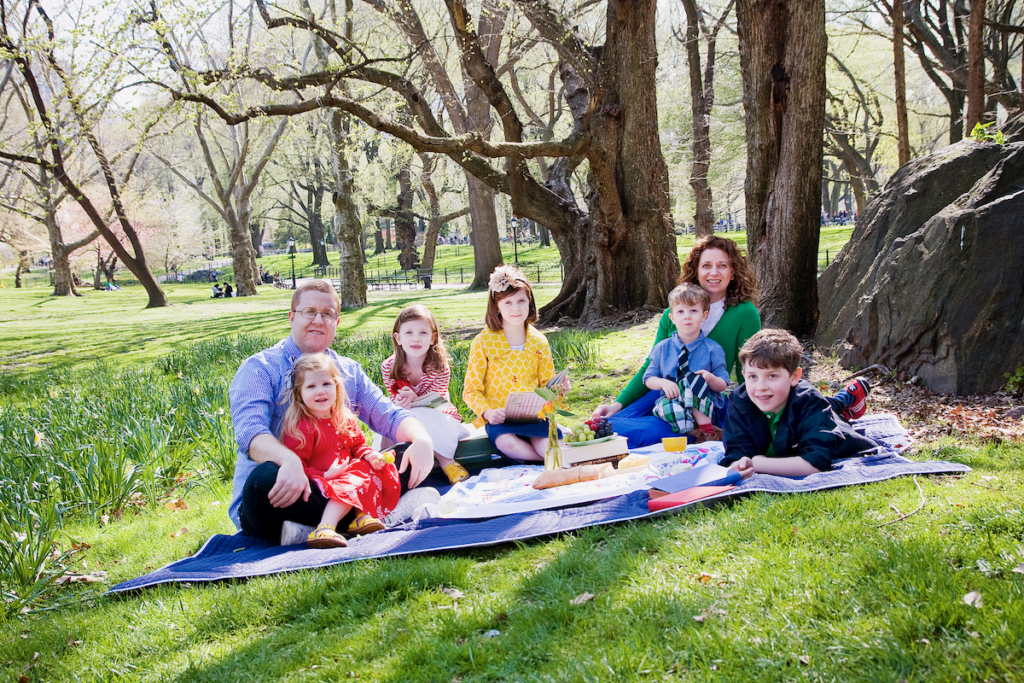
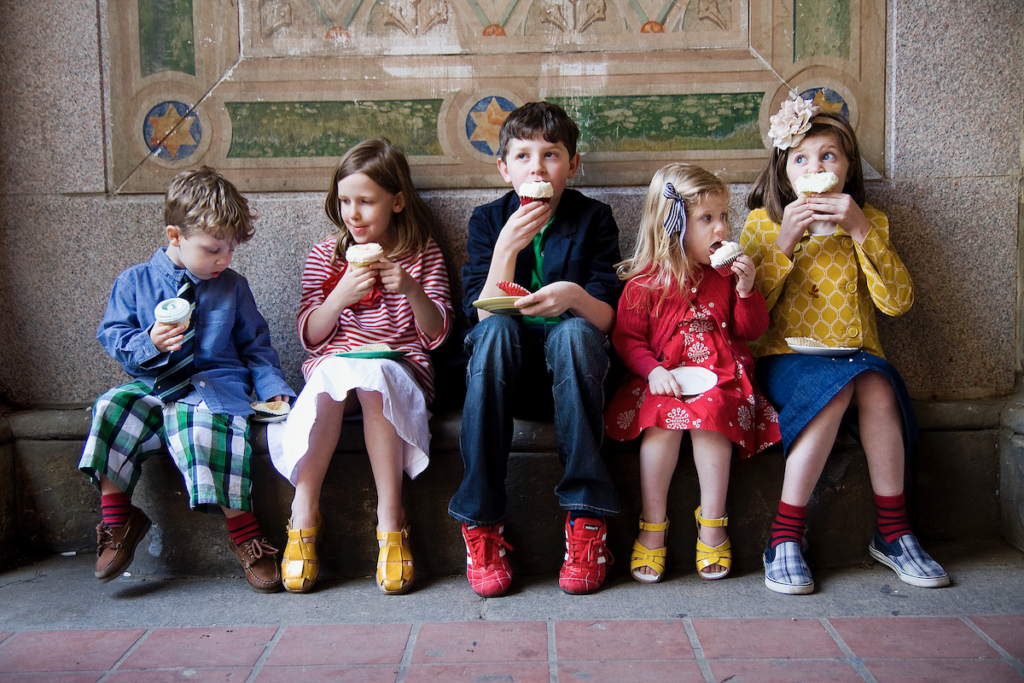
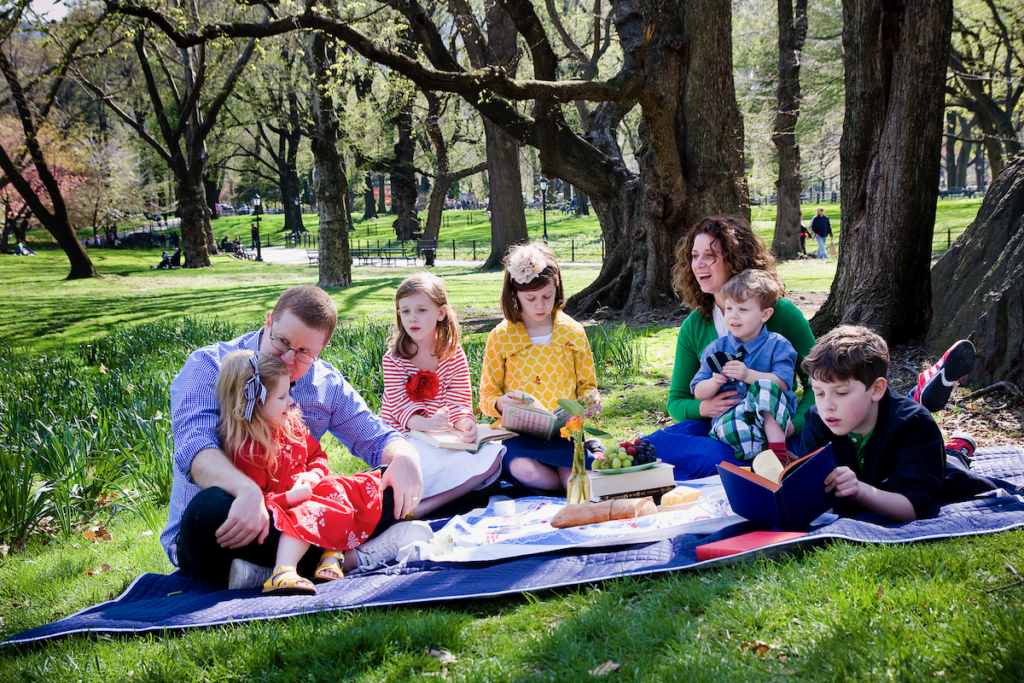
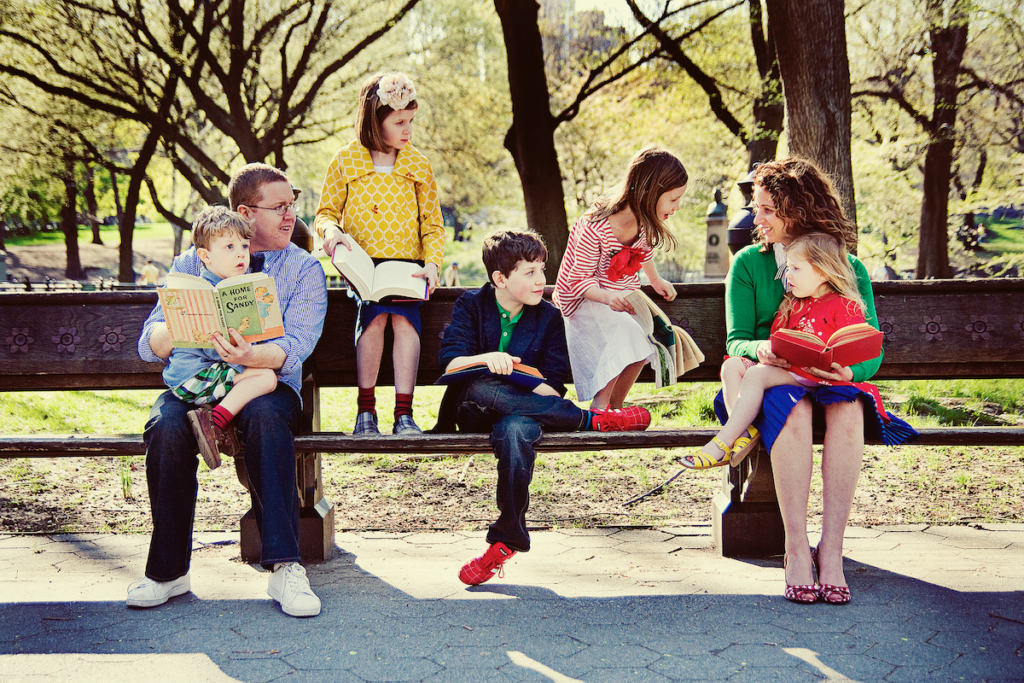
While I took care of the clothes, Brenda and Candice provided all the props. The picnic. The teacups. The books. And the cupcakes from Magnolia Bakery. Brenda is an incredible stylist. It was a treat to get to see her in action.
What We Are Wearing
I worked hard on the outfits. Dug through closets. Borrowed, begged, bought. Recruited friends to help shop. Overbought just in case. Kept tags on anything new until I knew exactly what we were going to use. I used my bedroom floor to gather outfits as they came together and get a sense of what colors we still needed more of. The night before the shoot I had the kids try on different options until we narrowed it down.
We brought additional clothing to the shoot in case the photographer wanted to mix things up — a mustard jacket for me by J.Crew, a green check button down for Ben, etc. But we ended up shooting in exactly what we were wearing. Amazingly, we didn’t need to buy that much. And everything we did buy is very useable.
Betty wore an adorable dress from Ses Petities Mains. It wasn’t new (she’s owned it since December), but it still looks great. Her red cable sweater is by Ralph Lauren, a hand-me-down from a friend. Her yellow sandals are by Salt Water Sandals, from Zappos.
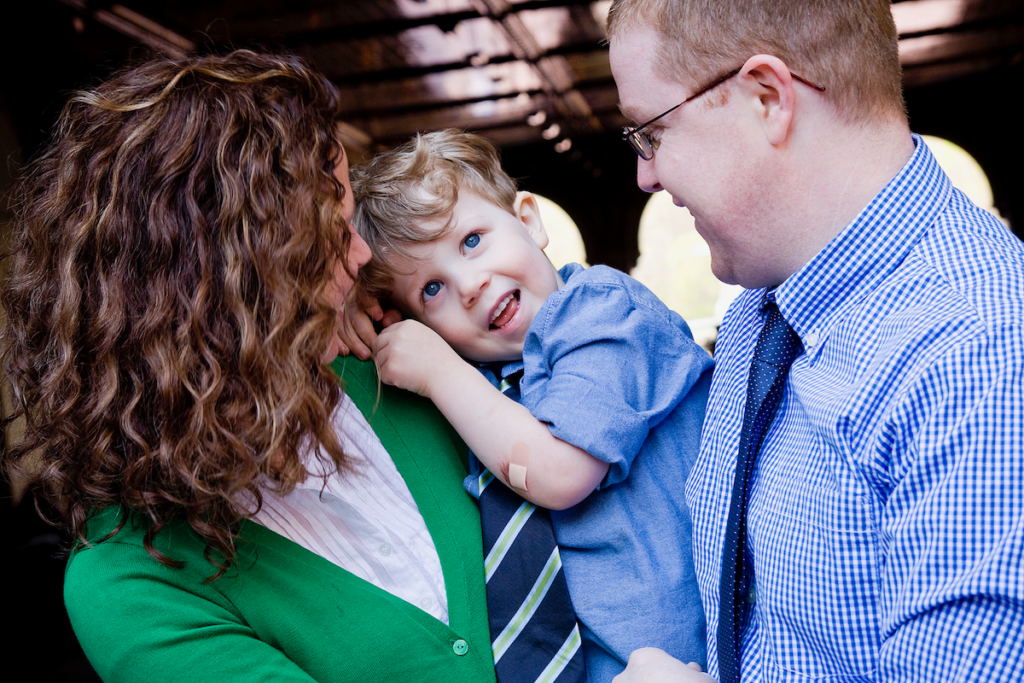
Oscar wore plaid shorts and a blue oxford button down from Old Navy. His tie was picked up at Gymboree (score: $6!). I actually had a different tie picked out for him with wide, diagonal mustard and navy stripes. But he wouldn’t wear it. The one he did wear worked out just fine. His shoes were picked up last summer, classic boat shoes by Perry Topsider.
Olive wore a white eyelet skirt by Ralph Lauren, borrowed from my friend Kathryn Carmona. Her mustard shoes are also borrowed from Kathryn. They are European and beautiful. I can’t remember the maker — Kathryn, if you’re reading, please share. They were actually a size too small for Olive, but she manned up and wore them anyway for the photo shoot — without complaint I might add. Olive’s red stripe shirt is several years old from Old Navy. Her red flower was a lucky last-minute addition. I picked it up at H&M; last summer.
Maude wore a gorgeous mustard jacket from Ismodern. On sale. Grab one while you can. The dark denim skirt she made herself at sewing class last summer. Her red stripey socks were borrowed from Ralph — all stripey socks in the photo are from H&M;, and were found in Ralph and Oscar’s stockings this past Christmas. The flower headband was made by Olive last Christmas as a gift. Edit: Forgot Maude’s shoes — purchased at Target last month in the boy’s shoe department.
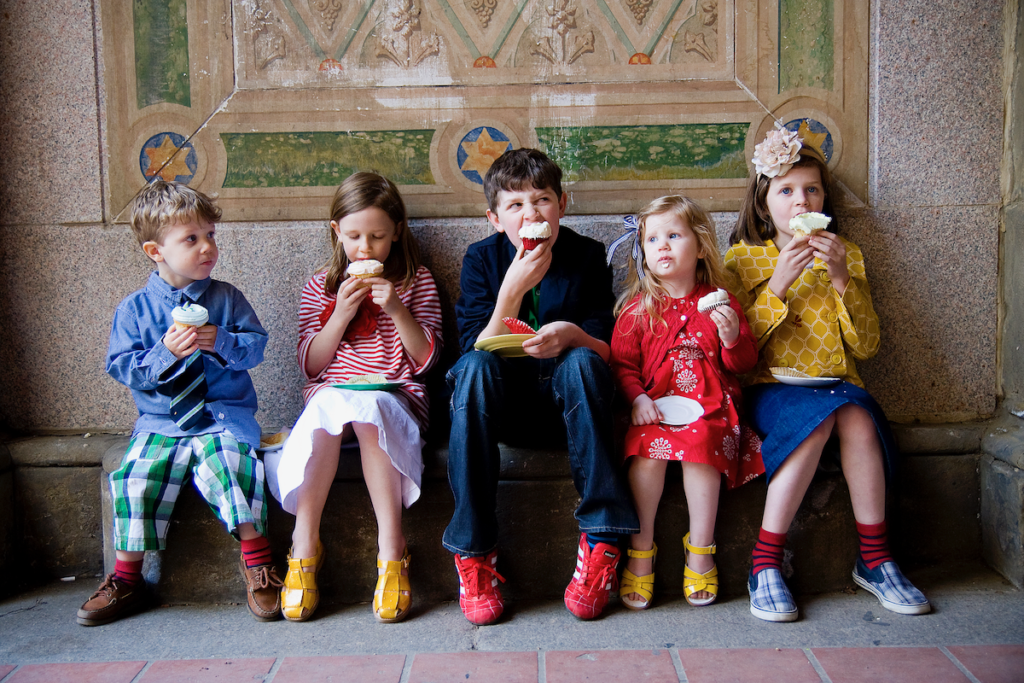

Ralph wore a green Lacoste polo shirt. Found at Lord & Taylor. Pricier than I would normally go for a polo shirt, but it was 25% off and was the exact perfect green. His navy blazer is by Gymboree (another score: $18!). His jeans he already had from H&M.; His sneakers were new — but weren’t bought for the photo shoot, he just needed new sneaks. By Adidas, from Zappos.
I wore a blue lamp-shade pleated skirt from Banana Republic. I already owned this. The white shirt is from H&M;, also already owned by me. The green cardigan was bought for the shoot and was found at Old Navy. Edit: Forgot my shoes — I bought the adorable gingham peep toes at TJ Maxx last summer, I believe the brand is called Unlisted.
Ben wore BR jeans he already owned. Lacoste sneakers he already owned. A tie he already owned. We picked up the blue check button down at Old Navy.
What The Shoot Was Like
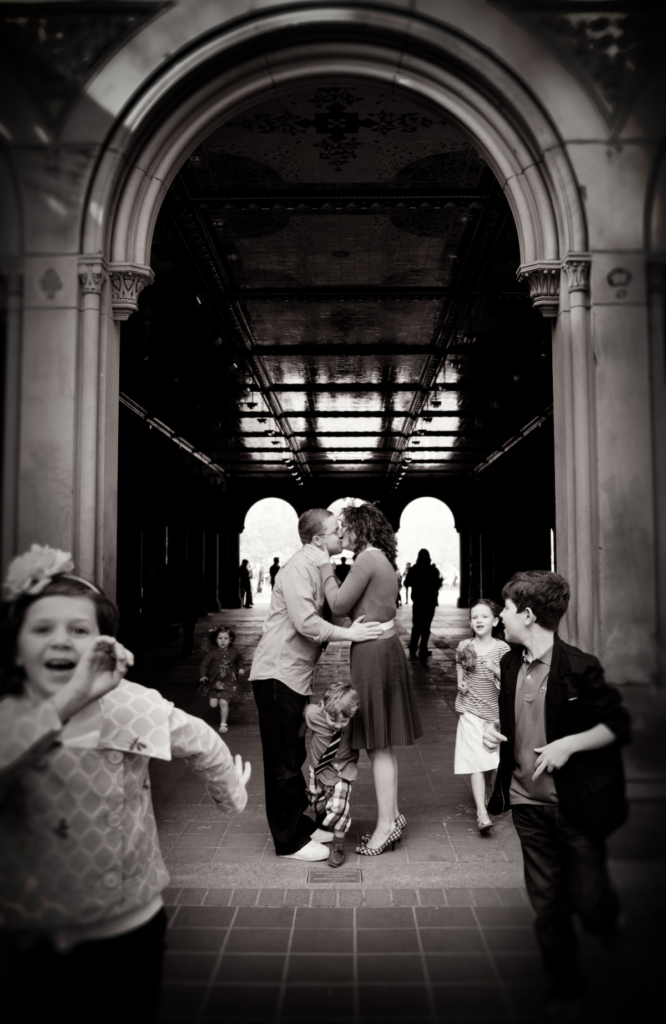
The shoot was 90% awesome and 10% Oscar throwing tantrums. But really, the kids were great. Candice was patient. The weather couldn’t have been better. The whole shoot took about 2 hours but felt like a few really wonderful minutes.
I said it before, but I have to say it again: I couldn’t be more pleased with how the photos turned out. A perfect souvenir of New York for my family. Thank you Candice and Brenda!
Central Park
The family pictures in Central Park turned out beautifully. Candice Stringham, the photographer, was incredible. Lots of patience. Great style. Flexible. A delight to work with. If you’re in New York — or anywhere near New York — book her right away. For reals.
I know preparing for a family portrait can be stressful. What will everyone wear? Will the kids behave? Will I look hot? : ) Leading up to our photo shoot, there were several times I was tempted to cancel — we’re just so busy right now. But I am beyond happy that I have these photos now. What a treasure for our family! Worth every bit of time and effort.
And I can’t even put into words how wonderful it was to spend an afternoon-with-perfect-weather in our beloved park before the big move. I’m going to get all weepy just thinking about it.
P.S. — Thanks for all the great feedback! Per your requests, here is a post about how the shoot and the wardrobe came together here.


Calling Cards
 Yesterday, the older 3 kids went to school with a stack of keep-in-touch calling cards to hand out. The cards list twitter handles, blog urls, email, skype names — everything but a phone number. My favorite were the titles they picked out: Kids Film Expert, Ballerina, and Girl Extraordinaire.


How to Make A Baby

5 Easy ways to teach a girl (or boy) to sew — By Guest Mom Amy Smart
image credit, Amy Hackworth
I think sewing is another great method for kids to express themselves creatively. I love this thought of teaching our children to sew as a means of being a “stabilizer” in their lives expressed beautifully by former first lady, Grace Coolidge:
“Every girl should be taught to sew, not merely for the sake of making something, but as an accomplishment which may prove a stabilizer in time of perplexity or distress. Many a time when I needed to hold myself firmly I have taken up a needle (a sewing needle, some knitting needles, or a crochet hook.) Whatever its form or purpose, it often proved to be as the needle of the compass, keeping me to the course.”
So here are some ways to get them (or you!) started:
One fun way, especially with really young kids, is beginning-level lacing cards. The ever-popular eeBoo has some adorable choices.

If your kids are a little older and you want to make your own sewing cards, check out Marie’s patterns at Make and Takes.

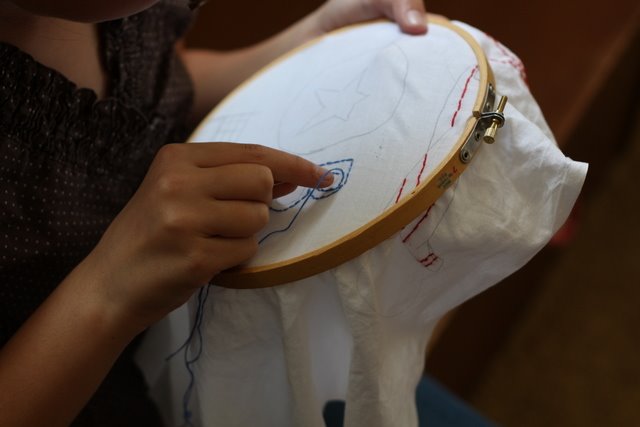
In The Creative Family, Amanda Soule suggests simply giving your children some fabric in a sewing hoop, a needle and thread, and letting them go.
We’ve also had success with my daughter drawing a picture and taping it to the window. Then she lightly traces it onto plain fabric, and stitches over the traced lines. A very simple way to let them capture their art in another form.
For another very simple project to do with your kids, Oliver + S offers this free download for an easy child’s skirt. I am no expert at sewing clothes (still a little scared of zippers and sleeves) but this one is totally do-able. And cute.

Really, you can do this. And it doesn’t need to be perfect. Keep it simple, but at the same time, let them run with it. Don’t be afraid to let them (or yourself) make mistakes. Your kids will love anything they have a hand in, and it will give them a ton of satisfaction to see a finished product that they accomplished with their own hands. Hopefully it will do the same for you too!
Recycled Boxes
 The towers of boxes in my living room are by turn exhilarating (new adventure!) and overwhelming (so much work to do!). Diane at Mayflower told me to call her whenever I’m getting stressed out about the move — she promised to talk me down from the ledge — and now I’ve got her on speed dial. : )
Mayflower will be bringing boxes when they arrive to do the packing on the 28th. But it turns out I want to do as much of the packing myself as I am able to. I didn’t know I would feel this way. I assumed I would want them to do all the packing. Every last Lego and barrette. But I’ve found that doing the boxing up myself is the ideal way to carefully go through drawers and closets and purge our belongings. And I have to say here, that purging feels good. Really good. If you come by my house and tell me you want something, I’m very likely to hand it to you. (Piano? Take it. Oscar? He’s yours.) It feels that good.
At one point, I did go to Staples and pick up some bankers boxes to put our paperwork and files in. But I’m trying to gather used/recycled boxes for the rest of our belongings. Freecycle has been my best source — by providing either actual boxes or advice on where I can pick up used ones for free. In fact this morning, based on some freecycle advice, Ben Blair and I gathered a ton of boxes at Sound Shore Hospital (and apparently they have dozens on any given morning — who knew?).
Diane also recommended checking out places like U-Haul or self-storage shops if we end up needing to buy any specialized boxes because they usually have the best prices.
What about you? What are your best box sources?
The towers of boxes in my living room are by turn exhilarating (new adventure!) and overwhelming (so much work to do!). Diane at Mayflower told me to call her whenever I’m getting stressed out about the move — she promised to talk me down from the ledge — and now I’ve got her on speed dial. : )
Mayflower will be bringing boxes when they arrive to do the packing on the 28th. But it turns out I want to do as much of the packing myself as I am able to. I didn’t know I would feel this way. I assumed I would want them to do all the packing. Every last Lego and barrette. But I’ve found that doing the boxing up myself is the ideal way to carefully go through drawers and closets and purge our belongings. And I have to say here, that purging feels good. Really good. If you come by my house and tell me you want something, I’m very likely to hand it to you. (Piano? Take it. Oscar? He’s yours.) It feels that good.
At one point, I did go to Staples and pick up some bankers boxes to put our paperwork and files in. But I’m trying to gather used/recycled boxes for the rest of our belongings. Freecycle has been my best source — by providing either actual boxes or advice on where I can pick up used ones for free. In fact this morning, based on some freecycle advice, Ben Blair and I gathered a ton of boxes at Sound Shore Hospital (and apparently they have dozens on any given morning — who knew?).
Diane also recommended checking out places like U-Haul or self-storage shops if we end up needing to buy any specialized boxes because they usually have the best prices.
What about you? What are your best box sources?
Ask Design Mom Week: Caring for Curly Hair

Question:
Hi Gabrielle. I’m really enjoying your Ask Design Mom week, and I have a question for you. What products do you use for your hair? Your curls always look beautiful, and I love that you wear it curly and don’t get it blown straight all the time. I also have curly hair and am always looking for product suggestions. Thanks, and good luck with the move. — Emily

Answer:
Hi Emily! Thanks for the hair compliments. I feel like I’m having a hair crisis right now, so I appreciate the positive feedback. My haircare has been heavily influenced by the book Curly Girl. I don’t follow their instructions exactly, but I have adopted many of their guidelines. Two that I use daily are:
1) Pile on the conditioner. I use a light shampoo very infrequently, and then a heavy conditioner very frequently. Any thick conditioner will work. I leave it on in the shower for a few minutes. Then rinse it out. After I’ve towel-dried my hair I put in more conditioner, mixed with gel, and leave it in. On a particularly frizzy day, I might scrunch my dry hair with even more conditioner throughout the day.
2) Get rid of your brush. When I’m wearing my hair curly, I never brush it. I keep a wide tooth comb in the shower to work the conditioner through, but I don’t brush.
What about you Fellow Curly Girls? Do you have any favorite haircare products or haircare tips?
Images of curly haired peeps from Bumble & Bumble. Win a $300 shopping spree from Peek? Find out how here.
Homemade Cherry Pie
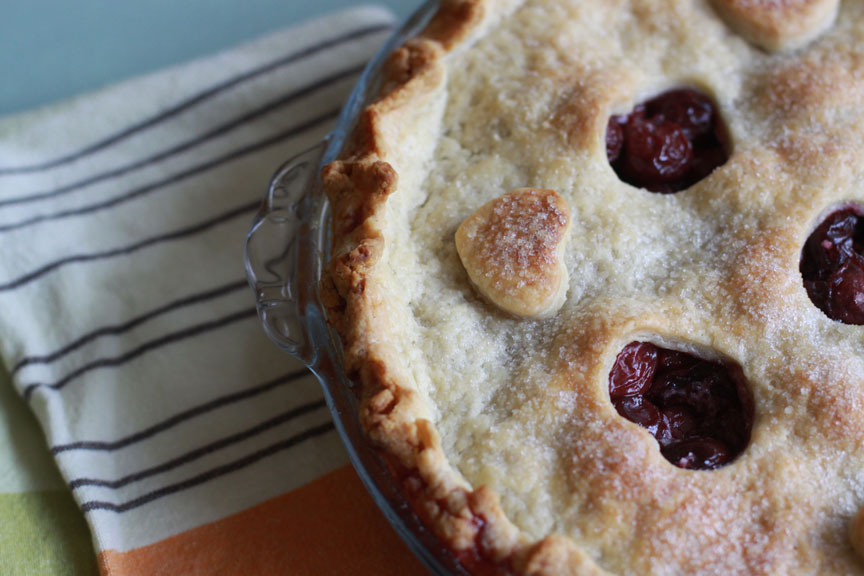 I just finished my 3rd piece of pie. I had one after dinner last night. One as a late night snack. And another for lunch today. The pie is so good. Cherry. Not weirdly-artificial-from-a-can-cherry, but real, sour cherry. With a buttery crust. Cherry pie is my favorite.
Yesterday after school, my friend Sherry came by with her kids. And she brought us this whole gorgeous pie. I couldn’t have been happier. I love afternoons spent with Sherry. We send the kids to the trampoline and then we talk about everything and anything that comes to mind. Kids and marriage and school and moving and photography.
I would ask Sherry for the recipe, but I know she’s one of those bakers that adds a little of this and a little that and doesn’t really keep track. So I took some photos of the gorgeous pie instead. So that I will remember her kindness when I’m far away.
I just finished my 3rd piece of pie. I had one after dinner last night. One as a late night snack. And another for lunch today. The pie is so good. Cherry. Not weirdly-artificial-from-a-can-cherry, but real, sour cherry. With a buttery crust. Cherry pie is my favorite.
Yesterday after school, my friend Sherry came by with her kids. And she brought us this whole gorgeous pie. I couldn’t have been happier. I love afternoons spent with Sherry. We send the kids to the trampoline and then we talk about everything and anything that comes to mind. Kids and marriage and school and moving and photography.
I would ask Sherry for the recipe, but I know she’s one of those bakers that adds a little of this and a little that and doesn’t really keep track. So I took some photos of the gorgeous pie instead. So that I will remember her kindness when I’m far away.
Ask Design Mom Week: Thank you/Welcome Gift
Question:
Gabrielle, I have been reading, enjoying and learning from your blog for a little over a year now and was hoping you could help me. I was elected as the new President for my sons preschool and will be taking this adventure with seven other wonderful, amazing women whom I want to greet, encourage and thank for joining together to make our school a better place.
I need gift ideas that are super cool and useful but on the less expensive side as I do not want to spend a ton. If you have any ideas or links you could send my way I would really appreciate it. I am a graphic designer so do it yourself projects would work too. Thank you for any help or direction you may give. — Jennifer
Answer:
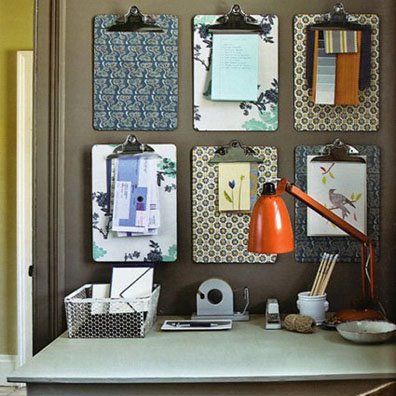
I love your question, Jennifer. There are always great suggestions in the comments whenever the topic is gifts — so many thoughtful ideas. Since you’ll be working with these women, my first thought was pretty office supplies. Specifically, I was thinking of the decoupaged clipboards I made for my daughter’s birthday party favors. I made mini ones, but you could make full size ones for the grownups. A great DIY project and very inexpensive. Plus they’re practical and useful. You can find instructions at Martha Stewart.
What about you, Clever Readers? What would you give as practical, super-cool, inexpensive gift?
You could win a $300 shopping spree from Peek Aren’t You Curious? Yay!! Find out how here.
Ask Design Mom Week: Baby Books

Question:
Do you have any baby books to recommend? Thank you! — Aiilie


Answer:
Sure do. There are many great ones out there. In lots of styles and price ranges. Take a peek at these books by Nikki McClure, Binth, Tracey Clark, the Metropolitan Museum (pictured) and Kistner Supply. All are gorgeous!
What about you Dear Friends? What are your favorite Baby Journal Books?
What’s Ask-Design-Mom-Week? See here. Win big. $300 big.
Green photo scavenger hunt
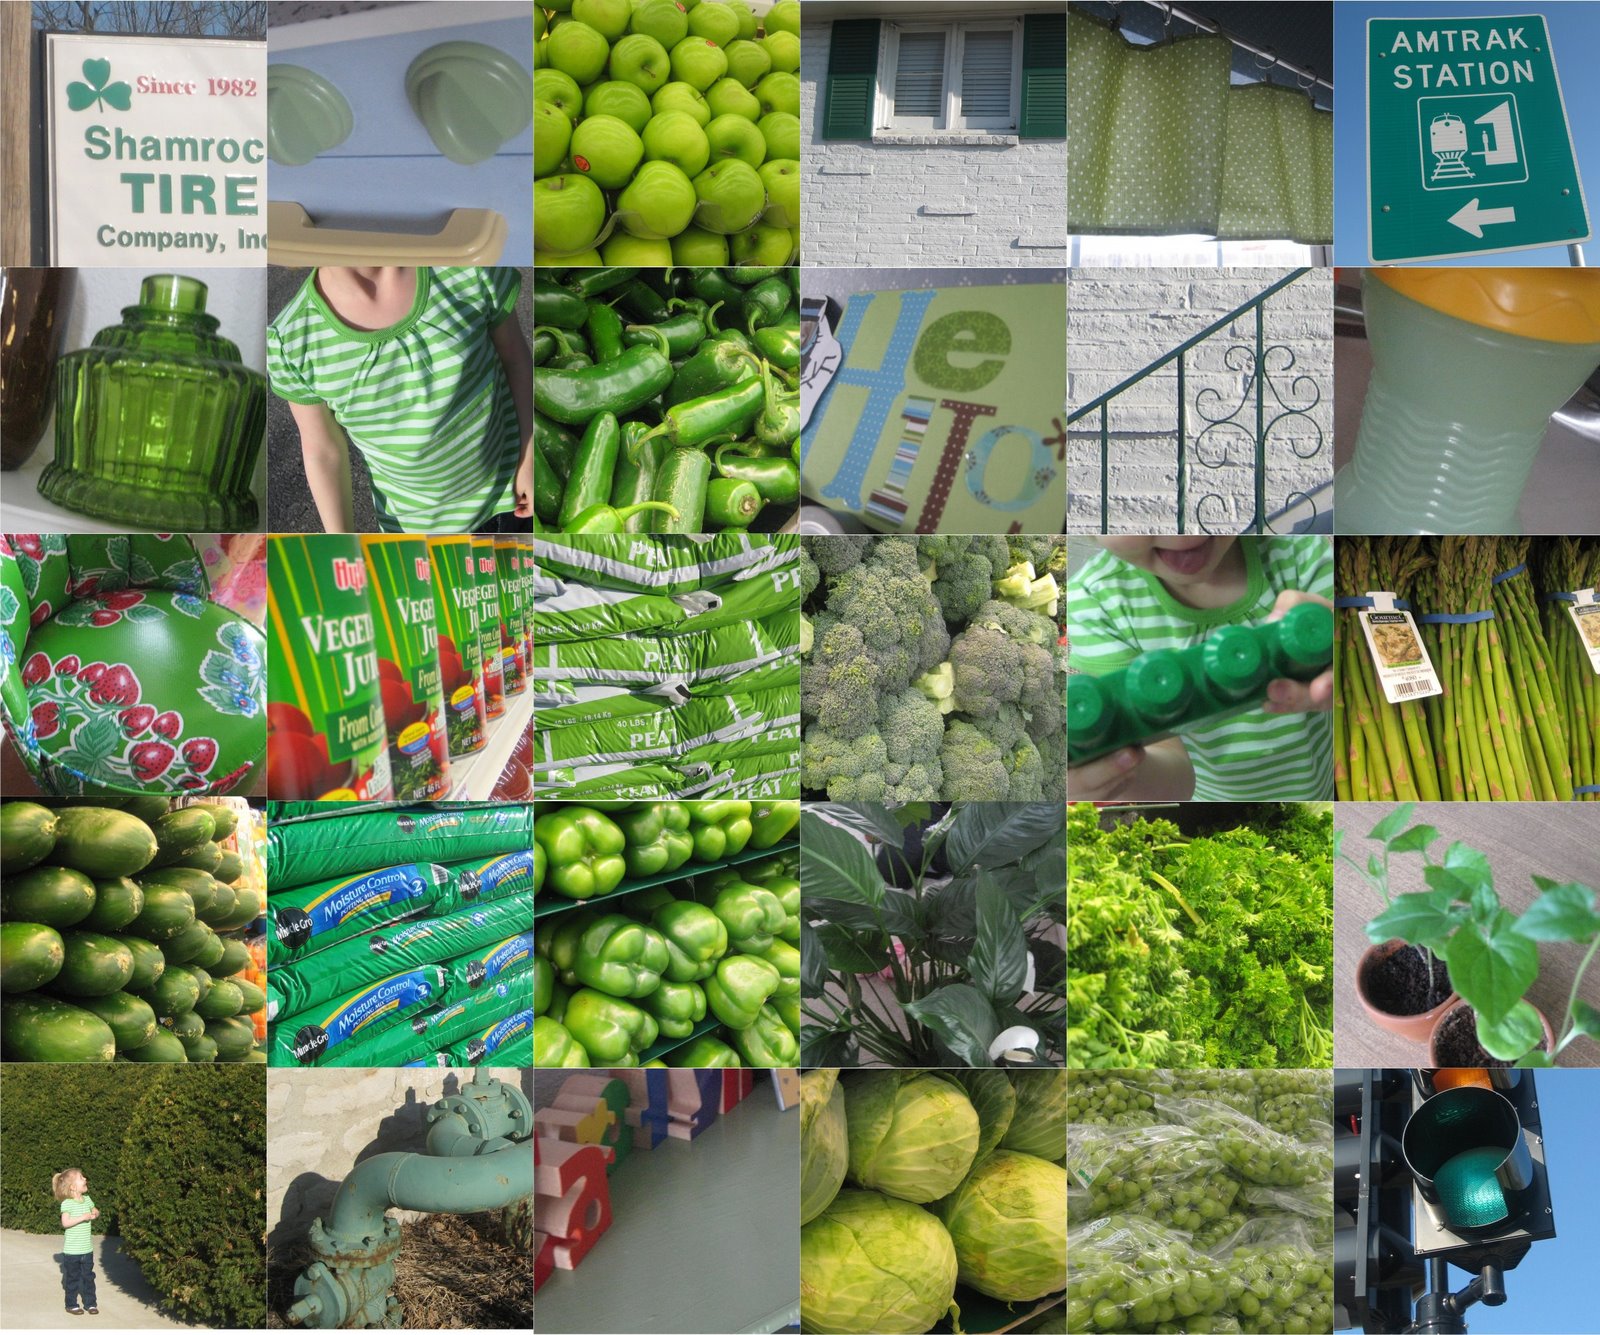
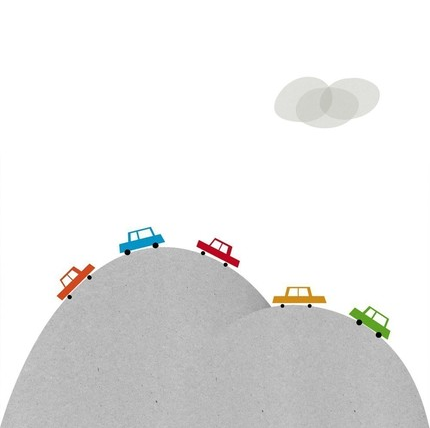
Katie Schultz had a great idea. She took her kids on a photo scavenger hunt. They walked around their neighborhood and took pictures of anything green they could find. So smart!
The same concept would work with any color. You could do it with letters as well. Or pick another sort of theme — smiles, toys, cars, things that make noise, animals, etc. Toddlers and preschoolers would be all over this.
Young Einstein Party Food & Decorations


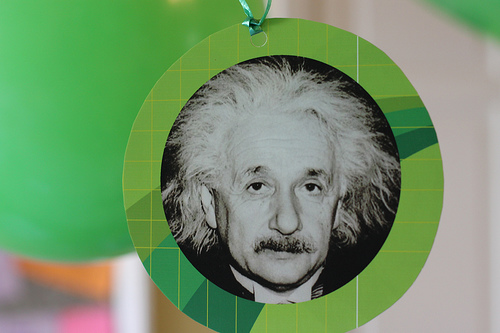 Maude’s Young Einstein party was on Saturday. It was a hit! Maybe the favorite birthday party we’ve ever hosted. Decorations were simple — green balloons hung upside down and circles featuring portraits of Einstein that coordinated with the invitations we’d designed. (They matched the party favors as well.)
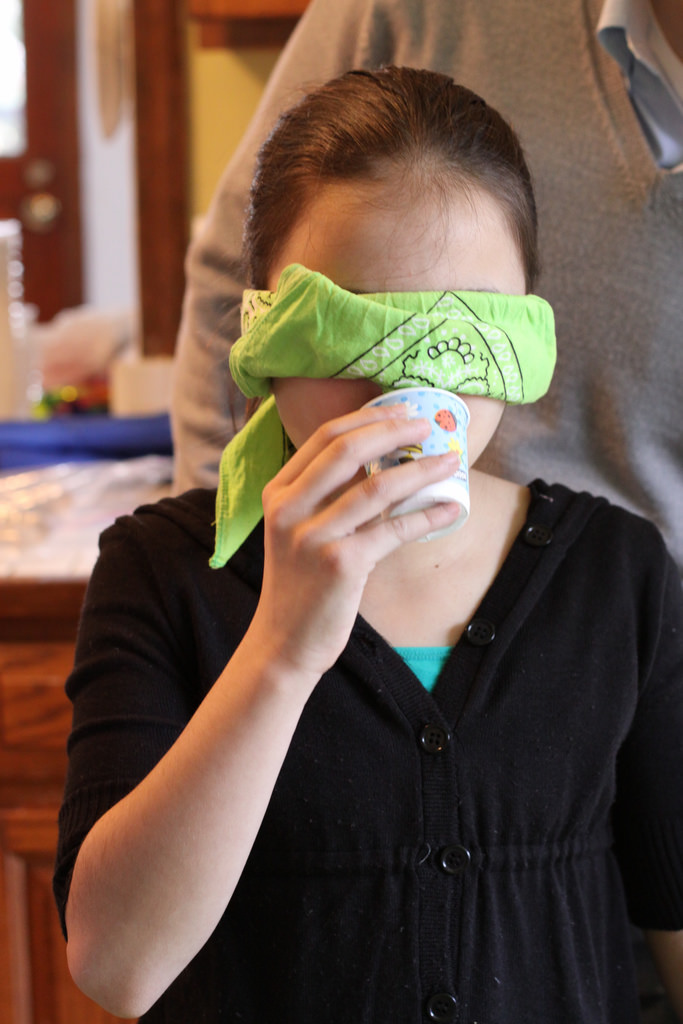
The first part of the party was filled with experiments showcased by Kiasa from Science Explorers of NY (they were wonderful — you can see my post about them by scrolling down or clicking here). And afterwards, it was time for lunch: pizza (delivered mid-party by our favorite local pizza shop) plus strawberries and bananas. But to keep it science-y, we started the meal with a blind-folded taste test between two different chocolate milks.
Maude’s Young Einstein party was on Saturday. It was a hit! Maybe the favorite birthday party we’ve ever hosted. Decorations were simple — green balloons hung upside down and circles featuring portraits of Einstein that coordinated with the invitations we’d designed. (They matched the party favors as well.)
The first part of the party was filled with experiments showcased by Kiasa from Science Explorers of NY (they were wonderful — you can see my post about them by scrolling down or clicking here). And afterwards, it was time for lunch: pizza (delivered mid-party by our favorite local pizza shop) plus strawberries and bananas. But to keep it science-y, we started the meal with a blind-folded taste test between two different chocolate milks.
 By the time the taste tests were done, Kiasa and her talented assistant Emily had already cleaned up all their equipment and were packed and ready to go. So efficient!
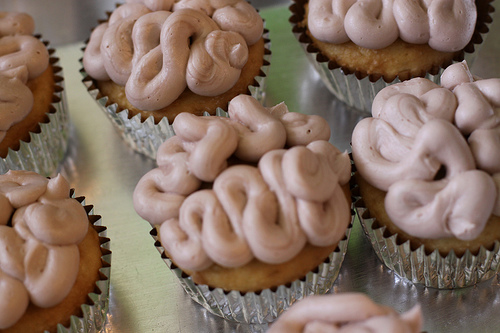
When lunch was finished, it was time for cupcakes and candles. Brain-y cupcakes of course. (I know. I know. The cupcakes are a little too gross/creepy/cheesy, but you can not believe how awesome they were with the 4th grade crowd.) Edit: for everyone that’s loving the brain cupcakes, take a look at this full on brain cake I found at Cookie.
By the time the taste tests were done, Kiasa and her talented assistant Emily had already cleaned up all their equipment and were packed and ready to go. So efficient!
When lunch was finished, it was time for cupcakes and candles. Brain-y cupcakes of course. (I know. I know. The cupcakes are a little too gross/creepy/cheesy, but you can not believe how awesome they were with the 4th grade crowd.) Edit: for everyone that’s loving the brain cupcakes, take a look at this full on brain cake I found at Cookie.

 Hooray for Maude turning 10 years old! Hooray for successful parties!
Lots more Young Einstein party photos here.
Hooray for Maude turning 10 years old! Hooray for successful parties!
Lots more Young Einstein party photos here.

Young Einstein Party Activities

 Kiasa, from Science Explorers of New York came to our home with her trusty assistant Emily. We had the decorations and food ready to go and they did all the rest. They came 30 minutes before the party started and had things set up in a snap.
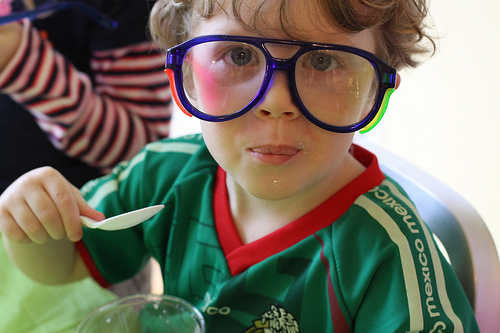
As soon as the guests arrived, everyone circled the table, put on their safety goggles and the experiments began.
Kiasa, from Science Explorers of New York came to our home with her trusty assistant Emily. We had the decorations and food ready to go and they did all the rest. They came 30 minutes before the party started and had things set up in a snap.
As soon as the guests arrived, everyone circled the table, put on their safety goggles and the experiments began.
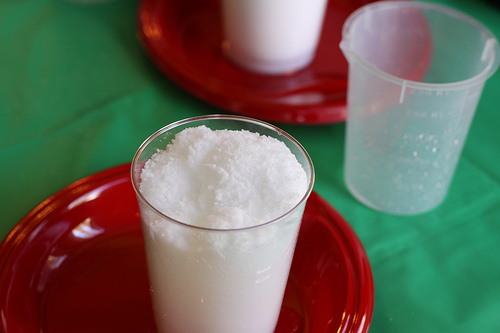
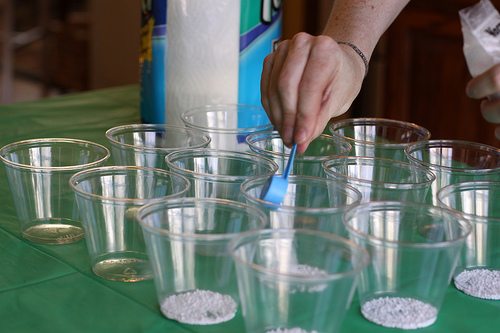
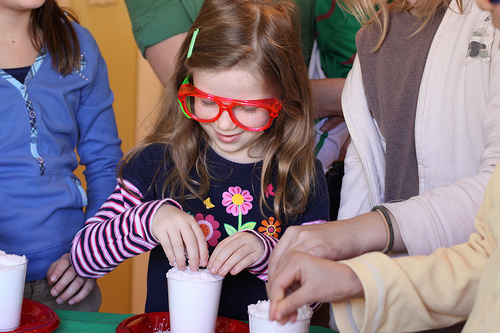 First, all the kids made their own cup full of fake snow. Spongy and fascinating. I was too busy taking pictures to listen to Kiasa explain what it was made of and how it was formed, but the kids were all paying rapt attention.
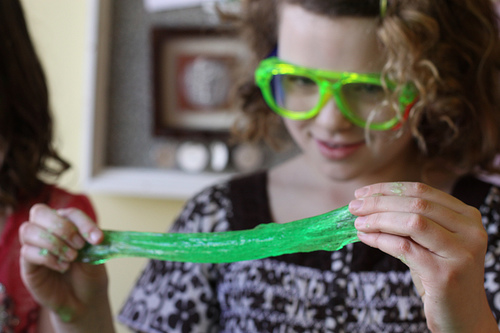 Second, everyone made their own batch of green slime. Stretchy. Gooey. Everything green slime should be.
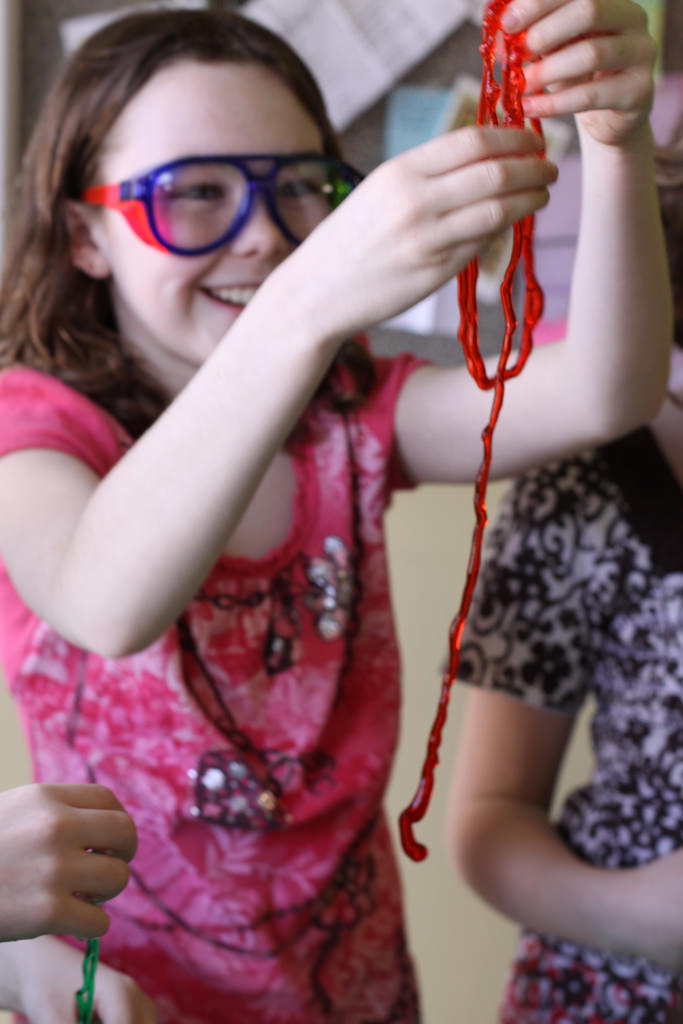 Third, it was time to make gooey worms in 3 different colors.<
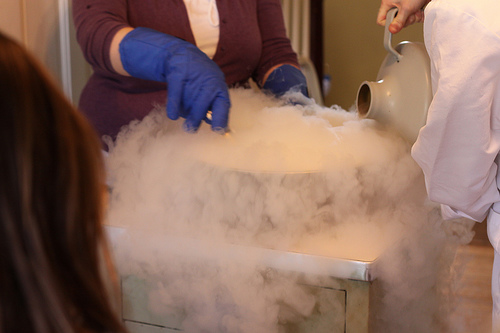
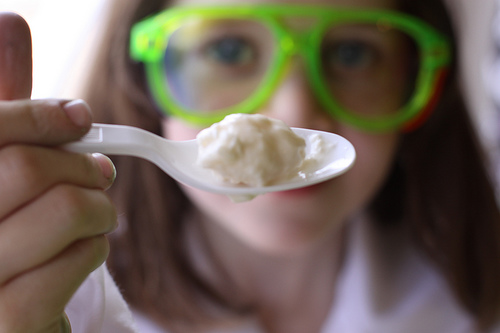
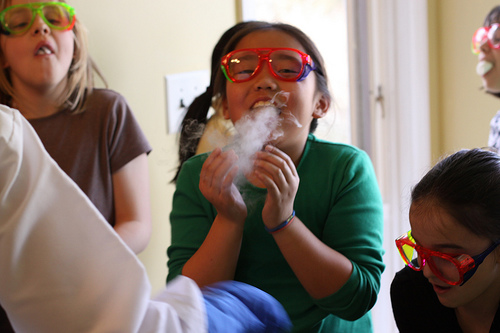 Fourth, on to the liquid nitrogen demonstrations. Kiasa showed what happened to a balloon placed in liquid nitrogen. Then, froze a bag of marshmellows — and let us sample their crunchiness. And that was followed by mixing and freezing a batch of ice cream almost instantly.
 And the whole time, Kiasa was engaging the kids with interesting questions and just enough info that it didn’t feel like a lecture. It was really fun, and really fast moving. Time just flew by. And I could concentrate on taking photos. Which is exactly as it should be.
The guests seemed to love it and my own kids did for sure. They’ve been talking about it nonstop since Saturday morning. An ideal party for any child in grade school. I would have this party again in a heartbeat.
More photos of the Young Einstein party here.
Invitations here.
Party food and decorations here.
Party favors here.
And the whole time, Kiasa was engaging the kids with interesting questions and just enough info that it didn’t feel like a lecture. It was really fun, and really fast moving. Time just flew by. And I could concentrate on taking photos. Which is exactly as it should be.
The guests seemed to love it and my own kids did for sure. They’ve been talking about it nonstop since Saturday morning. An ideal party for any child in grade school. I would have this party again in a heartbeat.
More photos of the Young Einstein party here.
Invitations here.
Party food and decorations here.
Party favors here.
Young Einstein Party Favors
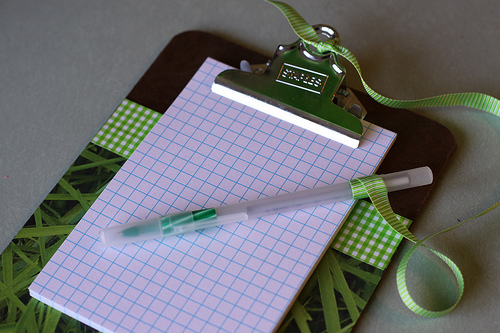

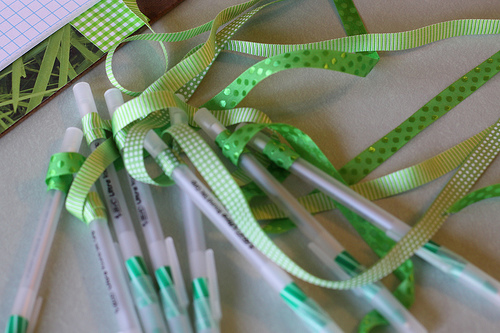
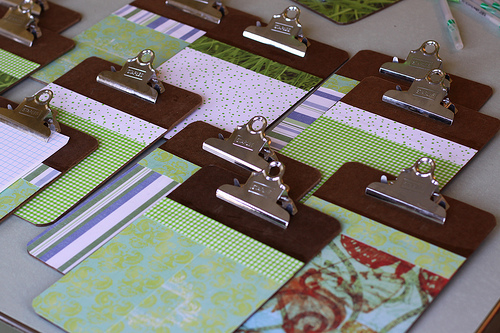
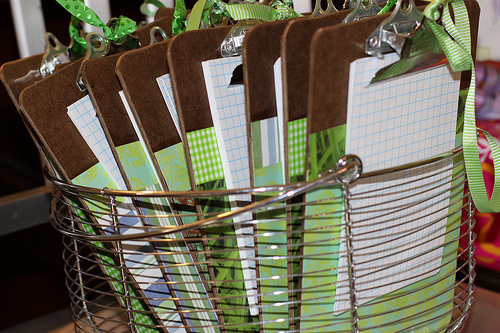
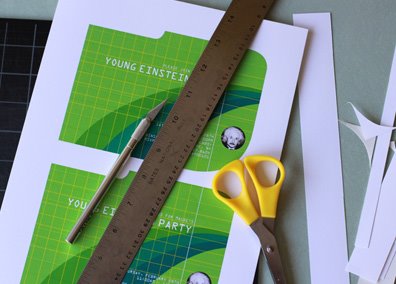
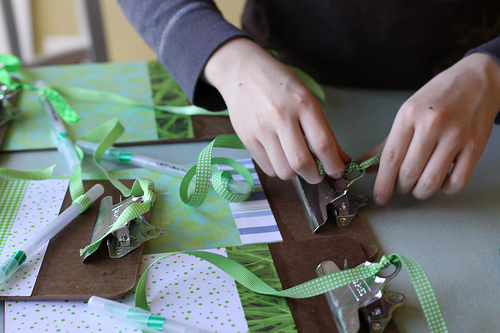 For party favors, the guests were able to take home samples of all the experiments they’d made (green slime, fake snow, etc.), so we didn’t really need to come up with anything else. But because Maude is a maker, we decoupaged mini-clipboards as well, filled them with graph paper and tied on a green pen. [Edit: I heard about this cute idea from my friend Megan. Thanks for the inspiration, Megan!]
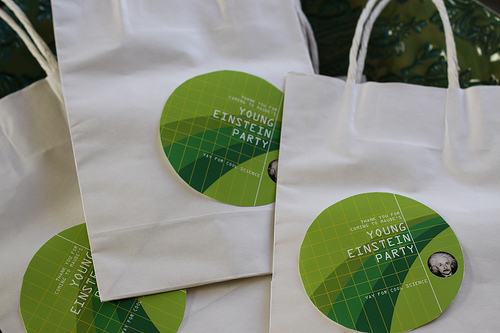 Kiasa brought white favor bags as part of the Science Explorers of NY party package. We added these green circles — attached with double-sided tape — to tie them into our party theme. They say: Thank you for coming to Maude’s Young Einstein party. Yay for cool science!
Here’s a link to a post about the party activities.
Here’s a link to a post about the party food and decorations.
Here’s a link to the invitations.
Lots (lots!) more Young Einstein party photos here.
Kiasa brought white favor bags as part of the Science Explorers of NY party package. We added these green circles — attached with double-sided tape — to tie them into our party theme. They say: Thank you for coming to Maude’s Young Einstein party. Yay for cool science!
Here’s a link to a post about the party activities.
Here’s a link to a post about the party food and decorations.
Here’s a link to the invitations.
Lots (lots!) more Young Einstein party photos here.
Four Affordable Art Sources – As Chosen By an Art History Major
 I spent my college career mainly studying Art History; and while that was long ago, I still appreciate the visual power of a work of art. Over the past several years I’ve slowly discovered a few artists that not only speak to me in a creative way, but appear to be quite affordable as well. This aspect makes the art even easier to love! And with the idea of “affordable art” being more popular now than it’s been in a long time, I couldn’t help but present you with a few options for your viewing pleasure. Some you may be familiar with, and some may be new to you. Either way I hope you enjoy how lovely they are…
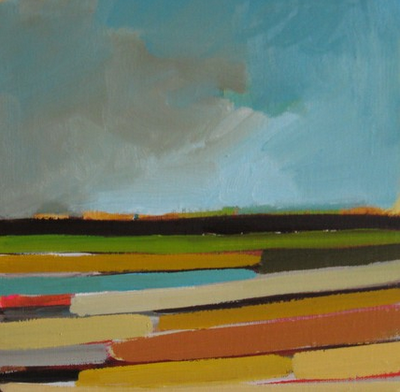
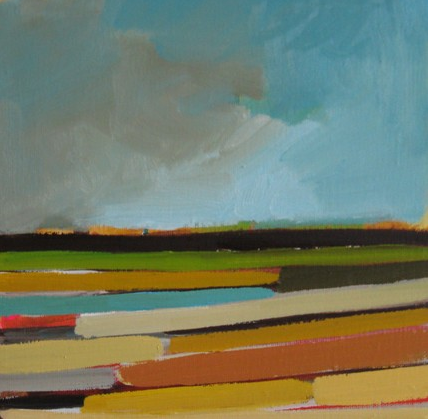
 1. Chad Wys…a thrilling discovery last year on Etsy; his modern landscapes are what I like to look at every day. He is also really, really nice :)
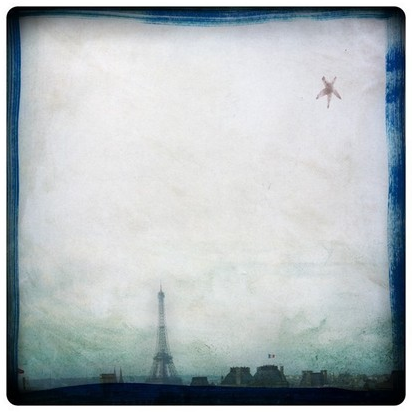
2. Labokoff…Fabienne mixes photography and painting in a such a beautiful, dreamy way. After visiting France I wanted something to remind me of that unique part of the world, but didn’t want it to be a touristy tchotchke. I imagined something I could display in my home, something that wouldn’t look out-of-place. These prints fit the bill! And even if you haven’t visited France, they are still beautiful prints to have on display.
3. Kelly Neidig…a Blurb bookstore discovery (you must check it out!); there is something about the boldness of those lines and that color combined that plays on my mind in just the right way.
4. Blancucha…I can’t get enough of these whimsical child-like-yet-still-grownup prints from Spanish designer Blanca Gomez. They are perfect for a playroom but I’ve seen them in a living room space as well and both look equally as fabulous.
1. Chad Wys…a thrilling discovery last year on Etsy; his modern landscapes are what I like to look at every day. He is also really, really nice :)
2. Labokoff…Fabienne mixes photography and painting in a such a beautiful, dreamy way. After visiting France I wanted something to remind me of that unique part of the world, but didn’t want it to be a touristy tchotchke. I imagined something I could display in my home, something that wouldn’t look out-of-place. These prints fit the bill! And even if you haven’t visited France, they are still beautiful prints to have on display.
3. Kelly Neidig…a Blurb bookstore discovery (you must check it out!); there is something about the boldness of those lines and that color combined that plays on my mind in just the right way.
4. Blancucha…I can’t get enough of these whimsical child-like-yet-still-grownup prints from Spanish designer Blanca Gomez. They are perfect for a playroom but I’ve seen them in a living room space as well and both look equally as fabulous.
 One more tip: You can easily obtain a custom-framing look without the hefty price tag, by using the Wood Gallery Frames from Pottery Barn and then having a custom mat created by a professional framer. These frames are good quality and are often on sale! While you are at the framer, ask him/her to attach wire to the back of your store-bought frame. This will make hanging it 10 times easier and only costs about $2.
Credits: Written by Stephanie of Stephmodo
Young Einstein Themed Birthday Party
 Back from Houston and thinking about what’s coming up.
We’re having a birthday party for Maude next Saturday. A woman from Science Explorers NY is coming to teach the party guests some fun experiments — they’ll be making fake snow, green slime, gooey worms and liquid nitrogen ice cream. Maude is super excited.
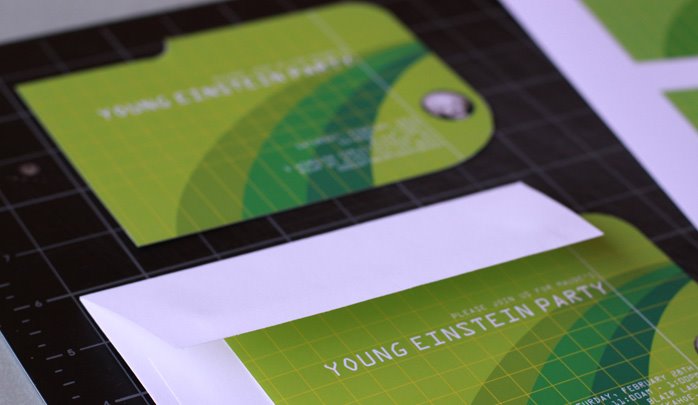
We were coming up with a name for the theme and Maude was hesitant to use anything that mentioned science. So I suggested the name Young Einstein Party and she thought that was awesome. Didn’t the invitations turn out cute?
——–
Want more info about this party?
Decorations and food here.
Party activities here.
Party favors here.
More photos here.
Back from Houston and thinking about what’s coming up.
We’re having a birthday party for Maude next Saturday. A woman from Science Explorers NY is coming to teach the party guests some fun experiments — they’ll be making fake snow, green slime, gooey worms and liquid nitrogen ice cream. Maude is super excited.
We were coming up with a name for the theme and Maude was hesitant to use anything that mentioned science. So I suggested the name Young Einstein Party and she thought that was awesome. Didn’t the invitations turn out cute?
——–
Want more info about this party?
Decorations and food here.
Party activities here.
Party favors here.
More photos here. An Interview with Cortney and Robert of Novogratz of Sixx Design

On Interior Design & Sources:
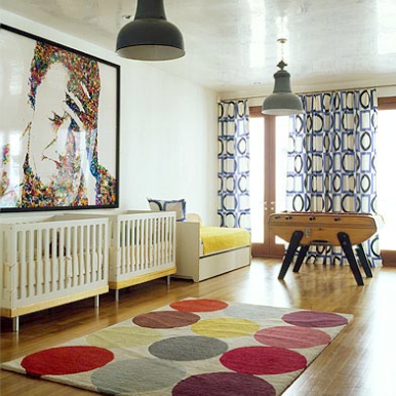
1) Tell us about your new book. How did it come together? What was your favorite part of the experience? Do you have a chapter that you love the most? The book was an amazing experience which journals our first 10 years of designing and creating homes. All the chapters were fun because each photo and story brings back memories (good and bad!), but I think the home in Great Barrington, Mass. will be a lot of reader’s favorite project. Looking back, we have learned so much, yet we are inspired and learning constantly. It keeps us humble and sharp. 2) The pictures filling the staircase wall in your Great Barrington Home are inspiring. Do you have any practical picture hanging and picture arranging advice? Like, what height should pictures be from the rising stairs? What about working with a variety of frames? The photo wall is an on going process. We are not perfectionists; the frames are different sizes, high and low end, custom and store bought. A couple of tips are to lay the frames out on a floor area first, put the largest photos on top and toward the center, and play around with it. Don’t be afraid to make mistakes. There is nothing a little spackling paste, paint or even another picture can’t hide! Have fun and let it grow. We have only family on the wall from cousins to great grandparents. It is cool to see the family tree and resemblances. All our photos are black and white. With digital cameras, it is easy to convert your color photos. 3) Rumor has it that your family moves into a house, makes it fabulous, and sells it. If this is true (and I hope it is!), I’d love to know how you pick the area to move to and how you pick the house to buy — how do you spot the “diamond in the rough?” When looking for a “diamond in the ruff,” look to where the creative community is moving to in your area. They are always the first ones in. 4) Where do you go for inspiration? And what inspires you? Big Cities inspire us. 5) Spill, please. Where are your favorite flea markets? Good fleas are hard to find these days. The Paris Flea Market is a place everyone should go at least once in his/her life. 6) Will you please share the source on the amazing rug under those 2 turquoise chairs in your Great Barrington house? How about the source of the turquoise chairs themselves? And also, the source on that amazing Union Jack? The turquoise chairs were 25 dollars at a tag sale that we refurbished for cheap. The Union Jack is by an amazing artist out of London named Anne Carrington. 7) I love the way you use natural light in your projects. Do you have any advice on bringing natural light into a space that’s lacking in it? Add high hats for more light. 8) What are your strategies for keeping a home both child and adult friendly? Reducing clutter is the key to an adult and child friendly house. Be organized and ask yourself if certain things are essential. Keep valuables and art out of reach of the children. Relax, home making should be fun. A well designed and functional house should be just that. Next time your child breaks something, remind yourself that “it’s just stuff.” 9) How about tips for decorating a nursery or child’s room in particular? Childrens’ rooms and nurseries don’t have to be decorated in a theme. Again, keep the clutter to a minimum: a desk, a bed and a place to play. Children, like adults, don’t need that much. Less is more. 10) Once you’re moved in and settled in a home, how often do you change your decor? We seem to move before we change our décor. Certain pieces will travel from home-to-home with us and it is fun to incorporate those pieces within a new space or a different aesthetic.
On Work/Life Balance & Parenting:
11) Obviously, you have a busy and full life. What is one thing that you do with your kids that you would not stop doing — no matter what? Travel. 12) If the “moving often” rumors are true, how do you create continuity for your family amidst all the change? We try to create a fun life and solid foundation for our children. Happy parents equal happy children. 13) How do you handle education? Public school? Home school? Tutor? Private school? A combo? Great question. Our children are all very different; strong students, weak students, both confident and shy, great athletes and weak athletes. With seven, we truly see both ends of the spectrum in many regards. Our children attend private school. My feeling on private is it helps the weaker students or mediocre ones get over the hump. Good public schools work well for stronger students, but my experience has been some students can get lost in the pack at a public school and not receive the attention they deserve. Robert and I are both liberal thinkers. We feel each child learns differently. The key is to keep your children humble and hungry. I would urge all of your readers to watch the Ted Talks on tedtalks.com (check out the one on education by Sir Ken Robinson). 14) I’ve read you’re big on world travel. How many trips do you take a year and to where? Is every trip a family trip? Do you have a favorite vacation spot to take your kids? We go to Brazil every year to our home. The kids love the beach and the outdoors which they don’t get as much of living in New York City. 15) I am amazed and inspired by you. How do you manage/juggle the business and the kids? By running our own company we are able to make our own schedule. It enables us the luxury to schedule our meetings around our children and our family time. 16) Which parts of the day to day (of both the business AND the kids) do you manage yourselves and which parts do you prefer to hire out? Nanny, housekeeper, bookkeeper? Chauffer, stylist, assistant? We always have at least one baby sitter with us. When Robert and I do get a little time to just the two of us, we need two sitters. We have yet to find anyone to watch all seven. Even Mary Poppins and Nanny Mcphee would not take on that task! Besides that, we have coaches, tutors, sewing teachers, etc. always helping. We are firm believers that it takes a village to raise a child. 17) Many moms seem to be born with “guilt” feelings. Is there any aspect of being a working mother that brings out the guilt for you? Guilt is a wasted emotion. I have always tried to make and live with my choices. Also, it’s very important that all mothers treat themselves well, no matter how many children they have. What great responses. A big thanks to Robert & Cortney Novogratz for joining us today. Don’t miss their excellent book.DIY Friendship Bracelet Valentines (with Free Printable)
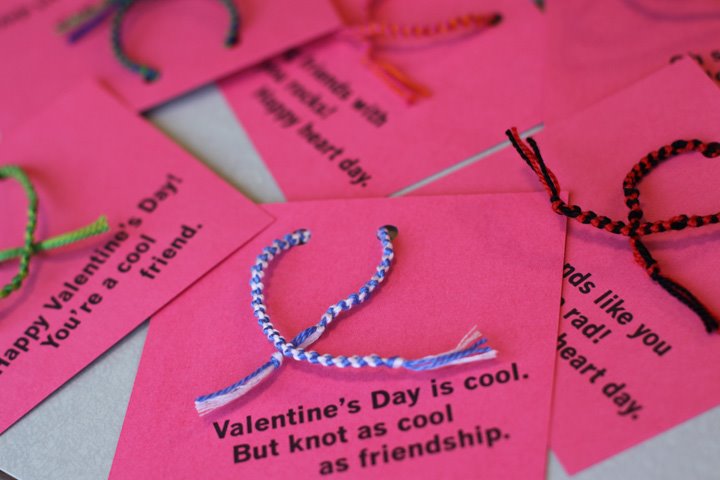
 Let’s make friendship bracelet valentines!
My daughter Maude is a maker. Last year, she made origami hearts filled with treats for her classmates. This year, she is way into friendship bracelets, so she decided to make enough to give as valentines to her whole class.
Let’s make friendship bracelet valentines!
My daughter Maude is a maker. Last year, she made origami hearts filled with treats for her classmates. This year, she is way into friendship bracelets, so she decided to make enough to give as valentines to her whole class.

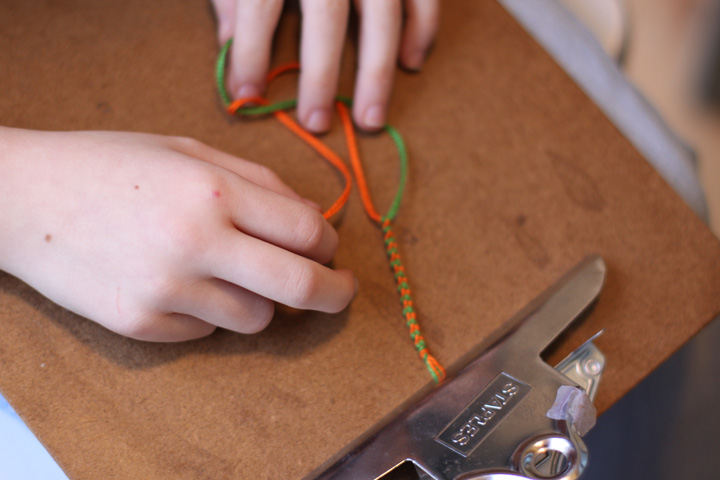 It took her about 3 hours total. An evening, a morning and an afternoon work session. She used an especially simple pattern so she could work quickly. Also, she kept a specific classmate in mind as she picked the colors for each bracelet — so, for a boy who’s a big Yankee fan, Maude would choose white and blue. They turned out wonderfully and Maude felt great about them.
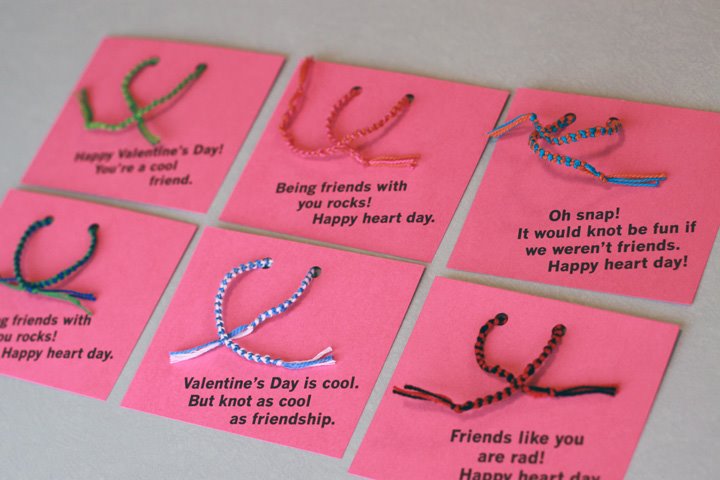 I was wishing I had a copywriter at my side while we came up with Valentine messages. Mostly we used the words “friend” and “knot.” We printed the messages on cardstock, trimmed them out, punched two holes and threaded the bracelets through, ready to be tied on to wrists and ankles.
Here’s a pdf of the 6 friendship bracelet messages if you’d like to download and print them. Not sure how to make a friendship bracelet? Here’s friendship bracelet tutorial from Maude.
P.S. — DIY MadLib Valentines.
I was wishing I had a copywriter at my side while we came up with Valentine messages. Mostly we used the words “friend” and “knot.” We printed the messages on cardstock, trimmed them out, punched two holes and threaded the bracelets through, ready to be tied on to wrists and ankles.
Here’s a pdf of the 6 friendship bracelet messages if you’d like to download and print them. Not sure how to make a friendship bracelet? Here’s friendship bracelet tutorial from Maude.
P.S. — DIY MadLib Valentines. DIY: Valentine Bookmarks for Classmates

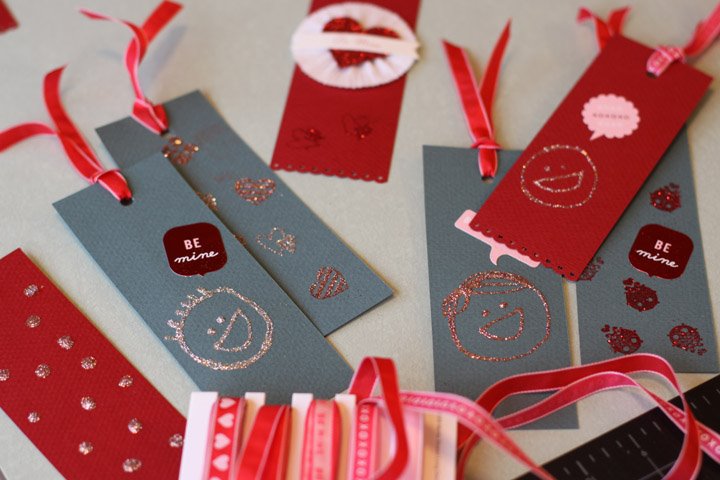 For classmates valentines this year, Olive made DIY Valentine Bookmarks.
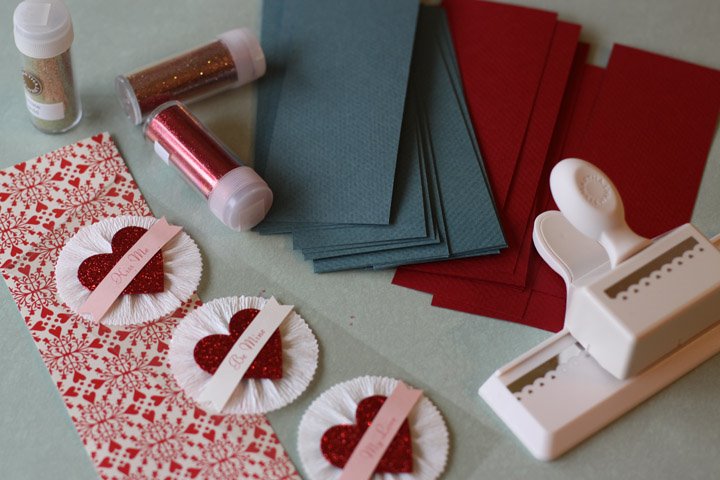 First, we cut some heavy cardstock (green/blue and red) to 2.25″ x 6″ strips. That’s a good, comfortable bookmark size, with plenty of space for decoration. On the back, Olive wrote a to/from note.
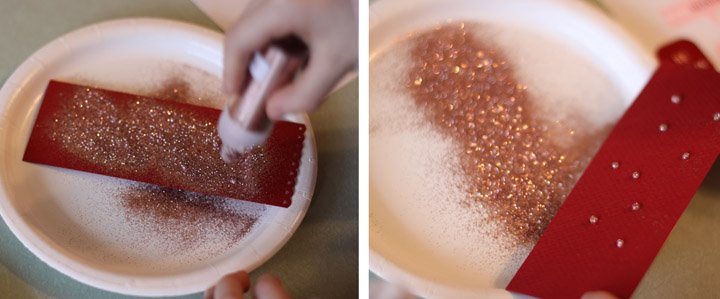 Then she went to work glueing, glittering and stickering the fronts.
 On some she made a decorative border with an edger hole punch.
 Velvet ribbons were attached when the glue was dry. Since our stickers were little word bubbles, on some of the bookmarks, we used the glue to make faces so that they could speak the little Valentine’s messages. So cute!
DIY Valentine bookmarks are sweet and personalized. They make a really good no-candy option, while encouraging reading at the same time.
Velvet ribbons were attached when the glue was dry. Since our stickers were little word bubbles, on some of the bookmarks, we used the glue to make faces so that they could speak the little Valentine’s messages. So cute!
DIY Valentine bookmarks are sweet and personalized. They make a really good no-candy option, while encouraging reading at the same time. Nativity
In lieu of the usual live Nativity Pageant at my church Christmas party this year, our congregation tried something new. The kids put on the nativity one Sunday with no audience and with staging happening in rooms all over our church building. A few parents with good photography skills followed the kids around and took lots of stills. Then, the amazing Travis S. put the pics together into a video.
The video debuted during the Christmas party and it’s just about the sweetest thing you’ve ever seen. Costumes, props and general direction are by the incomparable Jennifer Darger. Narration is by Travis’s talented daughter Scout.