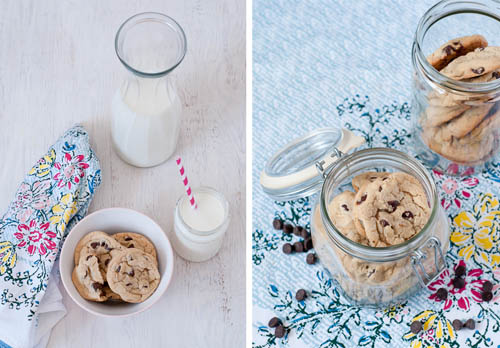
Chocolate chip cookies. Could there be a more perfect cookie in the world? And in my book, knowing how to bake them — and get a consistent outcome every time — is a basic life skill.
There are chocolate chip cookie variations. Thin and crispy with loads of butterscotch flavor. Soft and cake-y, dotted with a few chocolate chips. Or a fan favorite: irresistibly chewy and chock-full of dark, gooey chocolate.
For this tutorial, we’ll go with chewy chocolate chip cookies. But it will also include tips for creating different kinds of cookies (as mentioned above) and include troubleshooting advice as well. In no time at all you’ll be confidently playing around with your own recipe to make The Perfect Chocolate Chip Cookie.
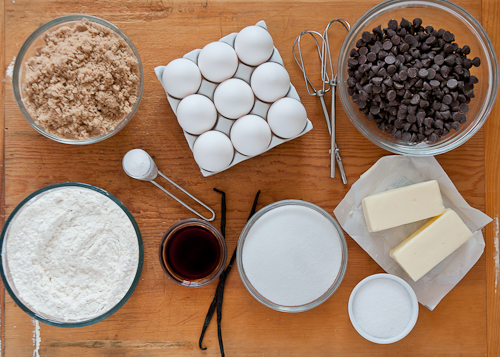
All chocolate chip cookie recipes call for the same 8-10 ingredients: butter, sugar (white and brown), eggs, vanilla (or another flavoring), flour, leavening (usually baking soda), salt and chocolate chips. At the bottom of the post, you’ll find the perfect recipe to work with, but first, let’s talk about ingredients and processes that will help you make the perfect chocolate cookie.
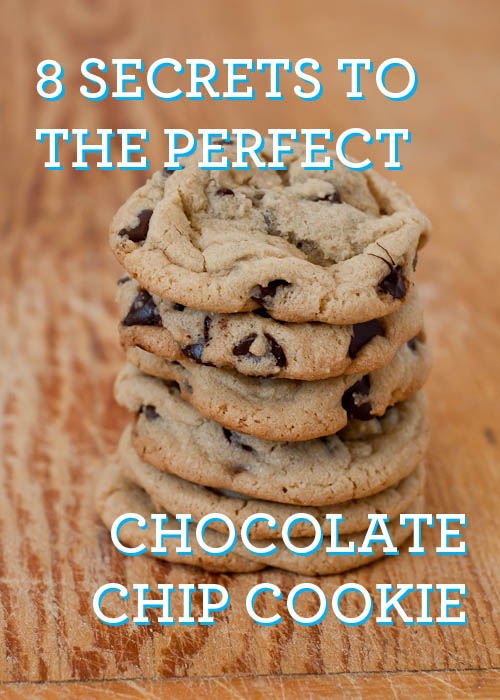
8 SECRETS TO MAKE THE PERFECT CHOCOLATE CHIP COOKIE
Butter = flavor. Shortening is fine for baking and the cookies will come out looking pretty, but they won’t taste as great. Shortening just can’t compare to straight-up butter.
Using unsalted butter when baking means you can control the amount of salt in a recipe. But that’s just preference.
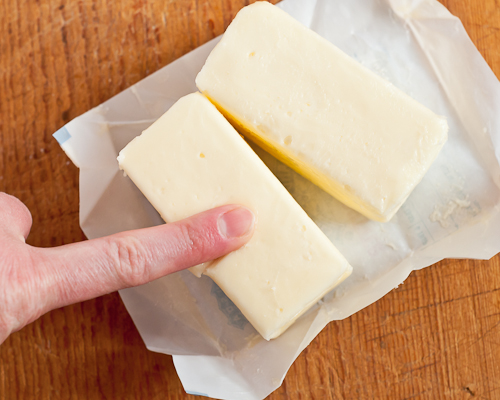
Secret for the Perfect Chocolate Chip Cookie #1: Butter should be at (cool) room temperature. This means it’s pliable and you can press your finger into it. If you use butter that is too soft, your cookies can end up greasy and oily. It also won’t cream as well with the sugar.
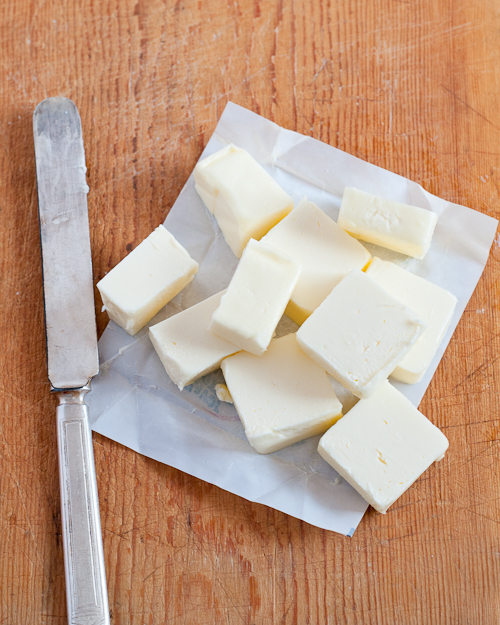
Microwaving butter to soften results in unevenly softened butter — usually a very melted center. The best way to bring your butter to proper temperature is to cut it into pieces and let it sit at room temperature for about 30 minutes while the oven is preheating and you’re gathering all of your ingredients.
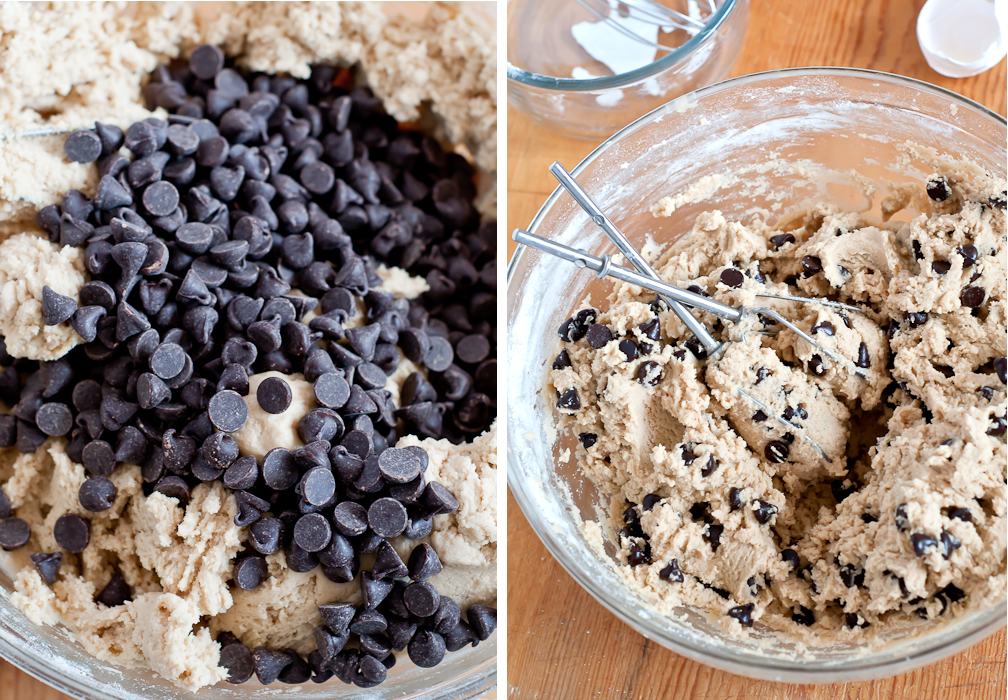
Creaming is the process of beating butter and sugar together until it’s light and fluffy. This is important for chewy, delicious cookies. The sharp edges of the sugar help aerate the butter. (We’ll save the science lesson for another day, just trust me, you don’t want to skip this step.)
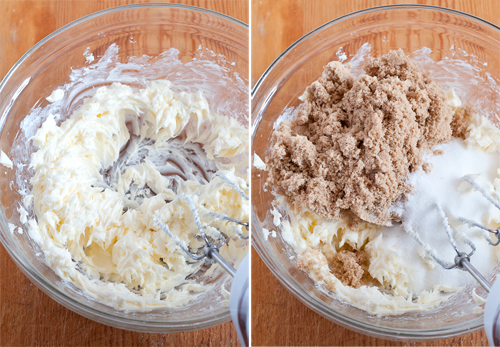
Secret for the Perfect Chocolate Chip Cookie #2: Start by creaming the butter by itself with an electric mixer, then adding the brown and white sugars.
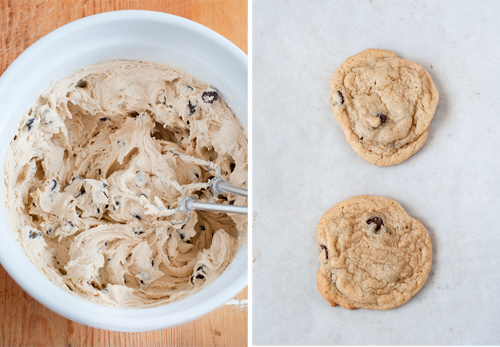
While we’re on the subject, an electric hand mixer or stand mixer is the way to go for creaming. The stand mixer is a little quicker, but more people have a hand mixer, so that’s what is shown in these pictures.
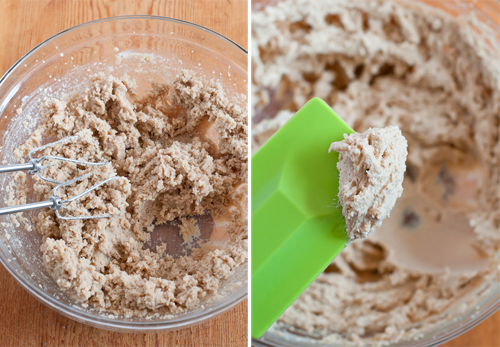
The picture on the left shows the creaming at the halfway point. The picture on the right shows properly creamed butter and sugar. It’s lighter in color and very fluffy.
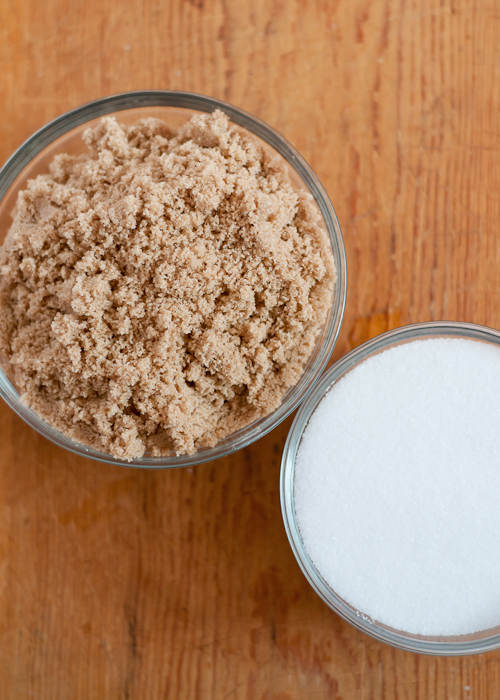
Most recipes call for a combination of white and brown sugars.
White sugar will help give cookies a nice crisp edge. The brown sugar, because of its higher moisture content, will lend chewiness. Brown sugar is white sugar with molasses added back into it. There is also dark brown sugar which has more molasses and will give an even stronger butterscotch flavor to the cookies.
Secret for the Perfect Chocolate Chip Cookie #3: Using all white sugar will give you hard, crunchy cookies. All brown sugar will give you tender, chewy cookies. Play around with the ratio until you get the cookie how you like it. This recipe recommends using almost all brown sugar, with just a little bit of white.
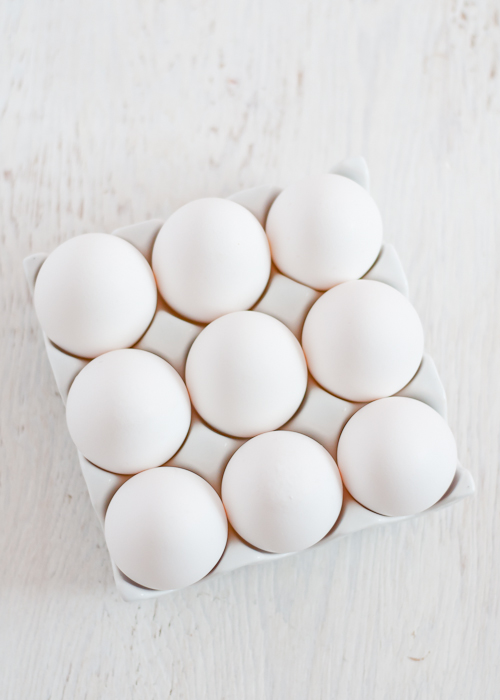
Eggs should also be room temperature. When you add eggs to the creamed mixture and they are cold, the mixture will curdle. This can affect the way the cookies bake and lead to uneven results. If this happens, let the mixture sit for a few minutes until it warms up and then continue beating. It should eventually come back together.
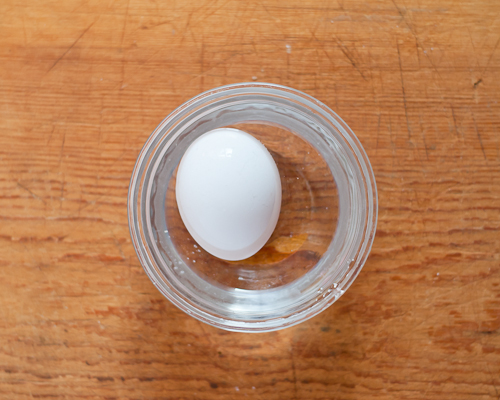
A quick way to get an egg to room temperature is to place it in a bowl of warm tap water for about 10 minutes before using it.
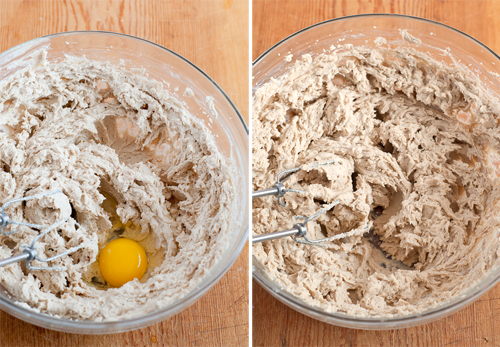
Secret for the Perfect Chocolate Chip Cookie #4: Eggs should be added one at at time and beaten well between additions to keep the mixture nice and emulsified.

Vanilla is the traditional flavoring for chocolate chip cookies. You can also add a little of another extract for a variation — almond is a favorite. The debate between pure vs. artificial vanilla can get heated. Use what you like. Go with a generous tablespoon for plenty of vanilla flavor.
Unbleached all-purpose flour is ideal for most baking needs.
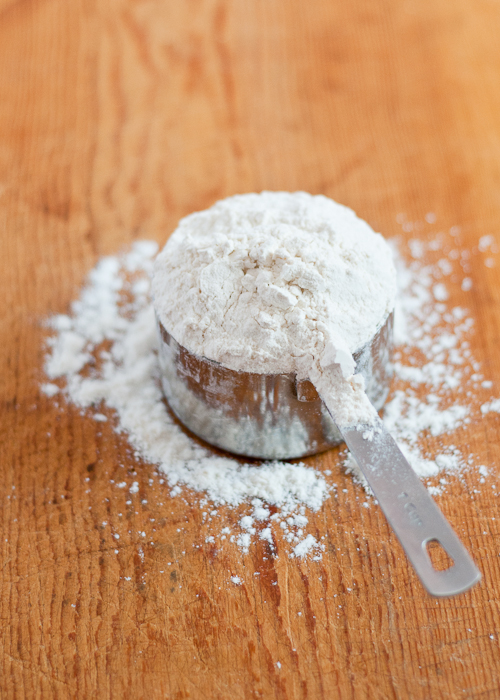
Secret for the Perfect Chocolate Chip Cookie #5: How you measure your flour is more important than what kind you use. Try spooning the flour into your measuring cup, then scraping off the mound with a butter knife. Dipping the measuring cup into the flour and dragging it up along the side of the flour bin, can result in too much flour in the cup.
Another great way is to weigh out your ingredients. One cup of unsifted all-purpose flour weighs 4.5 oz. or 125 grams.
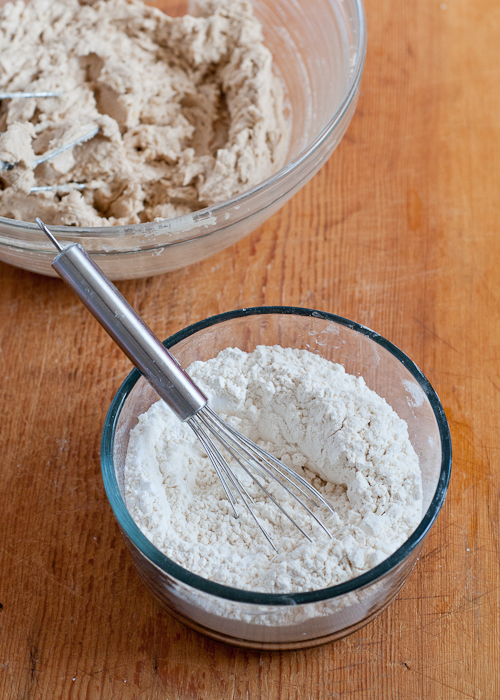
And that brings us to sifting. You don’t need to sift the flour for these cookies. A quick whisk is all the flour will need. (This is not the case for making cakes, however.) Sifted flour will weigh less than unsifted flour. Whisk after you measure the flour.
Salt is a huge flavor enhancer in sweets. If you use unsalted butter, start with what the recipe says and taste it. If you like, add more until it tastes just right to you. If it’s too salty, make note of it on the recipe and use less the next time. Unfortunately there’s no way to take the salt back out. If you use salted butter, you might want to use about 1/4 tsp. less salt than the recipe calls for.
Whisk the salt and the baking soda in with the flour so it’s evenly distributed in the dough.
If you should decide to use whole wheat flour in your cookies, use a little less than you would if it was regular flour. The whole wheat flour will absorb more of the liquid from the other ingredients.
Secret for the Perfect Chocolate Chip Cookie #6: You don’t have to follow your recipe word for word when it comes to the flour. That’s not always the case with other baked goods. But with cookies, there is a little room for experimenting to find what works best. Factors like humidity, climate, altitude, and brand of flour can affect how much flour a cookie dough needs. (So can slight variations in the water content of the butter or eggs you use.)
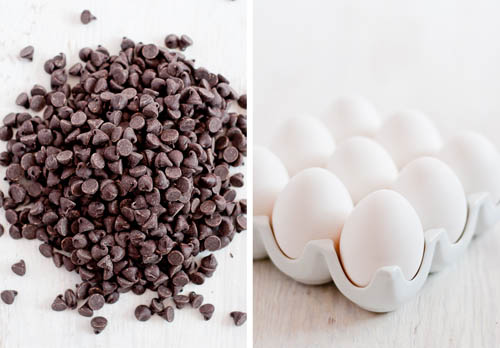
And now for the best part…the chocolate chips.
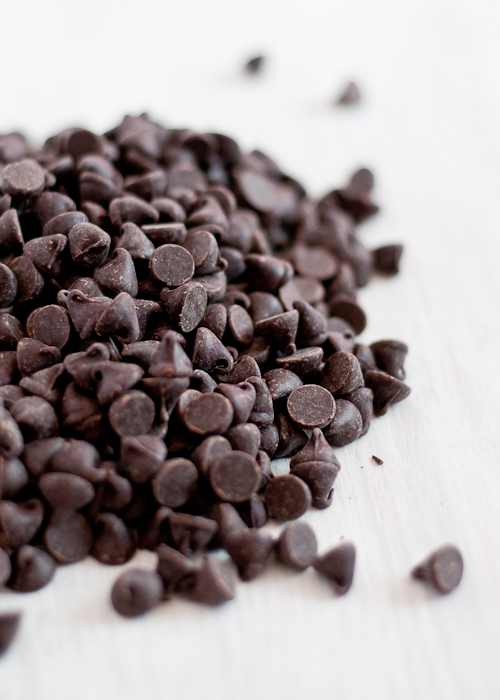
Have a generous amount of chocolate chips on hand. Dark chocolate, white chocolate, milk chocolate. As long as there are plenty of them, everything is fine.
Now let’s talk about the baking process — this includes baking sheets, temperature, and time.
Cookie sheets come in all sorts of shapes and sizes. The most popular is a basic, stainless steel rimmed baking sheet — preferably NOT non-stick.
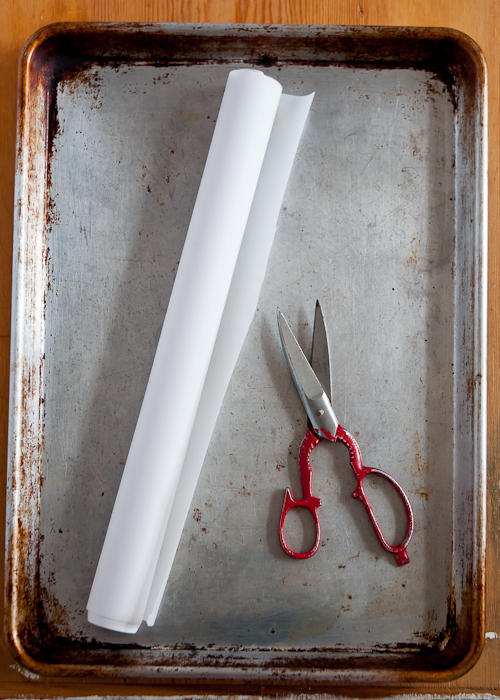
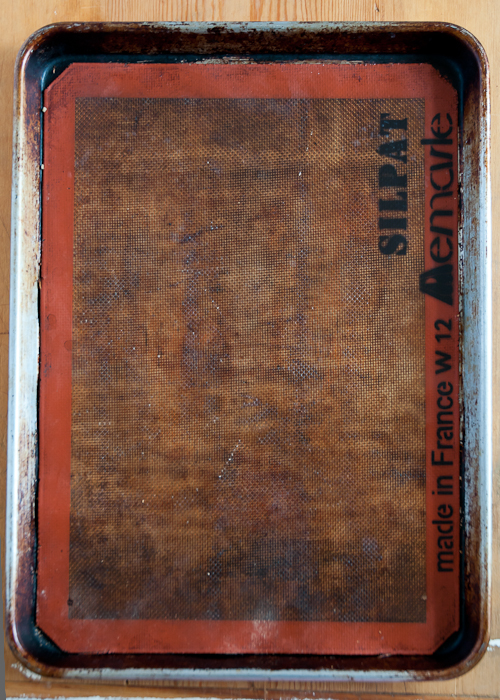
Line the baking sheets with parchment (NOT waxed paper) or silicone baking mats. Baking cookies on silicone baking mats or parchment paper will give you evenly baked cookies. You’ll be less likely to get cookies with burned bottoms and raw middles. Bonus: parchment makes clean-up a snap! If you don’t have access to either of these, greasing the cookie sheet works too.

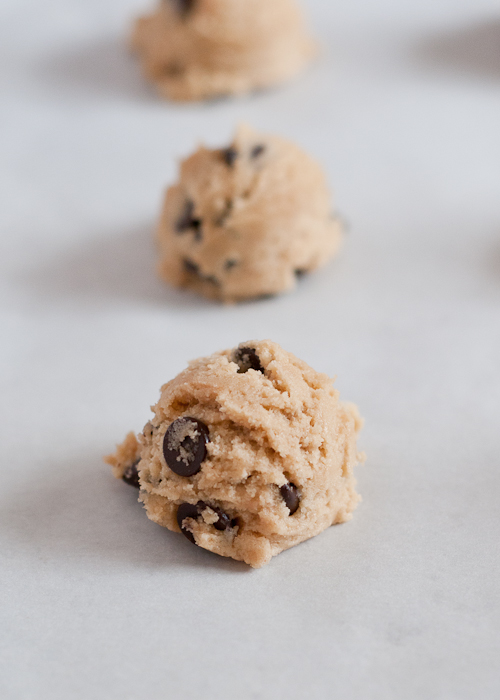
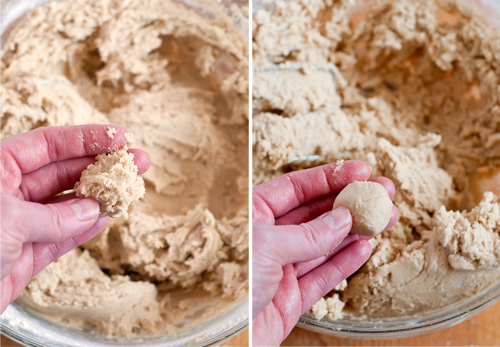
Secret for the Perfect Chocolate Chip Cookie #7: To make the cookies uniformly sized (for even baking), use a small spring-loaded ice cream scoop to spoon out the dough.
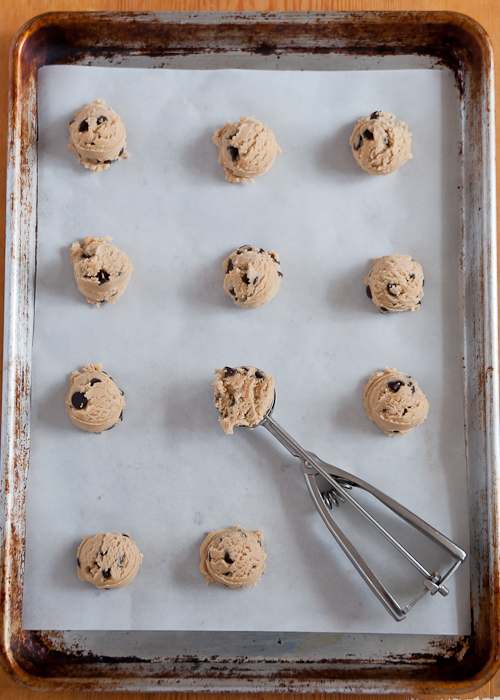
Once you’ve got your cookie dough onto the baking sheets, it’s time to close that door and set the timer.
Some people prefer to bake cookies one sheet at a time. For multiple trays, rotating your baking sheets back to front, top to bottom halfway through baking time will also produce evenly baked cookies. Most cookies only need to bake between 8-12 minutes, depending on the size of the dough balls and the temperature of your oven. (Invest in an oven thermometer if your oven is inconsistent and adapt it accordingly.)
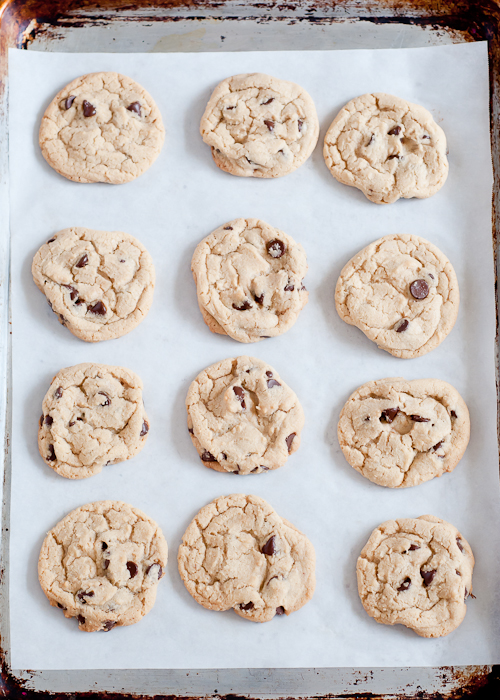
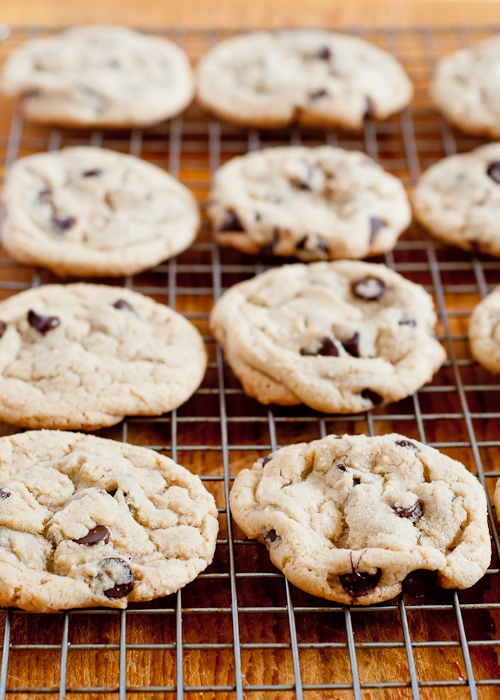
Let cookies rest on cookie sheets for a few minutes before transferring to cooling racks.

Secret for the Perfect Chocolate Chip Cookie #8: Let cookie sheets cool completely before baking the next batch of dough.
TROUBLESHOOTING & VARIATIONS
Now for those variations, as well as a few helpful hints for troubleshooting.
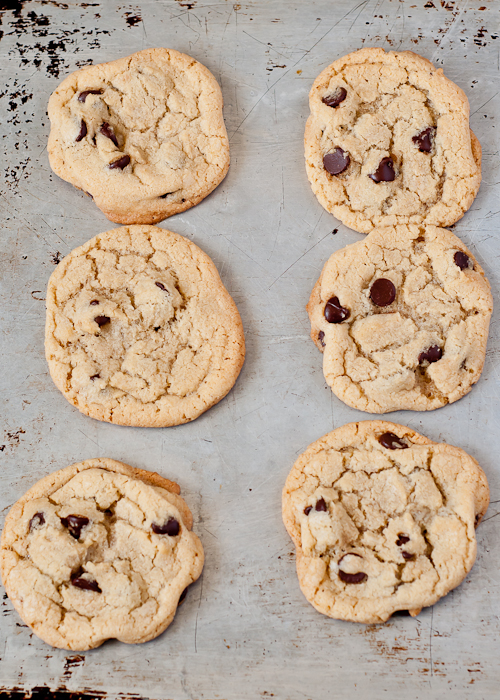
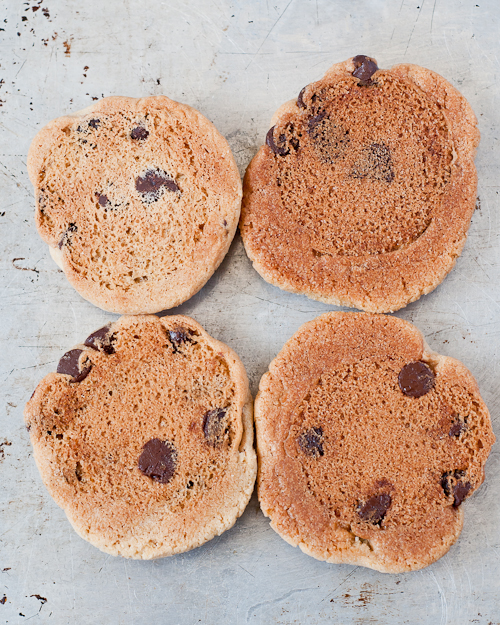
FLOUR: The cookies on the left were made with the exact amount of flour called for in the recipe, the cookies in the middle had a little more flour, and the ones on the right had about 3/4 cup more flour. All were baked for the same amount of time on the same cookie sheet.
With practice you’ll learn how much flour to add. A good thing to do is to always bake one or two test cookies to see how the cookies spread in the oven. If they spread too much, you can add more flour.
If you go overboard and add too much flour, add a little milk or water until the dough comes back to where you want it.
TEMPERATURE: These cookies spread too much. I already mentioned adding more flour to the dough. But you can also lower the baking temperature.
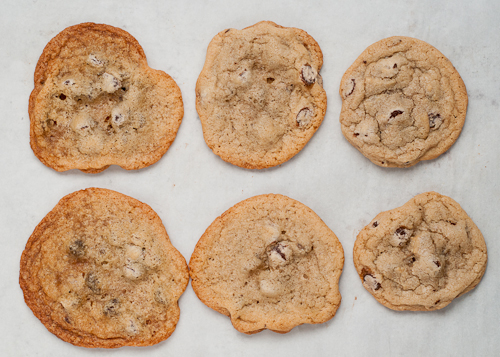
The cookies in the picture were baked at 375 degrees F (right), 350 degrees F (middle), and 325 degrees F (left) for about the same amount of time — give or take 60 seconds.
You can also chill the cookie dough which will help inhibit the dough from spreading.
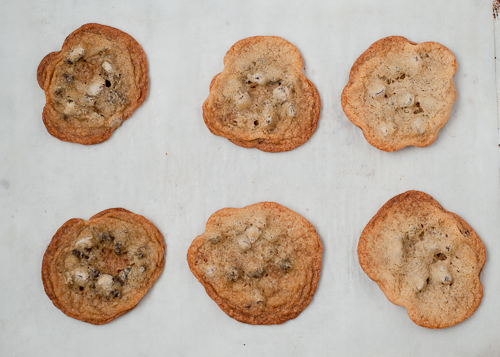
MELTED BUTTER: The cookies on the top were made with melted butter and a higher ratio of white sugar. The cookies didn’t brown very well. The cookies on the bottom had more brown sugar. They are both chewy because of the melted butter.
There are recipes that call for melted butter. If you go this route (and why not try it sometime?), use 2 Tbsp. less per 1/2 cup of butter so your cookies aren’t greasy. Skip the creaming process.
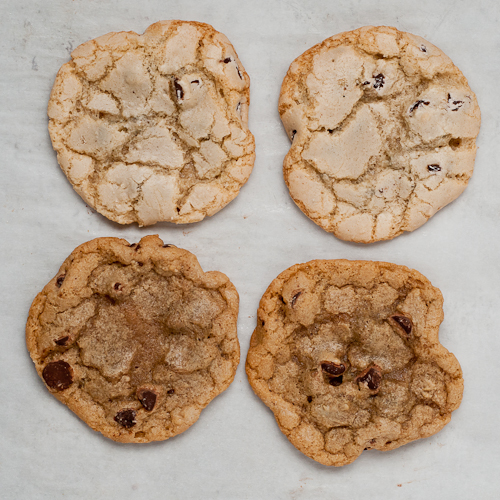
WHITE SUGAR: The cookies above were made with equal amounts of white and brown sugar and more flour. They were firm and not chewy or crisp.
BROWN SUGAR: These cookies were made with all brown sugar. They are very chewy and very soft.
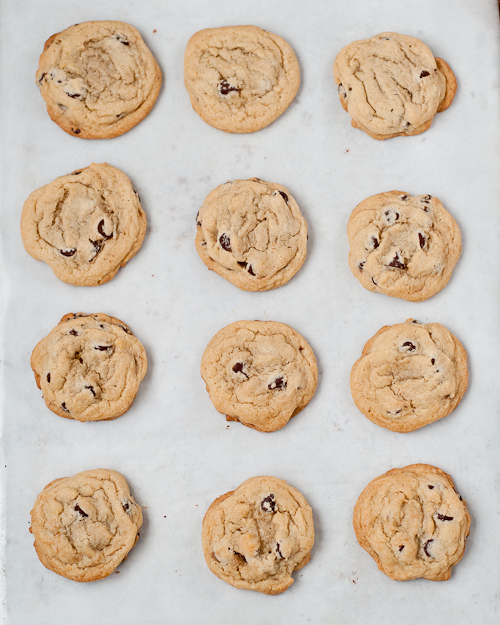
CAKE-Y: These are super soft, cake-y chocolate chip cookies. For these cookies, use an extra egg, about 1/4 to 1/2 cup less sugar, more flour, and a tablespoon of milk.
DARK BOTTOMS: The cookies in this picture were baked on parchment (left) and a greased baking sheet (right). If you prefer darker bottomed cookies, skip the parchment.
The Perfect Chocolate Chip Cookie Recipe
Ingredients:
1 cup (8 oz.) butter, at room temperature
1 1/2 cups brown sugar
1/2 cup white sugar
2 large eggs, at room temperature
1 Tbsp. pure vanilla extract
2 3/4 cup all-purpose flour
1 tsp. baking soda
1/2 tsp. salt
2 cups semi-sweet chocolate chips
Instructions:
Preheat oven to 350 degrees F. Line two baking sheets with parchment paper or silicone baking mats.
Beat butter with an electric mixer until creamy. Add the brown and white sugar and beat for 5 minutes on high speed until light and fluffy. Add the eggs, one at a time, beating for another minute after each addition. Add the vanilla and mix well.
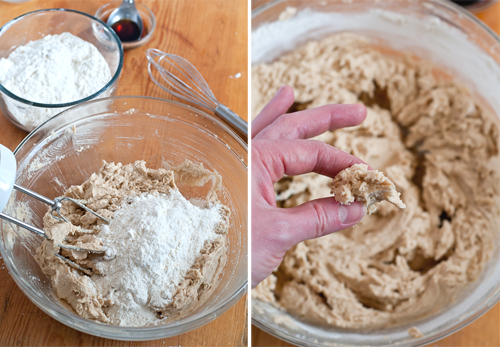
Whisk together the dry ingredients. Add the dry ingredients to the creamed mixture in two or three additions, mixing on low speed just until the flour is incorporated. Stir in the chocolate chips using a silicone spatula or the mixer on low speed.
Using a small ice cream scoop or tablespoon, drop balls of dough onto the prepared baking sheets, leaving a few inches of room between them. Bake for 10-12 minutes, rotating baking sheets front to back and top to bottom halfway through baking time. Let cookies cool on baking sheet for about 10 minutes before transferring them to a cooling rack.
Makes about 3 dozen perfect chocolate cookies.
——
This was a lot of information. If you made it to the end, congratulations! You can say you are now officially a chocolate chip cookie pro!
P.S. — Baking chocolate chip cookies is a satisfying task, and if you’re looking for a kid-friendly activity, it’s a great fit! There are lots of steps kids can help with. They’ll enjoy cracking the eggs, spooning the flour, balling the dough. But most of all, they’ll love sneaking chocolate chips to snack on while the first batch bakes, and waiting (impatiently) for the cookies to cool just enough to handle without burning their tongue.
Another secret – size! I’ve had very different results using different size cookie scoops from the same batch of dough. I seem to get better results in texture from my bigger scoop for whatever reason…
Interesting. I just ran into my kitchen to see what size mine is. It holds one tablespoon. I know there are some that are smaller and some larger. What size is yours? I’m interested in picking one up to see how it compares. :)
i also use a 1 tablespoon scoop. then i get a lot of small cookies. my husband likes it best when i make 2 tablespoon cookies. crunch on the edge, but still soft in the center. of course i have to roll two scoops together to do this, but often he is willing to roll for me.
I cannot help it but everytime I see Nestle Toll House, I think of Phoebe from Friends insisting that her chocolate chip cookie recipe was from her French grandmother (said in a French accent) Nestle Tolhouse!
I loved that episode! Very funny.
Lindsay, I don’t understand how sifted flour weighs more than non. If I put 125 gm of flour into a bowl and then run a whisk through it, it should still be the same amount of flour and weigh the same 125 gm, yes?
You’re correct, Amber. It will weigh the same. What I’m saying is that if you pre-sift your flour and then measure it, and then weigh it, it will weigh a different amount (less) than if you measure out flour first, then sift it. It will weigh more. Sorry–I should have clarified that. Thanks for pointing it out. :)
And actually, this really matters more with cakes than it does cookies. Some cookie recipes are really dependent on the correct amount of flour, but there is a little “fudge” room with most chocolate chip cookie recipes. But measuring incorrectly is one of the biggest reasons for baking failures, so I included it here for newbies.
Beautiful photgraphs–makes my mouth water just looking at them. Great use of the natural light and a yummy way to start off this Tuesday. xo
These look promising! My friend’s mom has a secret recipe and somehow her chocolate chips are continually melty. Any ideas how that’s achieved?
One “secret” I have found to make a huge difference in flavor and texture is browning a portion of the butter. I usually double a recipe (to scoop and freeze at least half of the dough for a rainy day!), and brown half of the called for butter. Then I cream the rest and fold in the cooled, browned butter. I do find that chilling the dough for at least 30 minutes then yields the best cookie. Yum!
I’ve also heard about the chilling of dough:)
I used to make beautiful chocolate chip cookies. Then I moved to a high altitude location. Darned if that doesn’t screw me up every time. Any “no fail” high altitude tips/tricks? I already up the flour, reduce the sugar, add water, and reduce the cook time. I swear. I have two engineering degrees. Baking cookies up here shouldn’t be so dang frustrating! : )
I used to live at 10,000 ft and I found that if I put the temperature of the oven down 25 degrees, that helped things. I also found that increasing liquids just a little and puting scant dry ingredients in all of my recipes made them easier to deal with. If there is a lot of sugar/sweetener in a recipe, and it contains baking soda, make the soda less than half and that will make it not overflow….like a honey cake did….I cried. Very few things browned at such a high altitude.
Have you figured this out yet? I just moved to 7500 ft. The CSU (Colorado State University) Extension office has a pamphlet on high altitude baking. It suggested half the baking soda and half the fat. I have a teenaged daughter of a friend staying, and we are baking a batch every night and perfecting the recipe the next night.
So far, reducing the baking soda and the fat by half was great. I did have over cooked bottoms. I was thinking of reducing the temp, but everything always says increase the temp for high altitude. The next poster said that she reduces by 25 degrees. I will try that tonight.
I also chill the dough in the fridge for about 30 minutes. That helps so much with spreading. I even do that when I live lower at 5280 feet.
It’s funny, but I just posted my Mom’s chocolate chip recipe. They are my favourite and contain the surprise ingredient of sunflower seeds. You can find the recipe here: http://gracie-senseandsimplicity.blogspot.ca/2012/10/moms-chocolate-chip-cookies.html.
Great photos in this post – very inspiring. I need to work on my food photography.
Your mom’s cookies look great! I love the additions. And thanks for the nice compliment about the pictures. :)
OMG! This is PERFECT now with Fall and the cooler nights. I always make cookies with my children and no matter how many recipes I try, I could never get them chewy enough! So appreciate the GREAT photographs and the visual differences. I felt like a took a crash course in baking and now I’m ready to run home and try them myself! Thank you and I’m sure my children will thank you later!
Great post. I can’t wait to try it. I’ve been looking for a tried & true choc chip cookie recipe for a LONG time.
This is FANTASTIC! It answered so many of my questions and addressed so many of my “how did that happen?” moments!
(One note – are the cookies in the temperature photo in the same order as the caption, or L-M-R 375/350/325?)
You’re right! Left to right in decreasing temperature.
I LOVE this post. Planning to share on our blog if that’s OK? XOXO –b
Thanks so much for the troubleshooting tips and photos! It’s the most helpful baking-related info I’ve heard since learning that whole wheat bread does better in smaller loaf pans. Hooray for food blogging!
Love your tips, thanks! I was in the mood this weekend to bake these cookies too:) I have to say I am “known” for my cookies, but I follow the recipe on the bag of chocolate morsels LOL! My SECRET has been to always cut all sugar (white and brown) IN HALF! Perfect! A little cakey as well as cookie…I also add tons of choc chips and walnuts…and make them HUGE! They are like little mountains, as my husband says, a “dinner” in your palm:) I have recently begun using crisco on the sheet to give a nice golden-browned bottom too…ode to my Bapci (grandmother) ♥ I need cookies now lol
It’s ironic that a corporation (Nestle) that uses child labor is sponsoring a post on a blog about kids.
What about chilling the dough? This article here suggests that chilling the dough overnight is the secret to the perfect cookie. Any truth to this?
http://www.nytimes.com/2008/07/09/dining/09chip.html?pagewanted=all
So many tips I’ve never heard of! Can’t wait to try a few soon!
salt! you have to sprinkle sea salt on top–it makes all the difference. a couple of years ago the nytimes did a whole spread on chocolate chip cookies–sticking the dough in the fridge overnight, using those thin chocolate discs, sprinkling sea salt…
I tried all their variations and honestly the sea salt makes the cookies! the overnight in the fridge did help the taste somewhat, but then you lose the smell of freshly baked cookies and the slight improvement in the taste wasn’t worth the loss of the smell of freshly baked cookies
i read this post, and i went forth and baked! a very interesting recipe – i usually use nestle’s with a couple tweaks (more flour), but these have turned out well, too. i added a lot of salt because i like them salty … i think it was a bit much. but still, yum! thanks for all this info. i love when other people do all my baking research for me.
Raise your hand if you love using a mini ice cream scooper to make perfectly uniform cookies every time!
Hello Lindsey,
I would L O V E to make these cookies, but I live in Italy and don’t have measuring cups. Could you tell me the quantities in grams?
Thanks,
Christine
Christine, hello from India where we still use the metric system.
Butter-225 g, Sugar-400g and Flour-330 g
The rest is easy to follow.
Good luck.
This is incredible. I’m not a great baker (due to the exactness/measuring needs, I love to cook because I do whatever I want), and I’m always discouraged when my cookies spread, are greasy, get crispy. There is nothing more depressing than a crunchy cookie. I am excited to try for the perfect batch based on all this amazing info!
I love this! THanks!
The absolutely BEST and MOST HELPFUL cookie tutorial EVER! I so needed this! Thank you.
I made these today and my 6 year old loved them. Thank you for the great tips, I will be experimenting with the recipe again soon!
Pingback: How to perfect your chocolate chip cookie! | hellodesignlove
Hi, i think that i saw you visited my website
so i came to “return the favor”.I’m attempting to find things to enhance my web site!I suppose its ok to use some of your ideas!!
This was wonderful. Thank you for the great step by step.
So much fantastic information! Thank you! I’m going to go fool around with my lactation cookie recipe now.
Just made these and they didn’t turn out at all like yours. I ended up throwing out half the dough. They were very floury and cakey… Not moist or chewy at all :(
Oh dear! I’m so sorry. Feel free to e-mail me, if you need to. I can help troubleshoot that way. (cafejohnsonia (at) gmail (dot) com)
Great tutorial and instructions. I’ve pinned this post and will come back to it next time I make cookies. I appreciate all the different pictures of the different times for cooking, the different temps, and the different results with the flour and butter and sugars: if I tried out all those variations I’d be as big as a house, because I’d be the one eating most of the cookies!! :-) So my waistline thanks you! :-P Thanks so much!!! H in Healdsburg, Ca
Thank you for those wonderful tips. I already wrote them down so I don’t forget the next time I bake. I have a question, though. You didn’t use baking powder, why? Sometimes I don’t use baking soda when I bake cookies, just baking powder.
Pingback: Chocolate chip cookies - ...oh so lovely …oh so lovely
wow, wow, wow, I read the entire thing, and it was very informative!! I love the science behind it all, really helps me visualize the best methods. I have had trouble making the perfect chocolate chip cookie, and someone once told me to refridgerate the dough for a bit then cook, and that has helps, but tips on not putting the butter in the microwave (I always forget to set it out) and adding a bit more flour and using parchment paper were very helpful–thank you!
wow, wow, wow, I read the entire thing, and it was very informative!! I love the science behind it all, really helps me visualize the best methods. I have had trouble making the perfect chocolate chip cookie, and someone once told me to refrigerate the dough for a bit then cook, and that has helps, but tips on not putting the butter in the microwave (I always forget to set it out) and adding a bit more flour and using parchment paper were very helpful–thank you! I also have to add that the pictures are GORGEOUS, and so nicely set up. I know this was a time consuming post, and your efforts are appreciated;)
~Kristen in Texas (who would love to move to France someday)
Amei esta receita,vou fazer estes biscoitos para meus filhos….Parabéns pelo site.
Hi Lindsey,
When I was in college a couple of my roommates were constantly experimenting with chocolate chip cookies, trying to come up with the perfect recipe. This reminded me of them, and of eating all their delicious experiments!
Thank you for explaining it all so well. I love to bake, and it is interesting to have a science lesson. It all makes perfect sense. Well done!
Joan
Made these tonight and they were wonderful!! Thank you for such a great recipe :) the only thing i changed was the baking time (7 instead of 10) and they came out perfect. Thanks again for the recipe and great tips!
I linked to this post on my blog today as part of a “What cookie Am I?” quiz. Thanks!
I was thinking of trying the “cornstarch” addition to cookies, but found this page first. Your cookies sound and look tastier, so I’m going to try these instead!
I’ve always loved chocolate chip cookies. They are my favorite. Especially with dark chocolate chips. I usually just do the original Nestle recipe, but my last attempt didn’t turn out so hot. This afternoon I will try your recipe and see how it goes!
I made these yesterday to give as a gift. I was told they were amazing! Thank you for giving me my new favorite recipe.
I followed your recipe to a T but they turned out flat! I don’t know what I did wrong! The flavor is great and they are still soft, but they spread out a lot in the oven so they are really thin :'(
I think you forgot to say when to add the white sugar
You’re so right! Thanks for catching that. Just add it with the brown sugar. I’ll go in and make the change. Thanks!
Thanks they turned out great…a new staple recipe
What about adding oil to the cookie? Binding the flour and making the cookie more chewy
Pingback: Food, oh Glorious Food « Swimmer 4 Life
This is beyond fantastic. I’ve been going through various methods for baking the perfect chocolate chip cookie and brilliant write-up (and great pictures) helped to clear up some of the confusion. There were several techniques I was already doing (thankfully), but others (such as the room temperature eggs) I was not. Reading this has also helped me to figure out why a couple other recipes weren’t turning out quite as good.
Thank you so much! I think this weekend is going to be a cookie weekend!
This cookie recipe is definitely a keeper! I added oats and they tasted gorgeous! Don’t miss out every little bit of advice and you will be ok.
Pingback: chocolate chip cookie quest | Unsophisticated Kitchen
This recipe is amazing! Ive already made it twice this weekend and I really appreciate you providing all the different tips and tricks for all the different ingredient. I love you. And i’m pretty sure my boyfriend would marry you if he had a choice. I wish you were a member of my family.