Secret #1: Start with a properly laundered shirt. Check the care label and follow the recommendations. Watch the temperature, because washing shirts in water that is too hot can cause the interfacing in the collar and cuffs to shrink, causing puckering and impossible wrinkling. And pay particular attention to any dirt on the cuffs or collar, or in the underarms, because ironing stains will set them permanently.


Secret #2: Heavy duty irons, though more expensive, will make a big difference in how quickly and easily you can iron. Definitely worth the investment. Save your pennies and get the best one you can afford.

Secret #3: Start with a damp (not dripping wet) shirt. Choose one that has hung to dry for a bit, or one that has been sprayed all over and left to sit in a ball for 10-15 minutes.

Press the top of the collar first, paying attention to the corners. Pull the fabric taut if needed (or in case the interfacing did shrink). Turn the shirt over and press the underside of the collar and the strip of fabric underneath the collar.

Next press the upper back of the shirt, called the yoke. Most shirts have one central pleat under the yoke, but sometimes you’ll find a split yoke with two small pleats on each side.

After the yoke and pleat, finish the back of the shirt. Spread out the back of the shirt from the yoke to the tail, flat on the board and iron in sections.

Now it’s time for the cuffs and sleeves. I iron the outward facing side first, followed by the underside. I also like to iron the little details and pleats on the sleeve while I’m doing the cuff. Next, spread the sleeve out flat on the ironing board and make sure to line up the seam properly.
Secret #4: If there is still a crease on the sleeve from the previous ironing, use that as a guide. A double crease is terrible! Start at the top of the sleeve and work down to the cuff. Pay close attention to any pleats, spraying any stubborn wrinkles with a little more water.

Now it’s time for the front of the shirt. Start with the side of the shirt with the buttons on it. If you have a cushy ironing board cover, you can turn the shirt over and press the backside over the buttons. Otherwise, use the tip of the iron to press in between the buttons.
Some caution should be exercised with the buttons. Good quality shirts have good quality buttons that can stand up to the heat, but occasionally a button might break with the heat.

Next I like to go around the arm hole with the tip of the iron, then move along to the rest of the front panels.

Secret #5: Remember that the goal is to iron in a pattern so that you don’t undo what you’ve just done. Let the ironed part of the shirt gently drape over the opposite side of the ironing board.

Secret #6: Once the shirt has been ironed completely, it needs to hang to “cure,” as it’s called in the business. (Wow. So professional.) The shirt may still be a little damp, and that’s okay. Let it hang until it’s completely dry, being sure to button the top collar button to help the collar keep its shape.

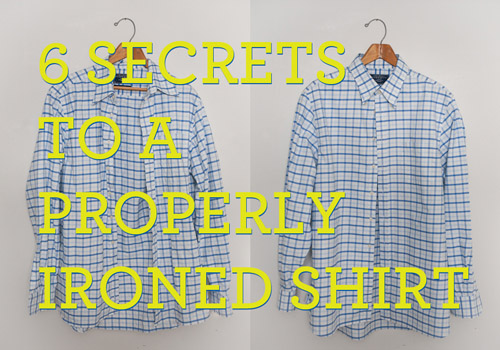
Once you get the method down, ironing will go by quickly and the shirts will look amazing. Walking out of the house in freshly ironed shirt will do wonders for how you look and feel.
Three cheers for a properly ironed shirt! Three cheers for living well!
Created by of Café Johnsonia for Design Mom
how do I get that gooky brown stuff out that the iron sometimes spits out?
my husband irons like you do. He is a Butler @ a casino on the strip of Las Vegas. He actually taught me how to iron a shirt. I always ironed with the ironing board point on the left not the right. It is much easier to iron his way and your way.
Thanks so much for the tips! My husband and I haven’t been married long, well, at least long enough that I haven’t been able to master ironing his dress shirts! I don’t know why guy’s dress shirts are so much harder than girls, but I can’t seem to achieve the perfect look that other wives do. Ironing is hard when you haven’t grown up doing it!
Would you prefer using an iron with a steam and/or spray function? Or a flat iron without the need to clean the holes where the steam comes out from regularly? My dad is the ironing pro. My husband is the one who says 50%-80% is fone since it will get creased again after carrying bags and shifting around. The good thing about my dad being the ironing pro is that he can teach us the technique for the respective clothes, iron much faster than us (so that he can clear piled up clothes for a family of 3 men, a 3.5yo kid and me) and the end product is just like what we get from the laundromat. The bad thing is, he has set the standard so high that I myself get rather perfectionistic when I iron the clothes.
hiya Natalie.
Not sure if you are in the Uk or USA . I’m in the Uk. My mom died when I was about 141/4 My dad employed a lady to come in a do the bulk of the housework and the ironing, this was mainly for him as I always preferred to do my own Stubborn wasn’t I but it was good training. I’ve taught myself so much over the years. Other people seem to think I make hard work of everything but its in this way I’ve trained myself lesser modes may be good enough for them but not for me. LOL we all love a shortcut but
time and time again I’ve found the only way is the right way ( well at least for me) and whether this way is the hard way or not its a bit like driving there are always more than one route yet its a physiological thing if it feels right you go on doing it another person might go a different route, get to the same end point, neither of you is right or wrong just a difference.
Hi there! Quick question that’s completely off topic.
Do you know how to make your site mobile friendly? My
site looks weird when viewing from my apple iphone.
I’m trying to find a template or plugin that might be able to
correct this problem. If you have any recommendations, please share.
Thank you!
You’ve really impressed me with that answer!
The third tip about starting with a lightly damp shirt works very well. When I was little, my mom kept a spray bottle full of water that she would use to wet something she was ironing. I always thought it would burn the fabric to have it wet, but it surprisingly doesn’t. I will have to try the rest of these tips to get perfectly ironed shirts each time.
Secret 2 is completely right, in testing lots of irons I’ve personally found that the type of iron you use really makes a huge difference, I’m glad you’ve recognised this too!
I’ve also found secret number 6 to be a big one and always make sure that I hang my shirts right after ironing!
I stumbled on to your site about ironing. Yes, I love to iron. When I was little I watched my MomMom iron. She taught me how to sprinkle and iron. She even ironed my grandfather’s boxers and starched them (ugh). All of your instructions are right on except the sprinkling of the shirt we sprinkled and rolled it like you would an Italian sandwich in paper wrap and let it sit for 10-15 mins. I still do it the same way. Ironing is becoming a lost art. Thanks for the posting.
I was taught at an early age how to wash delicate items by hand. shirts undies. i learned how to remove stains from my color and white clothes. what to use to get skid marks out of my boys briefs learned how to iron shirts and blouses at an early age (10) know how to iron blouses that have ruffles. Oxi Clean is not a new product. it is a by product of Oxalic Acid. used it years ago for my white clothes and white sheets.it’s nice to see someone that knows how to iron the way that i do.
Oh i sprinkle and roll the item put them in a plastic bag and place them in the frig until i’m ready to iron. it keeps the items from drying out.
Just this past weekend, my daughter said she didn’t know how to iron the upper part of the shirt. Now I can use your picture talking about ironing the upper to explain how to iron the shoulder and upper front as well. Thus the reason the ironing board is designed as such. Thank-you. My mother always ironed clothes before the hung them. Then when I raised a family, our closets were so blessed to be stuffed which wrinkled the clothes so we pressed them the night before or just before we put them on which means the ironing board was consistently standing and waiting. Today, in retirement I rely on non wrinkle knit fabrics. Yea!