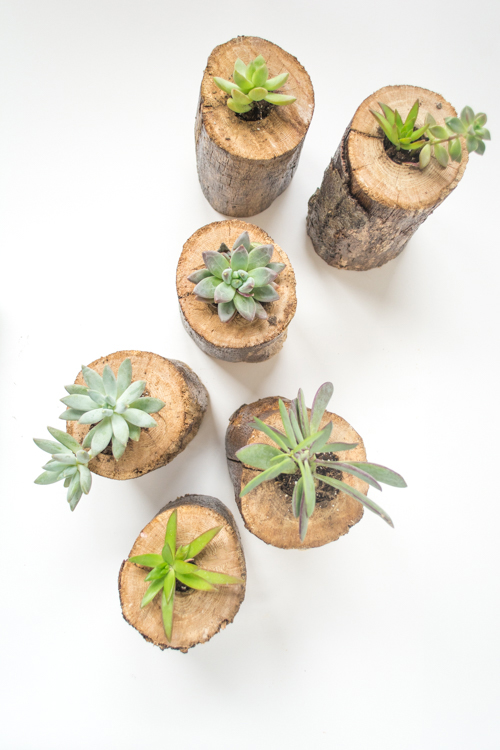
Hooray! I’ve got another gorgeous DIY to share with you. This project is the perfect excuse to get outside and interact with nature. These little planters would be gorgeous inside or out. I can picture them in our living room, and also on the balcony. I really want to make like 35 of these and line my front walk with them! I think they’re so cool.
I’m going to tell you right now, that this project takes a few bona fide tools and some muscle, too. But it’s actually pretty easy and straightforward. If you can handle a drill, then you can handle this project.
You ready to get started? Head out into nature and let’s make something!

Supplies:
– tree branch
– hand saw, table saw, or sawzall
– cleaner brush (an old toothbrush)
– power drill
– forstner bit — we used bits ranging from 1″ to 1 5/8″
– polyurethane or polycrylic
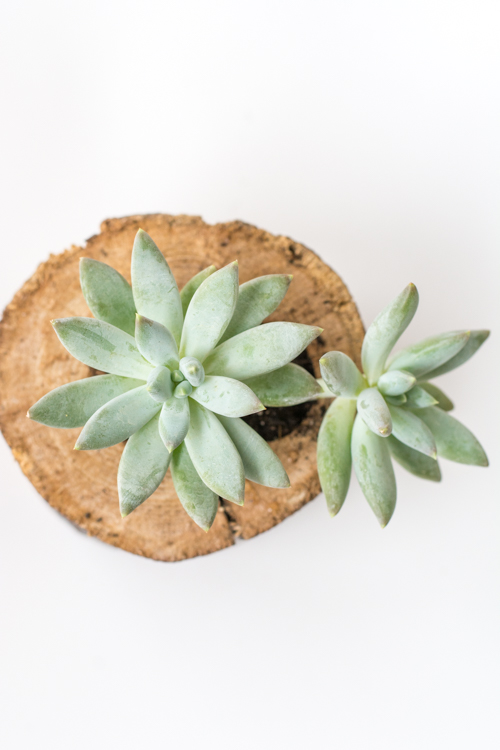
– mini succulents (or air plants, if you wish)
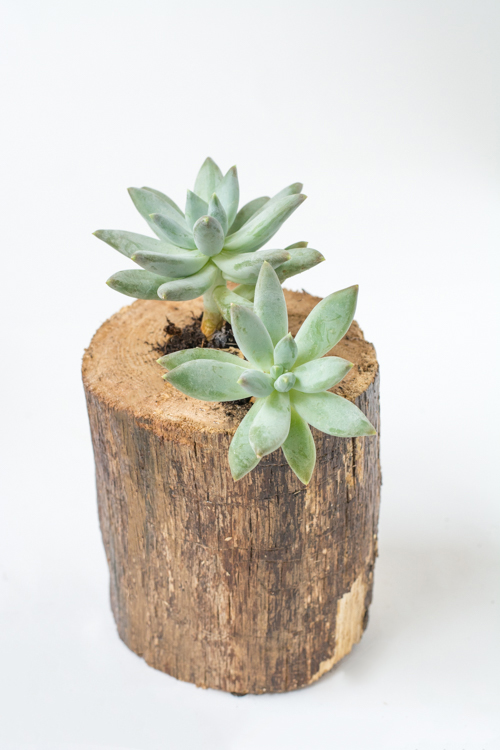
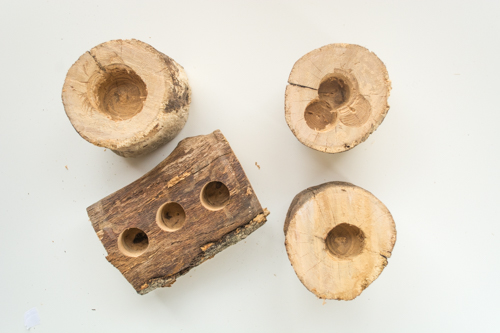
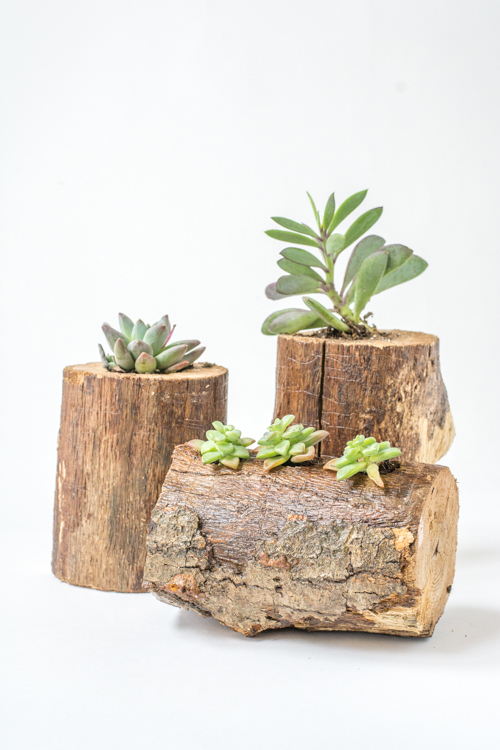
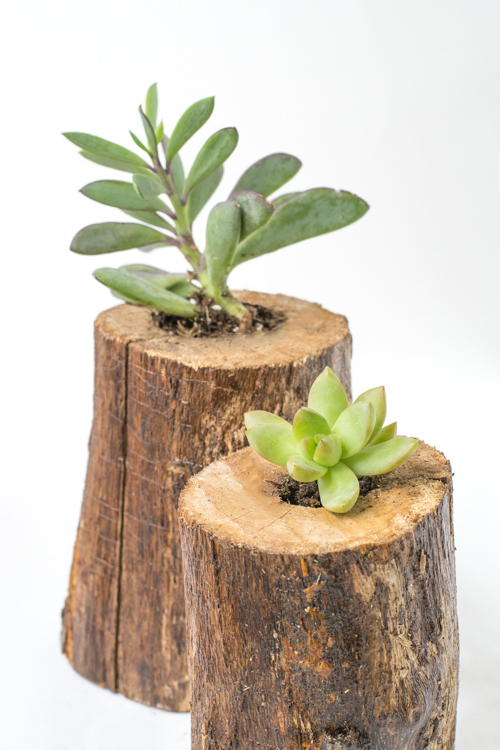
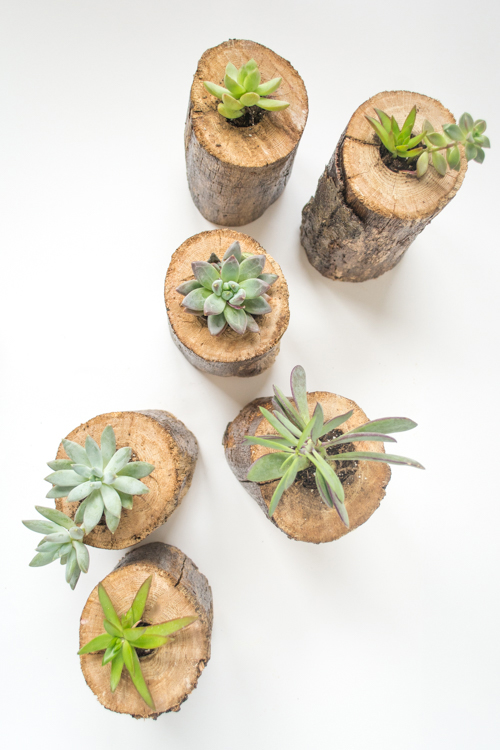
Find a tree branch. We picked this one because it was already on the ground, it wasn’t too weathered (aka. falling apart) and was the right size. Our branch is about 4-5 inches in diameter and had cool bark!
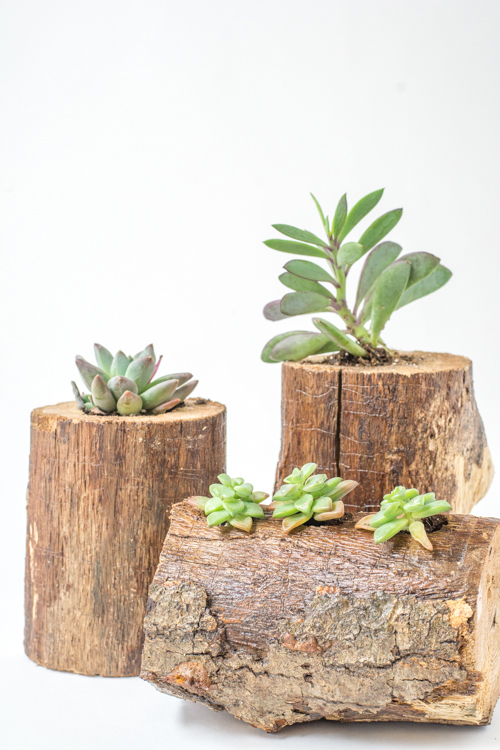
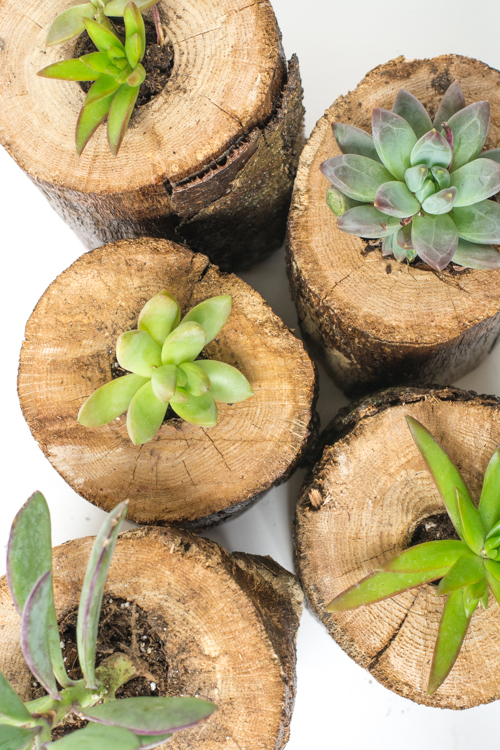
Using your preferred saw, cut the branch down into varying heights, your choice. The pieces pictured here are between 5 and 7 inches tall.
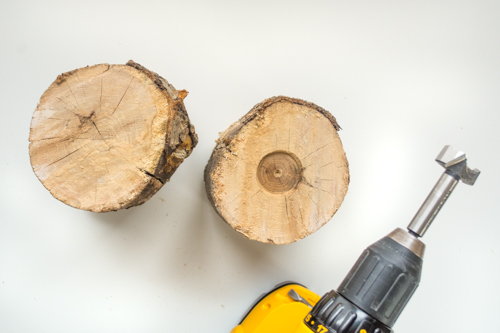
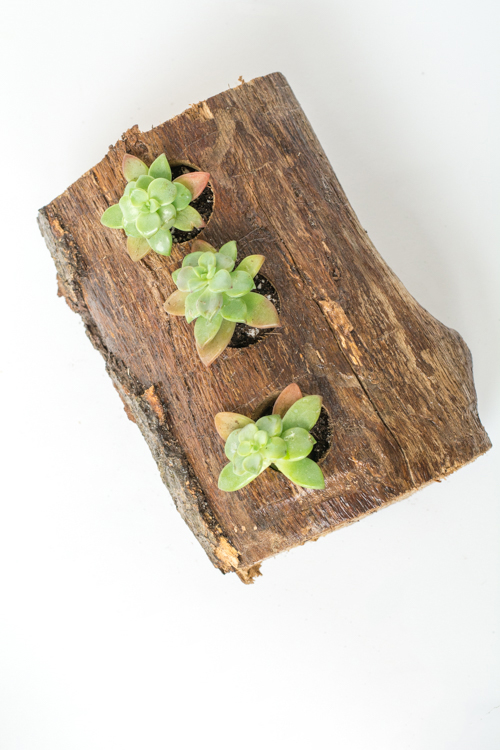
With the forstner bit on the power drill, hollow out a space for the succulents to sit. Note, this produces quite a bit of saw dust, so do this in a place where you can make a mess.
Succulents don’t need much water so the branch doesn’t need to be completely hollowed out. However, to keep the mini plants supported and surrounded by enough soil to keep them happy, the diameter of the hollow space should be wide and deep enough to fit the root system and some soil. Make the holes based on the size of mini succulents you wish to use: itsy bitsy plants can live in a 1″-1 1/4″ space. Larger ones need the 1 1/2″-1 3/4″ size. If you want to make them even bigger, combine two hollows together.
A couple things about forstner bits:
– Bring your patience. Forcing a bit into wood is challenging, especially a non-manufactured piece of wood with its natural knots. Concentrate initially on just getting the circle space set, as opposed to making it to the center of the wood instantly. Once a shallow hole has been formed, then concentrate on going deeper.
– You will need some muscle to hold the piece of wood in place (or equipment like a vise). We will be forcing a wide metal object into a log. There is going to be a little kick. Make sure you have a good grip on the branch piece and have some power behind the power drill.
– It gets hot! The drill, drill bit AND wood will get hot. If you see or smell smoking wood, pause for a bit and let things cool.
– It doesn’t need to be perfect and the wider in diameter the forstner bit is, the more challenging perfection will be. It’s okay. The succulent will sit in it and no one will know if the hole doesn’t have perfectly clean lines!
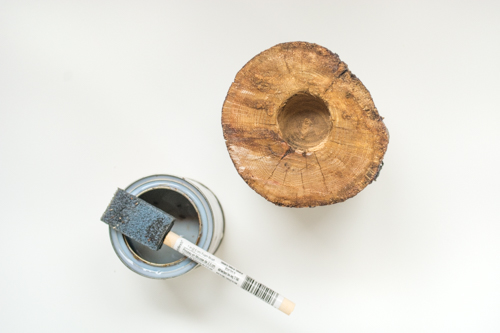
Use a stiff brush to clean the branch segments and hollow space. Use polyurethane or polycrylic to seal the branch everywhere but the hollowed out space.
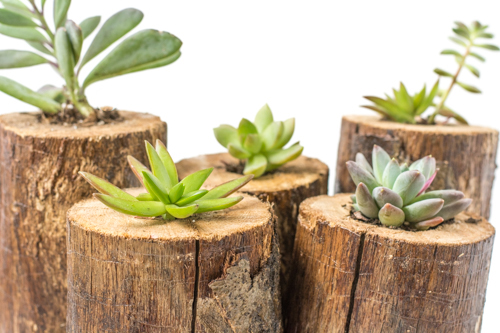
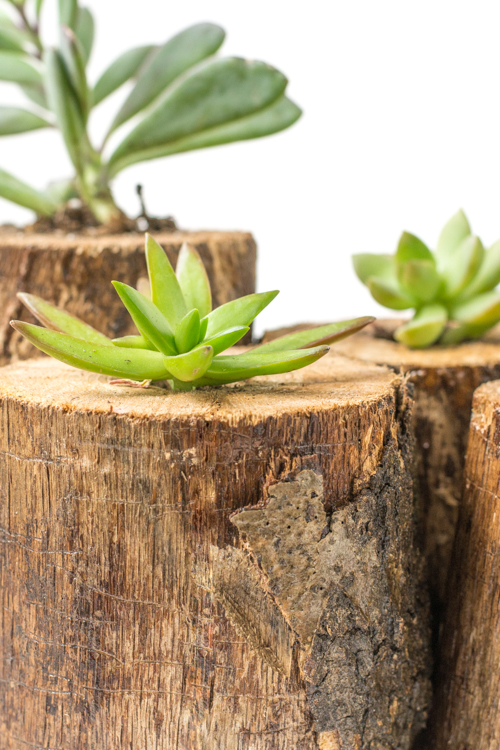
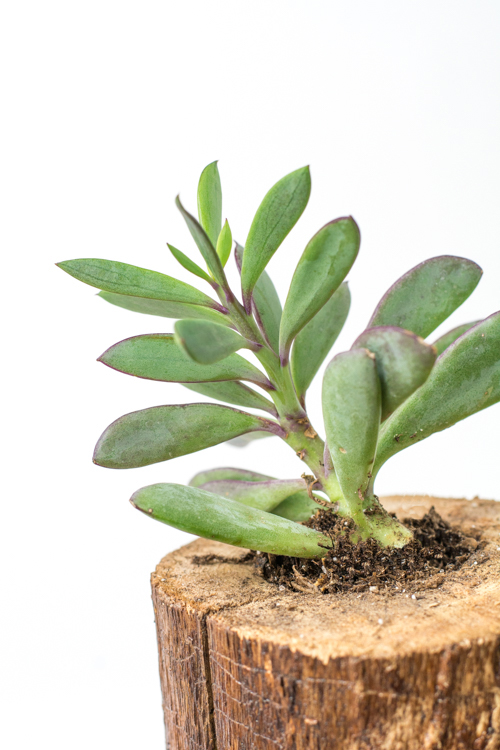
Transplant mini succulents to their new home. We find it easiest to spritz our little green friends with water each day.
__
Aren’t these gorgeous?
Okay, Friends, if you make one (or more) or these, I want to hear about it! And I want to know where you would display these as well. Are you thinking the family room? Master bedroom? Kitchen windowsill? They’d be so cute pretty much anywhere!
P.S. — More fantastic DIY projects.
Credits: Images and project by Amy Christie for Design Mom.
Do you have a good source for the succulents? We’re planning on doing small planters of them in our daughters wedding this summer, and could use a cheap source.
Love these! I’m also going to use these for my wedding!
Love this for a more rustic look in my home!
I love these!!! Great idea.
Super simple AND clever! I love it!
I’m actually doing this for my son’s wedding in June. The centerpieces are logs from dead trees we had cut down. All logs have patterns from bugs crawling around under the bark. It’s called wormwood. Wish I could post a picture. I will plant each log with multiple succulents. The smaller branches will be crosscut like yours with one succulent in each and will be used for guest favors. Im propagating all the plants myself…it’s become a hobby/addiction.
Sorry, a couple other things. On my prototype, I used solid miniwax to seal the outside of the log to preserve the pattern. I might experiment with matt polyurethane since it would be easier to apply. The other difference from yours is that i drilled drain holes in the bottom of the dugout area so I can water the plants normally.