Images and text by Amy Christie for Design Mom.
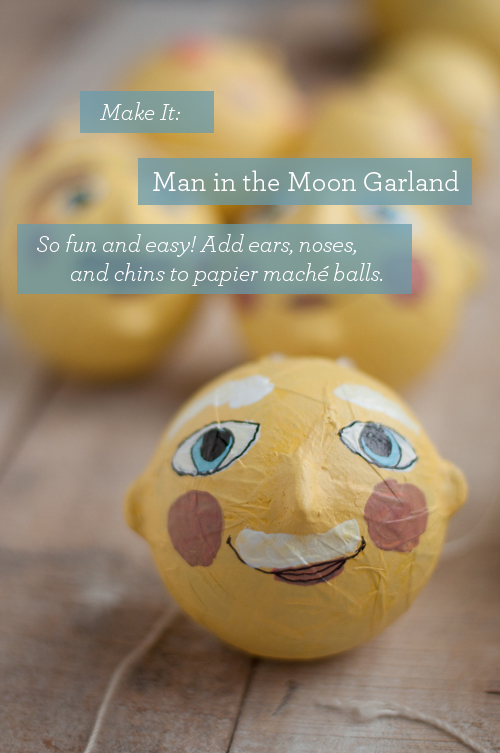
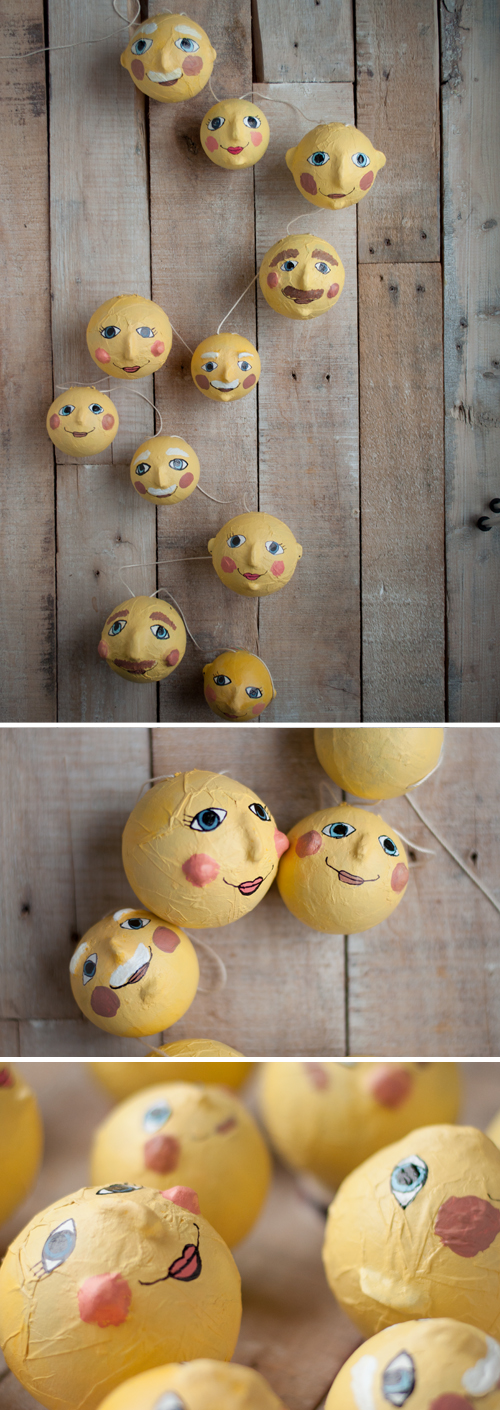
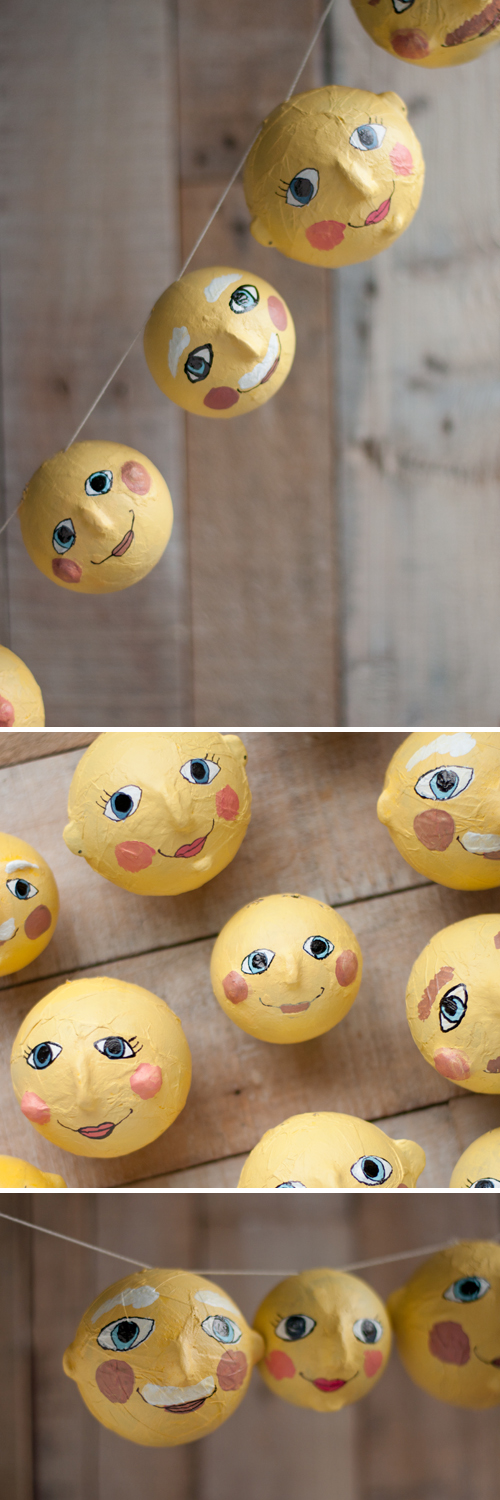
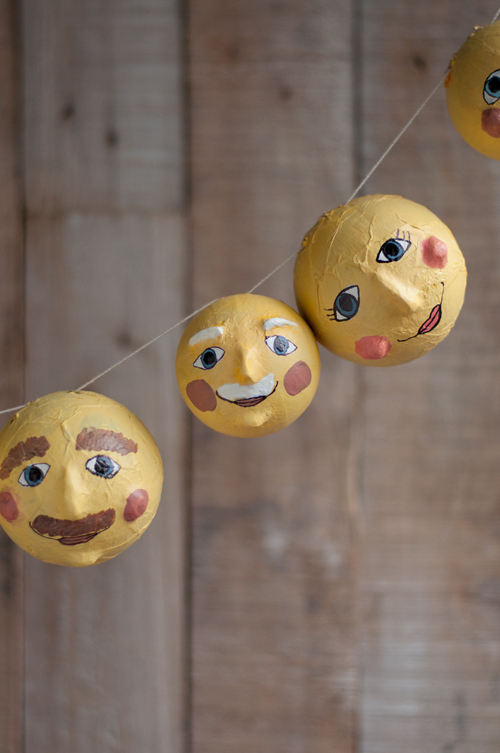
A Man in the Moon Garland! (With some Women in the Moon too!) What nursery wouldn’t benefit from such a friendly addition? And it can be easily customized to your liking — different faces, bushier eyebrows, paler cheeks — whatever you like!
I’m so pleased about how this project turned out. It’s actually quite simple, but the potential is big. (Don’t be surprised if you see me adapt this project to make holiday garlands, too. Or maybe one with familiar faces for a family reunion!)
Papier maché was perfect for this project but we skipped all the mess and started with store-bought papier maché ornament balls. So much easier! Then we upgraded those simple spheres with a little air-dry clay. We added 3-D facial features, like noses, cheeks, chins, eyebrows and ears — and then painted them up. Voilá! The little man-in-the-moon faces were born.

Don’t worry if sculpting or painting faces is not in your skill set. It’s barely in mine! I have done my best to breakdown the shapes and features into the simplest of steps.
So flex those fingers and let’s get started!
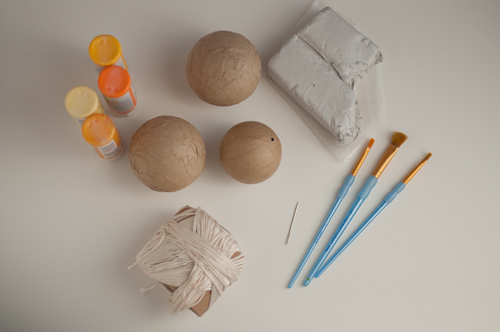
Supplies:
– papier maché ornament balls
– air-dry clay
– paint
– paint pens or permanent markers (I ended up using these to add fine details.)
– needle
– thread
– awl, sharp cutting blade, drill and very tiny bit
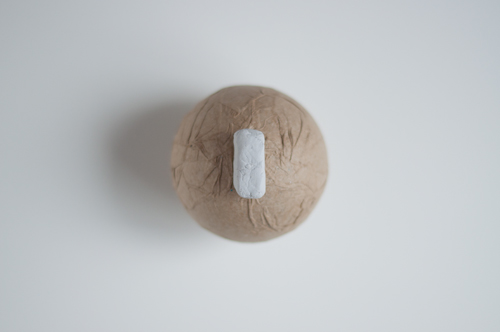
First, use little bits of clay to add facial features to the ornament balls. I used a rectangle to form the nose.
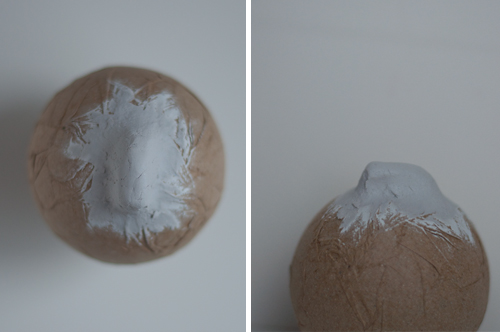
After placing in the center of the “face”, I took my thumb and pressed down the edges to form a nose. Smooshing it to the ball will also ensure the face parts will stick! And remember, there are all kinds and sizes of noses. Keep smooshing and pinching until it looks like you want. If, in the end, you dislike it immensely, pull it off and start again.
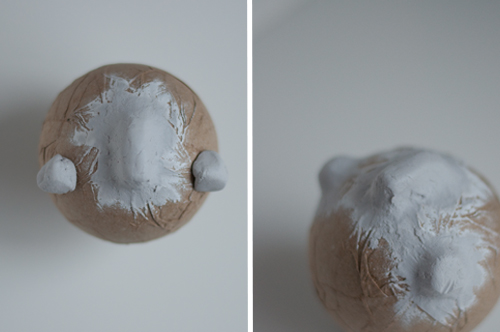
The cheeks started as little balls and again, I used my thumb to press down around the curves to shape it and adhere it. I added other things like eyebrows (really skinny rectangles), ears (small, flat circles) and chins (small oval) to some of them. They are far from perfect or identical but the variance gives them character.
Allow the clay to completely dry.
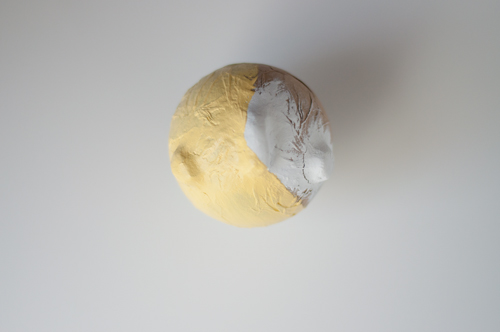
Then paint!
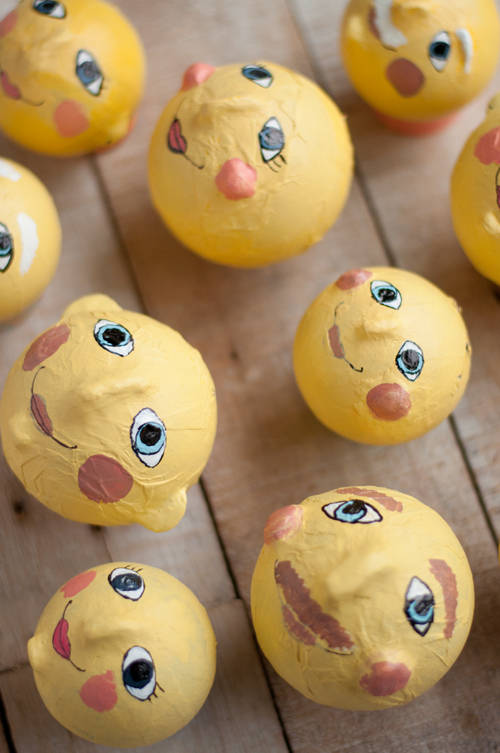
A base color, cheeks, lips and eyes (mustaches, too!). Make them to look like you want them to.
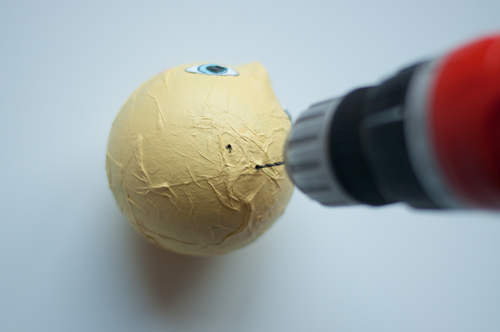
When the paint has completely dried, I used a drill with its tiniest bit to make holes for stringing them up. But if you don’t have a drill, an awl or a sharp cutting blade works too. I chose to make two holes at the top of the head to ensure the face would stay forward and not sag to the bottom.
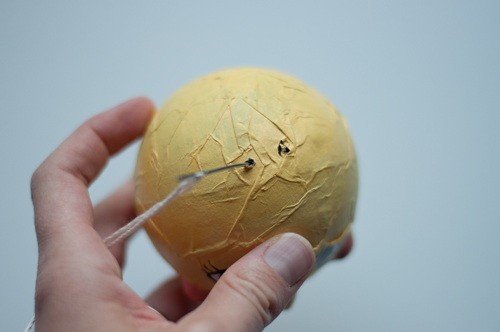
String them up and hang anywhere.
P.S. — Like to make things? Find more of our projects here.
Fun idea I’m going to try one with Santa and elves and abstract designs
Maybe tape a ring to the head for hanging
Thanks so much for the inspiration!
My goodness, these are adorable! Thanks for sharing–what a fun idea.
wow, these are super cute. I didn’t even know one could purchase prefab papier mache balls. I’ll have to price them out… :)
This is so cute!! These would be so great to do at a holiday or birthday party! Love the creativity.
This is such a cute and creative idea!
This garland is too cute!
Pingback: 74 fun things // 42 | 74 Lime Lane
Pingback: DIY with Design Mom: Man in the Moon Garland | this heart of mine
Pingback: Creepy or Cute: Man in the Moon garland | The Lovely Lifestyle
Where did you buy the balls? The ones I find seem expensive – for making an entire garland. Thank you.
Pingback: Papier Mache’ Ornaments | Whee! The People
Thanks for posting this tutorial! I became instantly curious when you updated your FB cover photo. These little guys are so fun!
Do you think you could use cheap boxed ornaments or $1 store ornaments for the base?