Images and text by Gina Vide for Design Mom. Edited by Amy Christie.
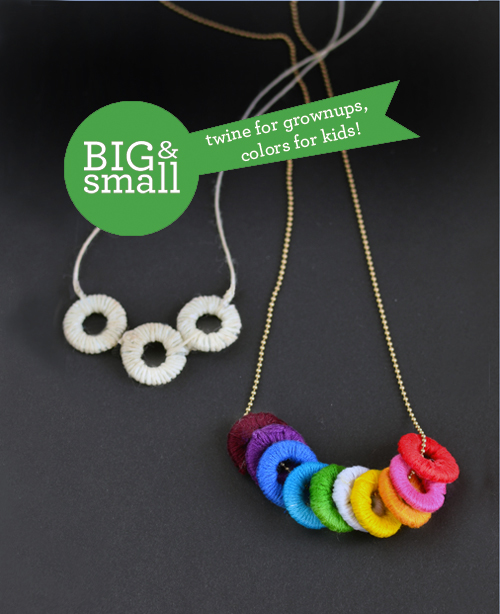
This side-by-side project is so simple, but at the same time, creates such a beautiful and meaningful piece for both Bigs and Smalls. Grownups, you can create a Mother’s Day necklace by wrapping one washer per child in a color/colors of your choosing. The disks can then be bound together to create a beautiful geometric necklace full of meaning.
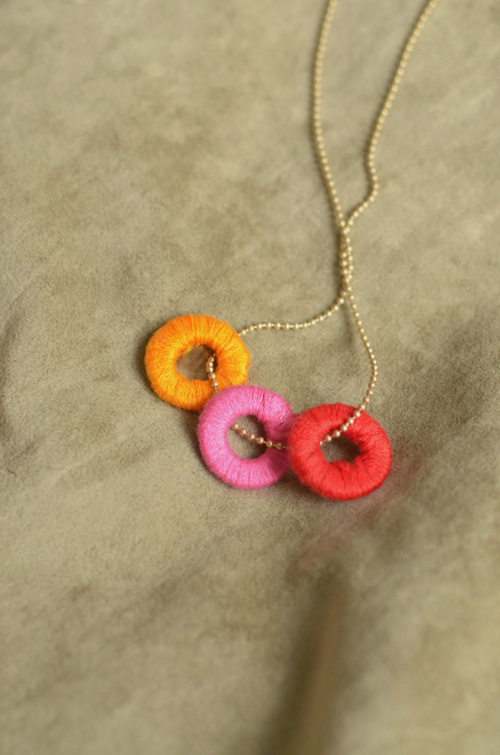
For you Smalls, create a necklace with a wrapped washer, one for each year of your age, in whatever colors you like, and string them on a chain.
We’ve made these for a Mother’s Day gift, and made another set for ourselves — and we’ve been wearing them all the time!
In addition to Mother’s Day, the Small version would be a wonderful birthday tradition, don’t you think? Create the first necklace together and then, every year bind a new colorful disk and add it to your “small’s” necklace. The necklace would be a perfect gift for a friend too.
Let’s start creating!
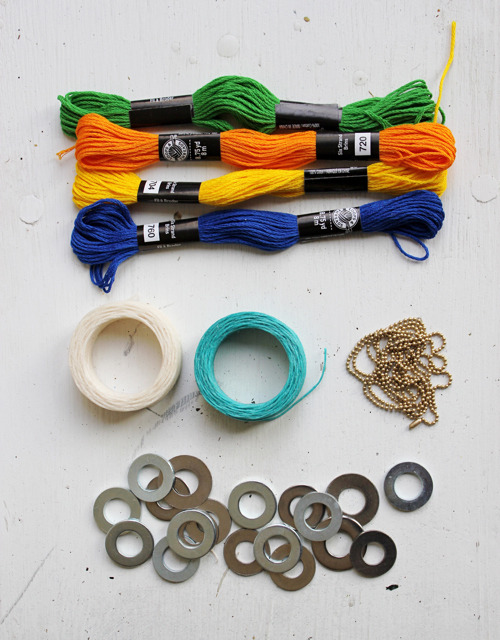
Supplies:
– Washers
– Scissors
– Chain necklace
– Big: Waxed Linen
– Small: Embroidery Thread
– Super Glue, optional
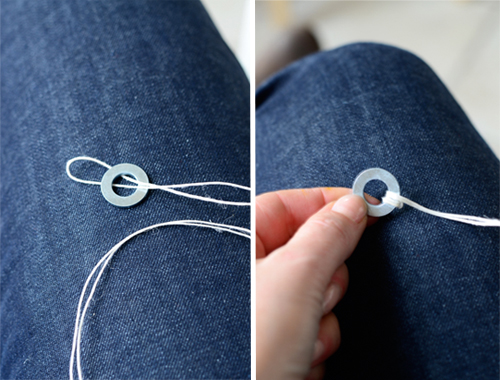
For both types of necklaces, you’ll begin by cutting an arm’s length of thread. Fold this thread in half and insert the top loop of this thread into the middle of the washer. Draw the tail of the thread through the loop forming a connection. You will have a double length to use for wrapping, rather than a single thread.
Hold the washer with one hand and carefully begin binding the washer. You will want to bind it smoothly and evenly. To bind, insert the end of the thread into the middle of the washer, pulling it out tightly, laying this double thread smoothly across the surface of the washer and continuing in this way all the way around the washer until it was completely covered.
I found the best technique for binding was to hold the washer in my left hand, holding the already bound thread in place with my fingers, while using my right hand to do the binding. If you are right handed, reverse this. By looping the thread into the middle, I found that I could see the binding best and keep it the most even.
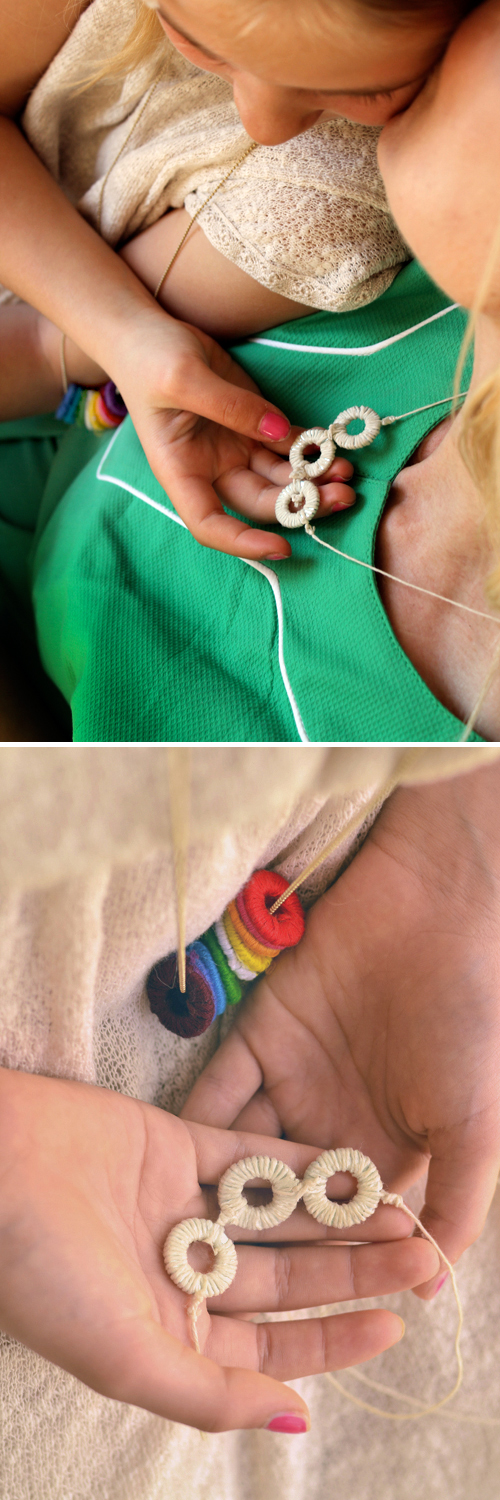
Those are the universal steps for both necklaces, but now we move into specific steps for each. We’ll start with the BIG necklace.
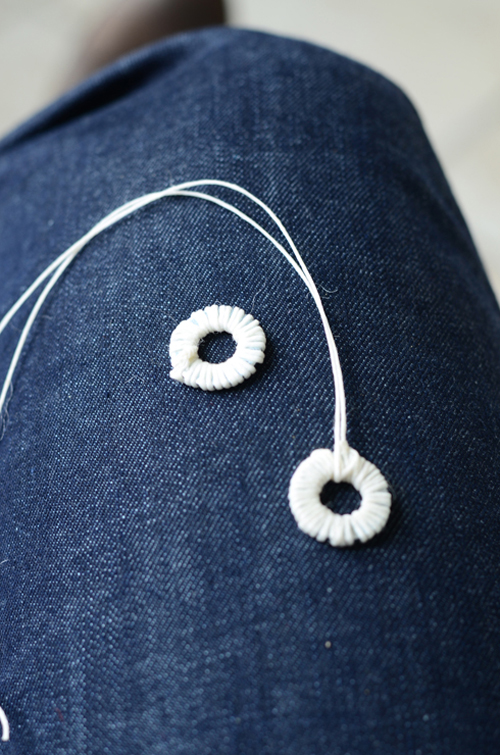
Continue to bind the washer until it is completely covered and tie off the final thread but do not cut the end. Bind as many washers as desired, finishing them all in the same way.
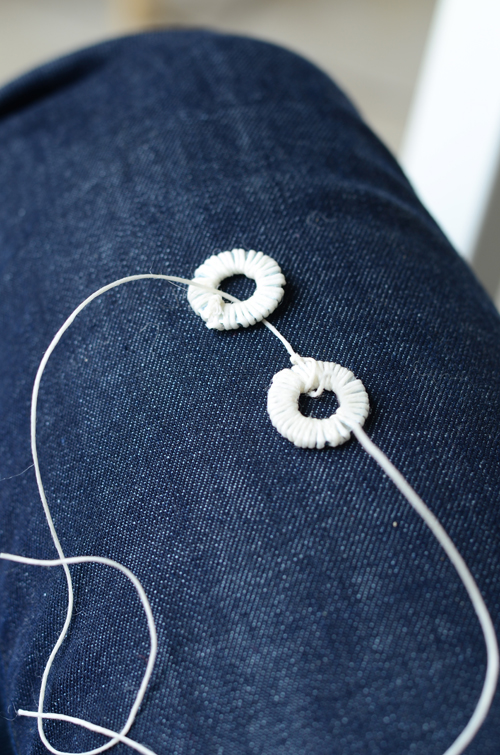
Once all the washers have been neatly bound and tied, you’ll attach them. Carefully clip the cord of one of the two disks, but leave the other tail long. Use that long thread to tie the two together, then wrap the thread through both holes three times, and end by tying a knot and clipping the excess — keep the knot on the back side of the washer.

If you do not have a long thread tail, simply cut a new length of thread, tie these two disks together with the the new piece and wrap this binding three times, then clip.
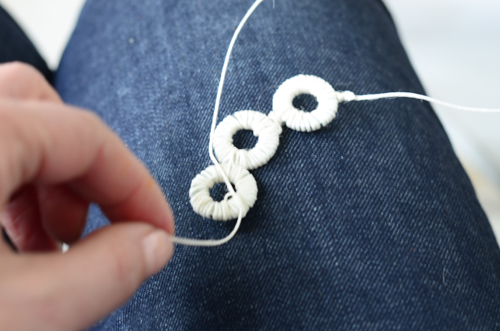
Continue connecting all disks together in this fashion until all of your washers are attached.
To finish, cut 2 new pieces of the this same thread. Each will serve as a side of the necklace. Cut these pieces accordingly — make these long enough for the necklace to sit at the correct length on your neck and also allow enough extra for tying a knot to the disks, and additional length for tying as a closure at the back of your neck.
Tie one piece of thread to the middle side of each side of the disks (one on the far left side of the left disk and one at the far right side of the right disk)
Waxed linen binds itself well but, if you are concerned with loose ends not holding or for extra wear, dot the end of the thread with super glue at the time. Let the glue dry.
Once dried, you Mother’s Necklace is ready for wearing! Enjoy!
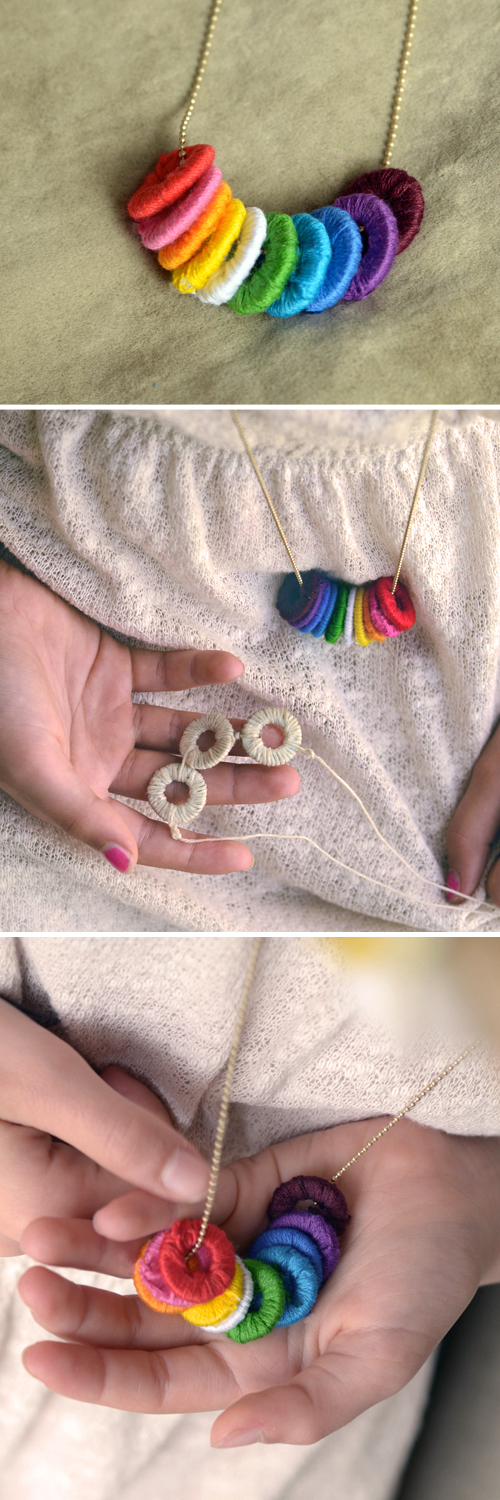
Now it’s time for the SMALL tutorial.
When the washer is completely covered (using the direction above), tie off the final thread and carefully clip the knot. Bind as many washers as desired, finishing them all in the same way. If you are concerned with loose ends not holding or for extra wear-and-tear dot the end of the thread with super glue with adult supervision. Let the glue dry.
Once completely dry, thread the chain with these colored disks and close the clasp — and your necklace is ready for wearing!


Happy necklace-making!
P.S. — The Big & Small series is about projects grownups and kids can do together. There’s a more advanced (and some times more sophisticated) project for BIGS (those are the grownups), and a simpler, related project for SMALLS (those are the kids). We love thinking of you and your littles making them side by side. Find all the posts in the Big & Small series here.
What a clever, inexpensive gift idea.
Going on the “I’m board.” list for this summer. Love it!
These are wonderful! I would love to make them for small Christmas gifts or anytime, really.
Such a fun simple idea, thanks for sharing!!
Such a fantastic idea. I love going to the local hardware store for crafting inspiration.
Love both versions…definitely pinning for summer, when they are ready for a change of scenery from the 100th friendship bracelet…
This is a fun and sweet idea. Would make for a fantastic birthday party craft!
Pingback: Big & Small DIY: Wrapped Washer Necklaces
I love this, Gina! I love picturing a grown-up and child making these side-by-side.
Thank you so much, Gabrielle for sharing this! I have to admit the project is a little addicting. It is honestly, such a wonderful side-by-side project to do!
I love Gina’s creations, always so brilliant!
Oh my… you make my day. Thank you so much and I hope that you’ll have the chance to make these, too!
Pingback: Crafts for Kids Blog » Tutorial: Wrapped Washer Necklaces
So pretty. I might have to make myself one. :o)
Love that this project is filled with so much color and love. My toddler son always plays with my necklaces so I can’t wait to make one of these and explain to him that he’s the inspiration behind my necklace.
Pingback: Cute crafty ideas | One Happy Mama
it’s a lovely idea! and while I love the grownup version, I wouldn’t mind a colorful one, either!
Pingback: Dig, Dream, Drool - Freckles in the Fog | Freckles in the Fog
This looks so fun! I am in charge of a camp for girls ages 12-18, and this would be a perfect activity. Where did you get the washers, and what sizes do you recommend?
Oh my gosh this is super cute!! I was wondering if I could feature your tutorial of it on my blog. It would be much appreciated, as I am just starting out.
Love this. I am really confused how to tie the rings together. Can you make it simpler? Thanks
Pingback: Laboratori per bambini : collana | Blog di creabimbi
Pingback: DIY, 10 Regalos “con Corazón” para el Día de la Madre | Nosolobebes | proyectos, vivencias, decoración,… cosas de niños y bebés
Pingback: 5 One of a Kind Mother's Day Gifts - Whats Ur Home Story
This is adorable. I loved it so much that I included it in my round up of 4 one of a kind gift ideas for Mother’s day. Thanks for sharing.
http://whatsurhomestory.com/mothers-day-gift-ideas/
Pingback: The Plaid Palette
Pingback: Ritter Public Library – Craft
Pingback: Noted, With Thanks for September 5th, 2014 | Noted, With Thanks
Pingback: Nahut Blog