
Holy fun times!! Water play is one of the best ways to beat the summer’s heat and a kid-sized, water-only “car wash” — that kids can ride through on tricycles, big wheels, bikes, skateboards, or rollerblades — is every child’s water heaven dream. I can attest that even as an adult, I am pretty giddy about it myself. So I thought it would be fun to build one for my own kids, and I took notes and drew up plans, so that you can build one too! Everything you need to know is right here in this post.
I had never used PVC pipe to build anything before so I was a little nervous, but once you come to grips with the PVC aisle (so. many. options!), it is very easy to work with.

With a trip to the hardware store and Target, this tricycle car wash came together quickly and easily. I promise, this is easier than you think! Let’s get started.
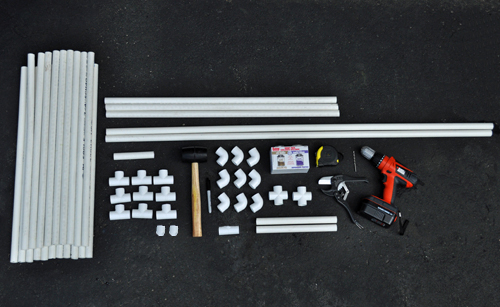
Supplies:
-1 – 6 inch piece of PVC
-2 – 1 foot lengths of PVC
-2 – 5 foot lengths of PVC
-3 – 3 foot lengths of PVC
-20 – 2.5 foot lengths of PVC
-2 – cross PVC connectors
-2 – PVC caps
-9 – ‘T’ PVC connectors
-9 – elbow PVC connectors
-1 – female hose adapter to PVC connector piece (try to get one with a spinning attachment)
-2 misters (found mine at Lowe’s in the PVC pipe section)
-rubber mallet
–PVC pipe cutter
-tape measure
-drill with 1/8 inch drill bit
-marker
-PVC adhesive (optional)
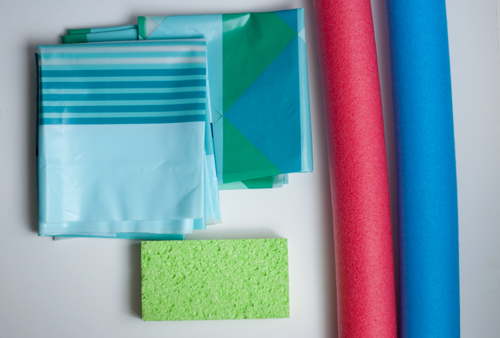
-sponges
-pool noodles
-plastic shower curtains
-scissors/rolling blade
-printable construction plan (free!)
Note: all the PVC pipe and connectors used for this project were 3/4 inch.
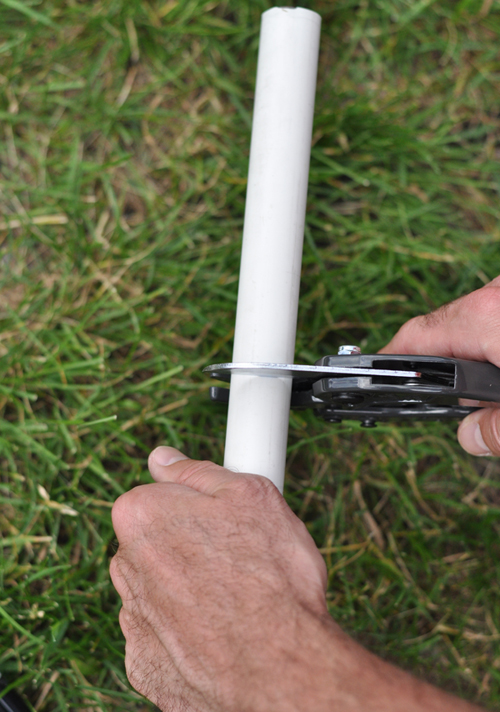
First things first, prep all the PVC pipe to the lengths listed above. Sometimes the store will cut it for free so if you are concerned about measuring or using sharp tools, try that route. We used the PVC pipe cutter I linked to above and were very happy with the ease of use and the results.

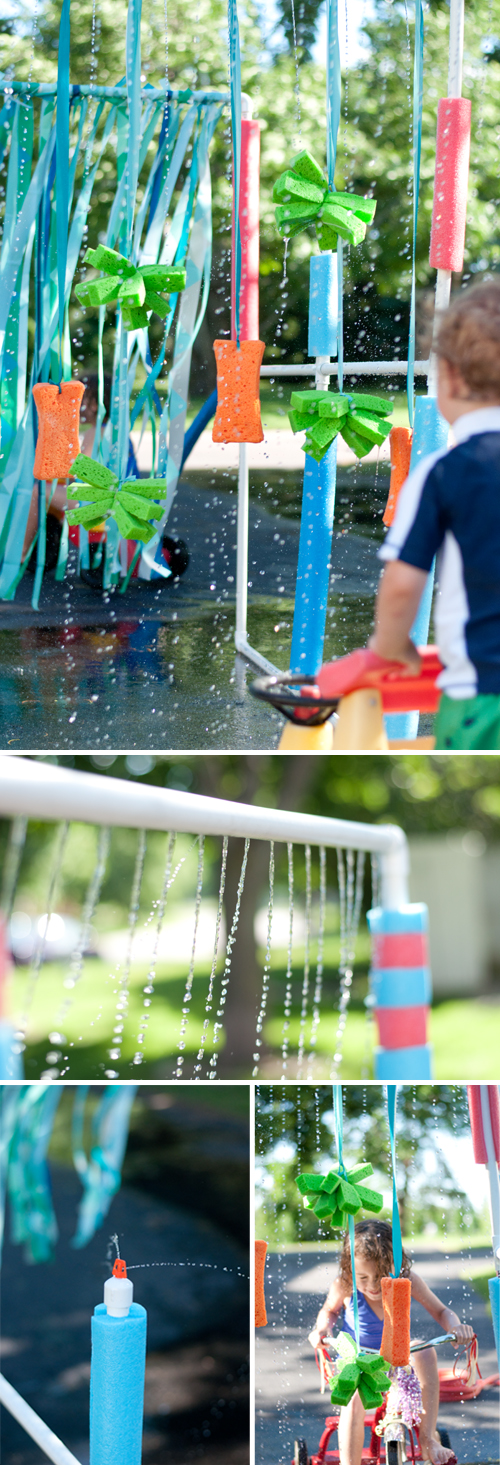
Holes for the water to spray out of will be drilled into two of the 3-foot lengths. We chose to put more holes (like 18) in one as it was slated for the first crossbar and guaranteed really wet kiddos. For the second bar, we only made 7 holes because of the hanging sponges. But you can adapt the plan as you like.
Remember, the more holes there are, the less water pressure for parts like the misters. However, more holes means more water which is super fun! Note: We didn’t do any holes in the third cross bar but you could add them there too if you want!
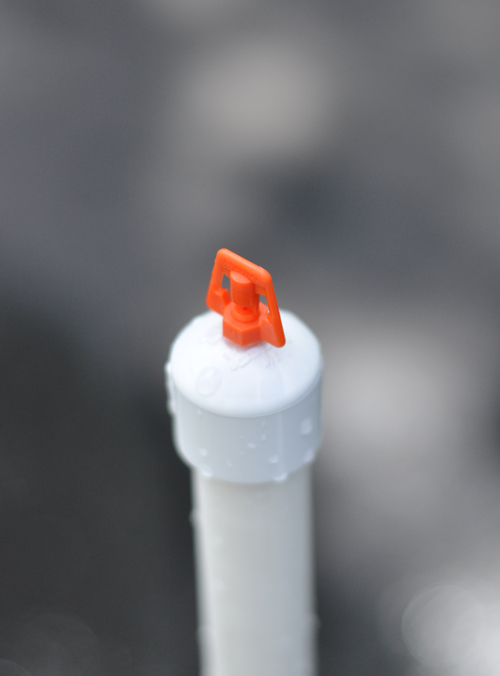
Use the drill to make a hole in each of the two PVC caps for the misters to stick in.

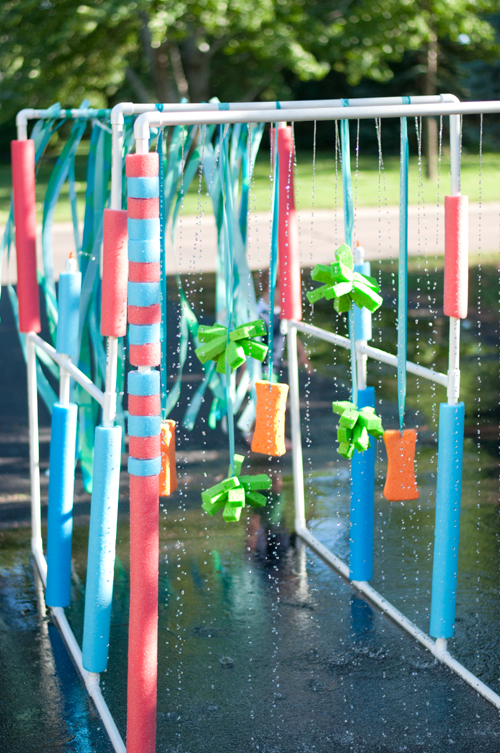
Once everything is ready, assemble it according to the printable directions. The 3-foot sections are the crossbars, the 5-footers are the first perpendicular poles of the car wash. There should only be one official opening (not counting drilled holes) and that is where the hose adapter/PVC connector is. Use the rubber mallet to securely connect the pieces.
We chose not to use PVC pipe adhesive. We don’t have a lot of space for storage and sadly, it’s not always tricycle car wash weather where we live, so for us, being able to dis-assemble this was important. But we haven’t had a problem with leaks. Before we start the water each time, we make sure all the joints and connections are solid and the pipes have stayed together.
If you go the adhesive route, use it according to the manufacturer’s directions. Note: Another advantage of not using adhesive is that joints can be separated when it comes time to drain the structure. It holds A LOT of water and it’s difficult to wrestle it around to get the water to drain otherwise.
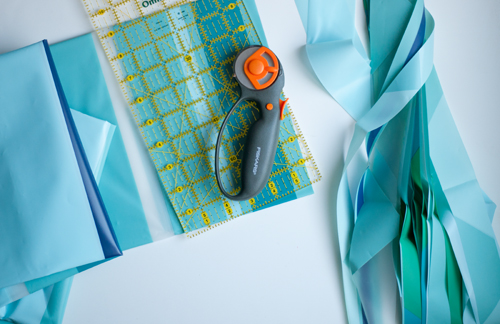
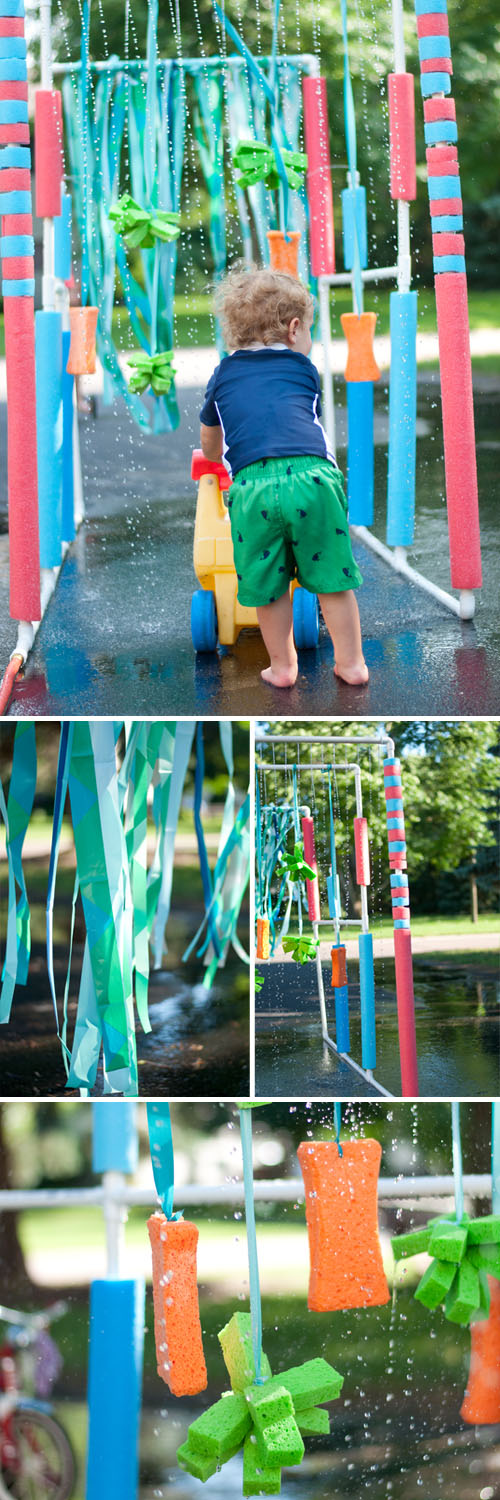
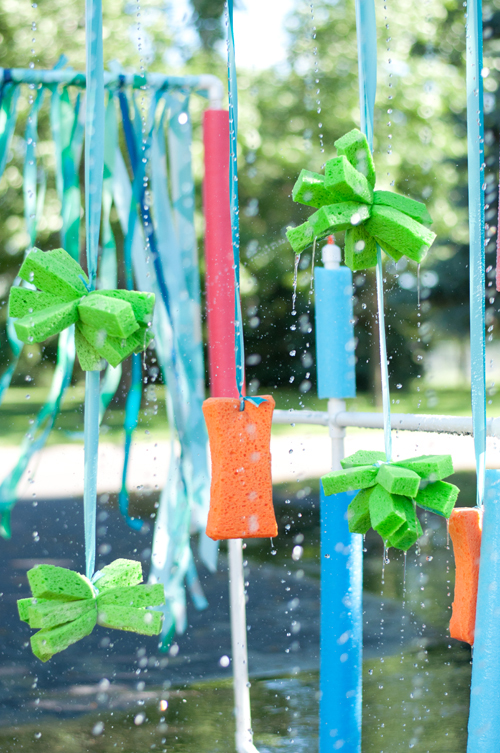
After the frame is assembled, it’s time to add some color. I used plastic shower curtains and cut them into 1, 1.5 and 2 inch strips. I tied the strips on the final crossbar to act as the car wash finale and add a little drama for the tricycle drivers. Note: I did try a lightweight plastic table cloth first, but the weight of the shower curtain was better.
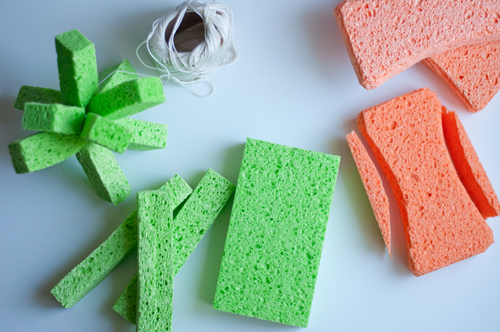
I took ordinary over-sized sponges and cut down the orange ones similar to the sponges in the inspiration pin and cut down the green ones to make sponge balls.
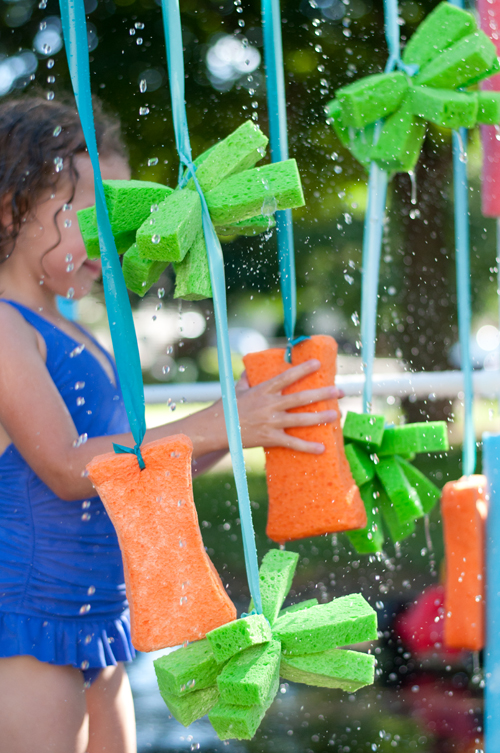
I used a few of the extra shower curtain strips to string the sponges up at varying heights, at the exact level for ultimate interaction with tricycle riders.
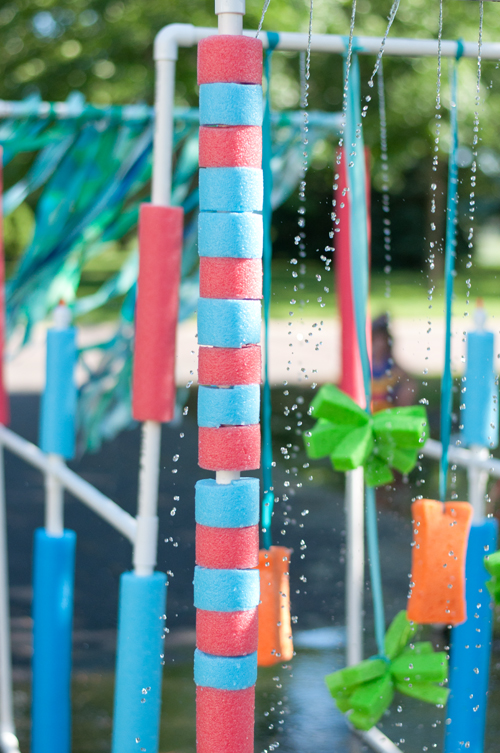
To give the PVC a little color and padding, I used foam pool noodles. I chose the ones with a hole in the center, and cut a line down one side of it. Then I was able to open it up and wrap it around the poles.
I cannot say enough how much fun our tricycle car wash is! Each time we turn it on, it seems to attract little neighbor friends. It’s kind of an instant water party!
P.S. — Don’t forget to download the free and helpful construction plan!

Created by Amy Christie for Design Mom
Pingback: 41 Ways to Throw the Best Bicycle Birthday Party | Girlistan
$19
Pingback: 25 Fun Things To Do With A Pool Noodle | InTheSwim Pool Blog
Thank you so much for your detailed instructions! We just made it and it turned out awesome!! My boys are thrilled! Great for a “Stem Saturday”!!
Pingback: Bu Yaz Suyla Oynamanın 23 Yolu - Eglence Merkezi
Pingback: Bu Yaz Suyla Oynamanın 23 Yolu - Hisse Portfoy
Pingback: 23 Ways to Play With Water This Summer
Pingback: 23 Ways to Play With Water This Summer – Adorably Perfect
Pingback: 23 maneiras de brincar com água neste verão - Educando Pequenos