Text and images by Amy Christie for Design Mom.
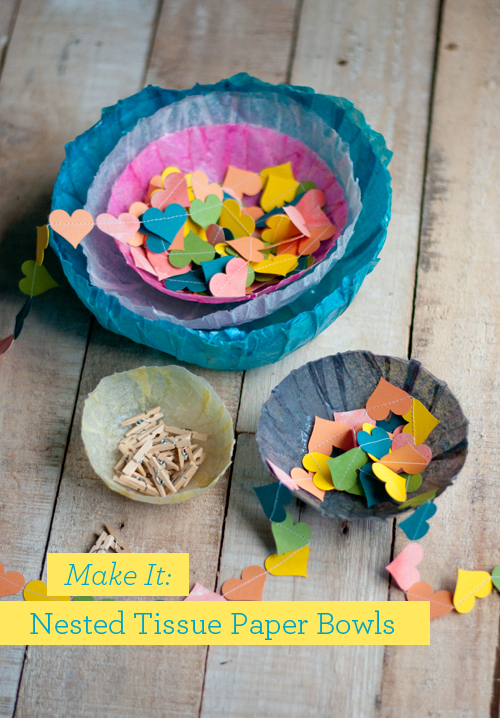
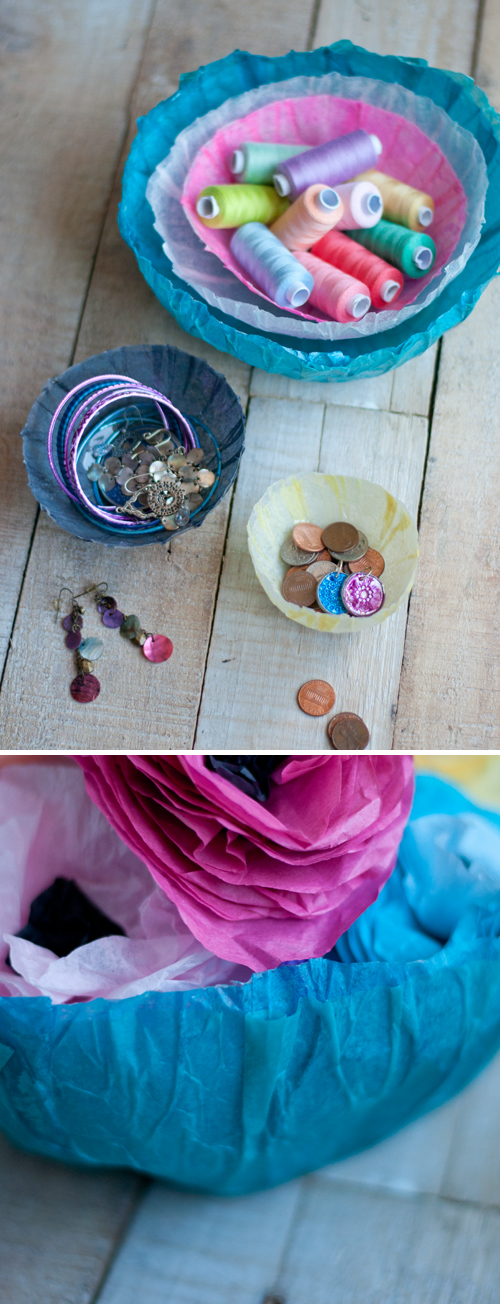
What is it about little bowls and containers? I’m drawn to them like a magnet. I set them on side tables and dressers. In bathrooms and living rooms. I use them collect bits and bobs — jewelry, safety pins, beads, crafts supplies, keys… And when I come up with a way to make them myself. Well. Suddenly I am compelled to make. all. the. bowls.
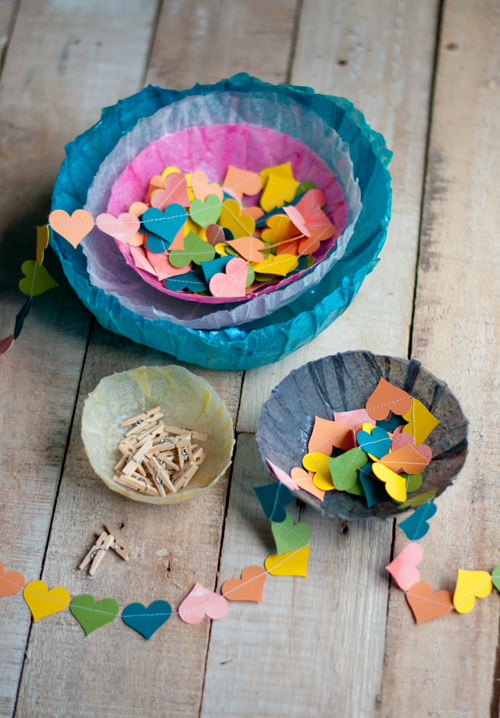
If you have a thing for bowls — or for pretty tissue paper — I think you’re going to really like this tissue paper bowls project.
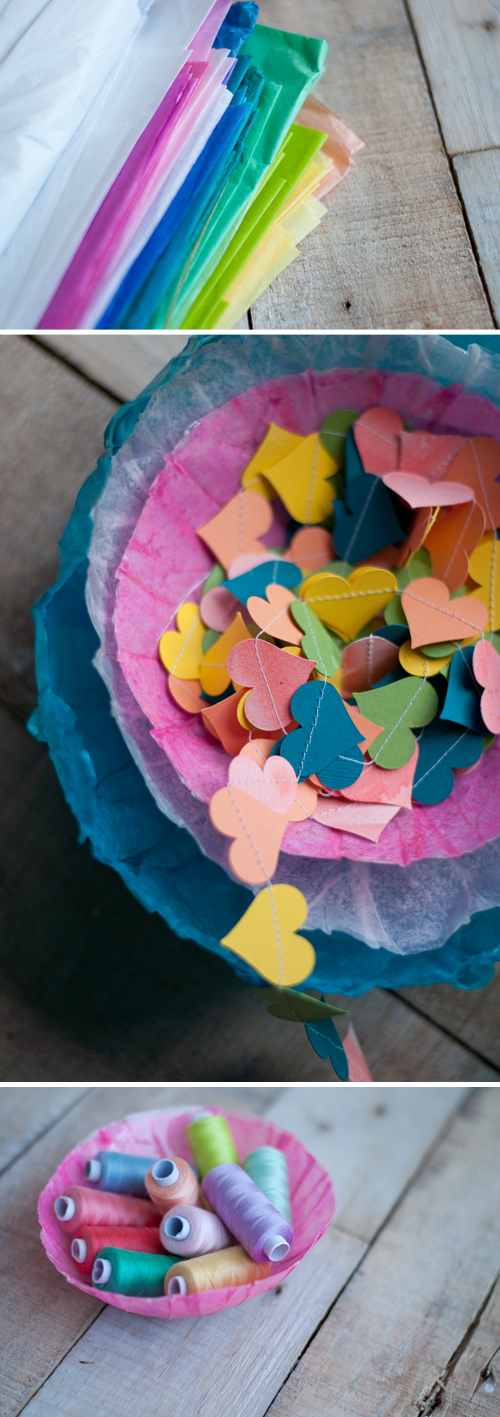
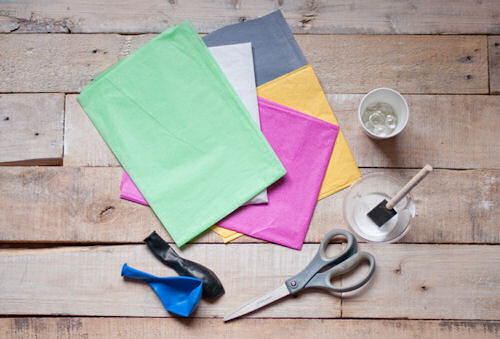
You don’t need much to make this happen. Just tissue paper, white glue, a balloon or two and a brush. These tissue paper bowls are quick and easy and don’t require perfection. The hardest part is waiting for things to dry!
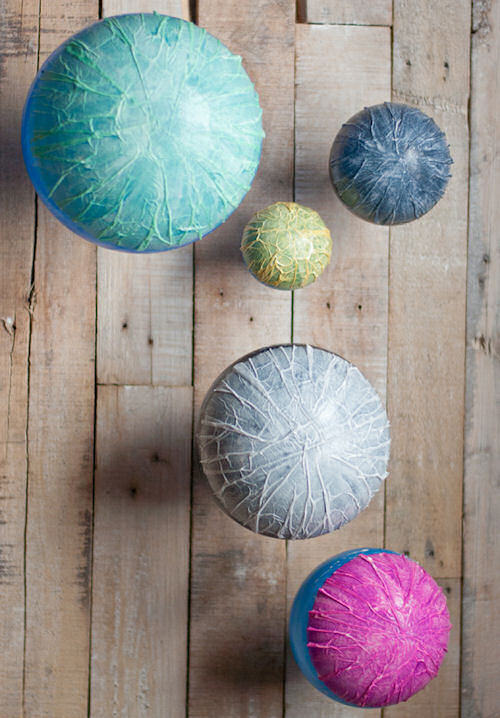
You can make your tissue paper bowls any size you want. Big or small, huge or tiny. Anything goes. And the colors are endless. Coordinate with your decor, the holiday party, or give a friend a set in their favorite colors. And you can make them lightweight and disposable, or more heavyweight, so you can keep them around awhile.
Ready to get started?
How to Make your own Tissue Paper Bowls
Supplies for your Tissue Paper Bowls:
-tissue paper
-balloons, any size works just depends on your wants
-scissors
-white glue or Modge Podge – I do like to water mine down just a little, to make it more spreadable.
-brush or foam brush
-weighted base for drying
-optional for strength -a coat of Enviro Tex on the inside and outside
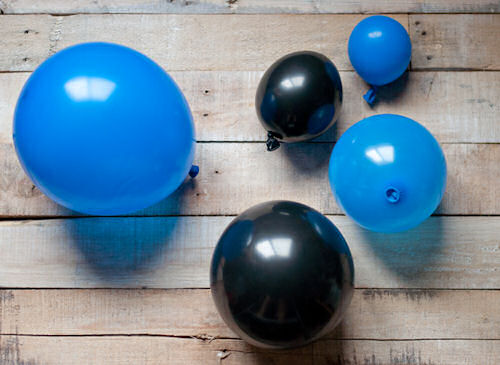
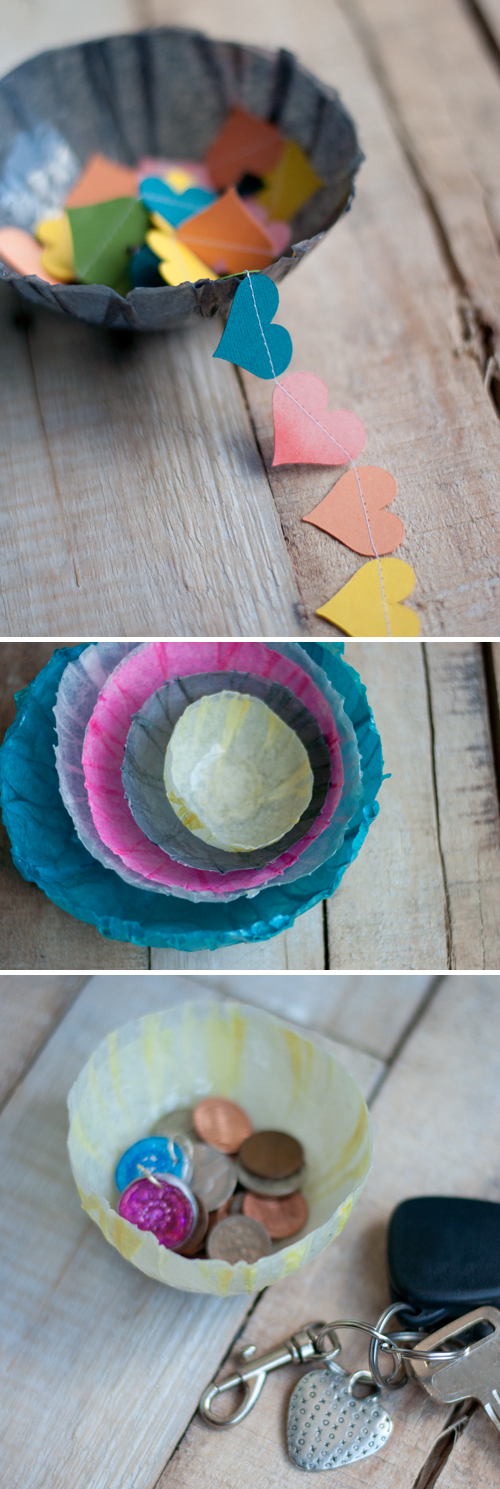
First, inflate the balloon to the desired size. I did a nested set so my balloons were sized from small to big.
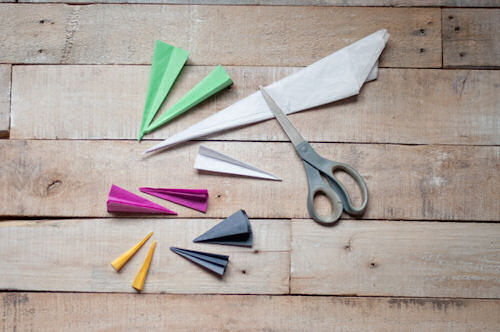
There are two ways to get a circle of tissue paper. One is to trace a circular object and then cut it out. A quicker though less exact way is to fold a square of it in half and then half again. From there, bring one folded edge over to the other folded edge to make a point, like above. Trim the tail straight across.
Continue to fold and make the piece more narrow. Then smooth out the non-folded edge and when you unfold it, it will be an almost perfect circle.
I used two pieces of tissue per bowl though use as many pieces as you’d like. The more you use, the thicker the bowls will be — and the more intense the tissue color.
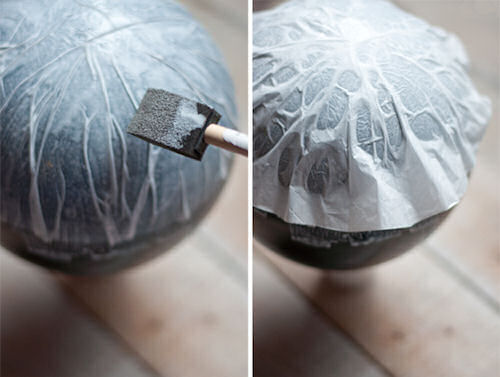
Place a piece of tissue paper over top of the balloon and begin to brush on the white glue. Continue until the whole surface is covered. Add layers one by one, coating each with white glue in the same method.
Allow your tissue paper bowls to fully dry. It’s really hard to wait, I know! But be patient.
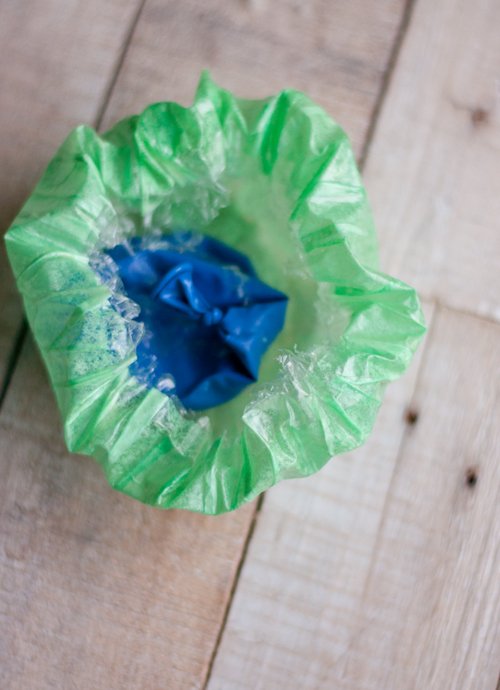
Then pop the balloon and release the air. The tissue form will crumple down, but once the balloon is deflated, gently adjust the bowls and the shape will keep. And now, your tissue paper bowls can be used.
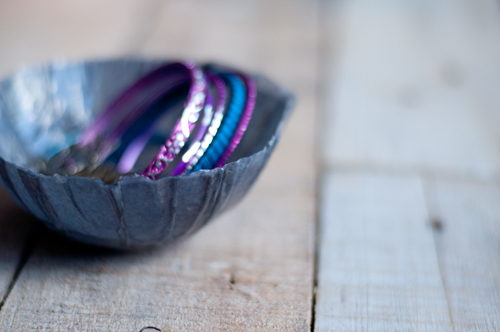
Drop whatever you’d like inside or leave the bowls stacked on a shelf. They are not food safe so place a napkin inside first before adding goodies.
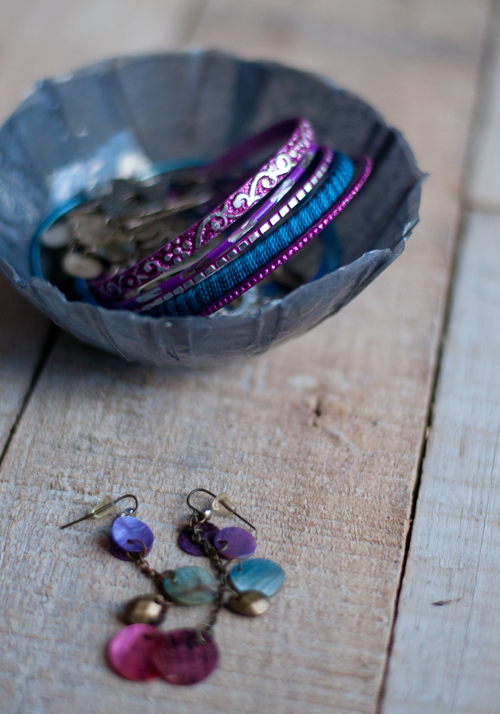
If you would like the tissue paper bowls to be more solid or firm, you can use a product called Enviro Tex (found at Michael’s) to coat the outside and inside of the bowl. It’s a hard finish medium that you brush on and when it dries, it makes a very solid surface.
And that’s it. Very doable, no? I hope you give this tissue paper bowls project a try. And if you do, I’d love to hear about it!
P.S. — We love making things! Here are lots more terrific projects.
What a great idea! We have a giant container of balloons – finally something to use them for (other than water balloons).
My gosh, Amy! Your DIY projects always blow me away. These bowls are so gorgeous. I couldn’t figure out where to pin them…DIY decor, party ideas, or gift ideas. Love, Love, love!!!
I love this!!
Pingback: DIY with Design Mom: Tissue Paper Bowls | this heart of mine
We make these in fall, using only white tissue paper, and we make the sides higher and sandwich pretty fall leaves in-between the paper. Then we put votive candles inside – voila – fall lanterns! The children look forward to making them every year, it’s become a tradition for them!
I love this variation and the tradition you’ve made. Such a lovely idea!
These are beautiful!
I always look forward to your posts, Amy. These are lovely!
These are so beautiful all grouped together!
Pingback: 74 fun things // 30 | 74 Lime Lane
Pingback: Instagram Challenge: August Break 2013 - Life in Sketch
These are just amazing! beautiful colors and great idea!
Ananasa.com- Home For Handmade
This is so stunning, thank you for sharing. Also Love your blog!
These are really cute! I recently took an interest in paper crafts and was elated to make a gift box from paper. This looks like its next on my list :)
Just stopping by from Purehome.com! What a wonderful DIY column- I couldn’t get away from it! Thank you for such great ideas- this tissue paper bowl one is so elegant- perfect to put hors d’ oeuvres in for the Holidays! Thanks for sharing with us.
Pingback: Fresh Picked Friday [Vol. 60] | Picklee
Hi
I am wondering how long you let them dry?
Thanks
These are really pretty and simple looking! I think they’d make really nice little “nests” for colorful Easter eggs. (Probably the plastic eggs that don’t weigh a lot would be best.) Thanks for sharing :)
Pingback: February DIY Challenge: Hearts!
Does this process makes the bowls shinny?
Thank you for sharing your beautiful bowls. My daughter’s birthday is coming up and I decided to give it a try with my 3 year old grand daughter so she could give her mama a special gift… Me not the most patients, her even less patient! Decided after 10 minutes of air drying , to take the blow dryer to them on medium low heat, for a few minutes, then I preheated the oven to 200 degrees turned it off, let it cool down to 100 degrees and placed them in the oven for about an hour and a half . Popped the balloon. They turned perfectly! My daughter is going to love them and my granddaughter is so proud of her creations!
Pingback: Fresh Picked Friday [Vol. 60] - Picklee