One of Ralph’s requests for his birthday was skinny ties. They are surprisingly hard to find — either too long or too expensive for a 13-year-old’s wardrobe. So a few weeks ago, I had an idea: I would buy some old fat ties at a thrift shop and take them to a tailor to have them altered. Brilliant, right?
But then, of course, I forgot about the idea till 3 days before his birthday. At which point, I tried to rush and make it happen. I found 5 great ties at Goodwill and sped them to the tailor. There, I was told it would take 10 days and cost $37 each to skinny them up. Blech.
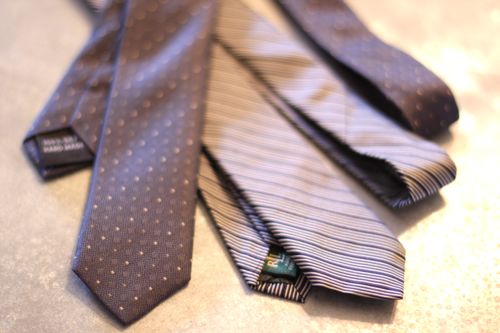
But since I had the ties in hand, and since they only cost $1 each, I figured I’d try it myself. If I failed, oh well, a $5 failed project is not the end of the world. As it turns out, the first one ended up great (it’s the silvery striped one above)! So I took pictures while I remade tie number two — and now I can share the instructions with you, in case you’re curious.
Here is the before shot. In the tutorial, I took the polka-dot tie and made it as skinny as the stripe tie:
Here is the after shot:
DIRECTIONS:
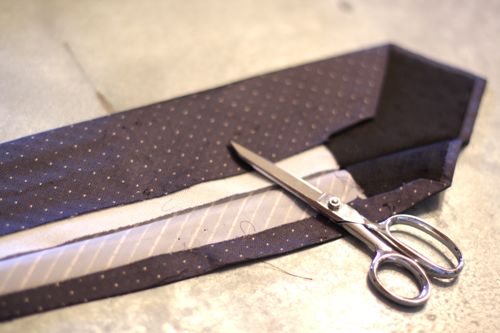
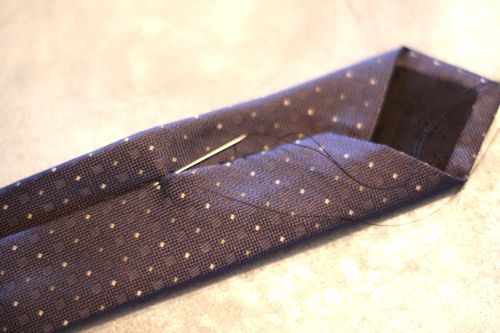
1) Turn your too-wide thrift store tie upside down. Un-stitch it:
Keep un-stitching till you get to the skinniest part of the tie:
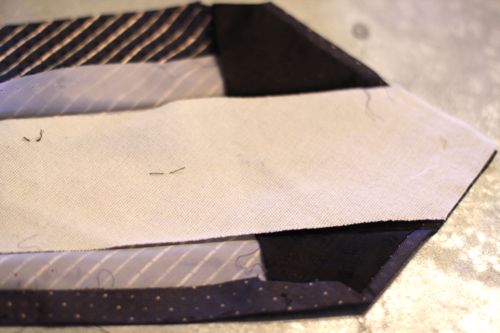
2) Pull the tie form fabric out of the lining (there is probably a real name for this, but I don’t know what it is). This is the piece of the tie that helps keep the tie shape.
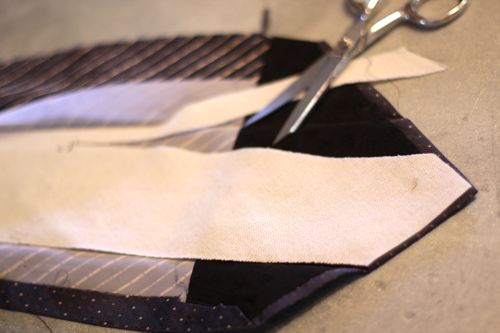
3) Trim one side of the tie-form fabric. I free-handed it on the first one, aiming for a finished tie that was about 1 1/2 inches wide. But for the other 4, I traced a skinny tie with a pen right on the tie-form fabric:
4) If you traced it, then cut out the second side. If you’re free-handing it, turn the cut piece upside down to get a matching cut on the second side:
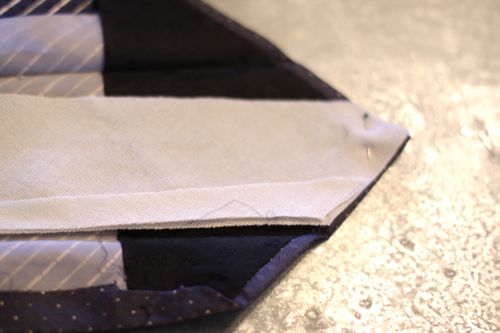
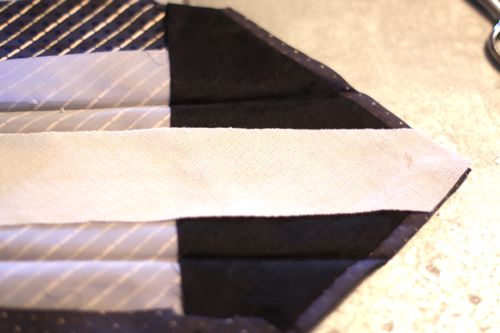
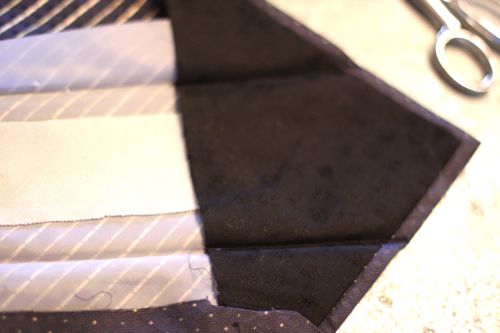
5) Your tie-form material should now look like a skinny tie. Tuck it back into the lining:
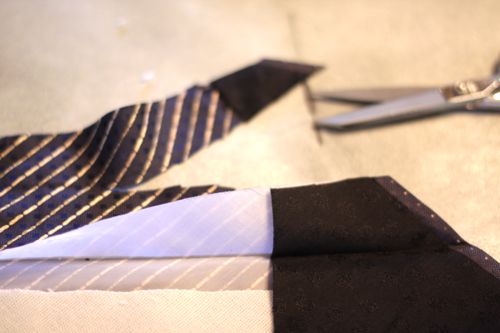
6) When you unstitched the tie, one side was overlapping the other, Starting with the side that was being overlapped, trim off some of the silk, tapering the trimmed piece as the tie narrows:
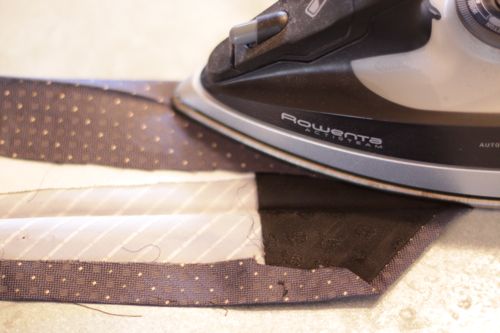
7) With an iron set for silk, press the trimmed silk so that it folds itself along the tie-form fabric:
8) Fold under the cut edge and iron again, so that the ironed piece is narrower than the tie-form fabric:
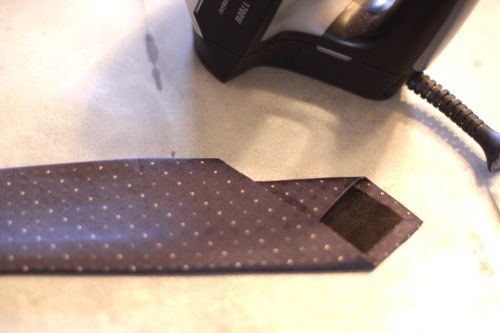
9) Now it’s time to iron the second side. Note: you may not need to trim the silk on this side:
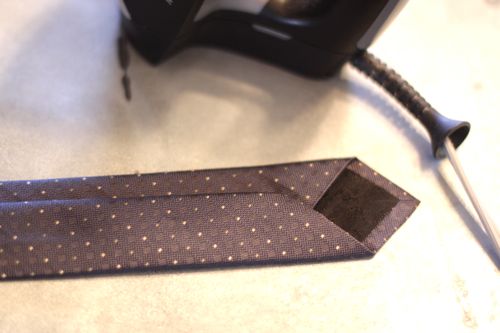
10) Tuck under the edge of the second side and iron once more. Aim to get the seam in the middle:
If you turn the tie over, it should now look like this (but don’t iron the front, you might damage the silk):
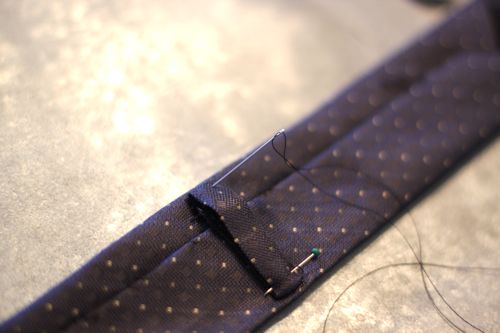
11) Next, using a needle and thread, stitch up the back of the tie. Take your stitches through both the back flaps and catch a bit of the tie-form fabric, but be careful not to reach the front of the tie. It’s pretty easy to hide the hand stitches between the back flaps:
12) If your tie came with a piece for tucking the tail into, you can reattach it now:
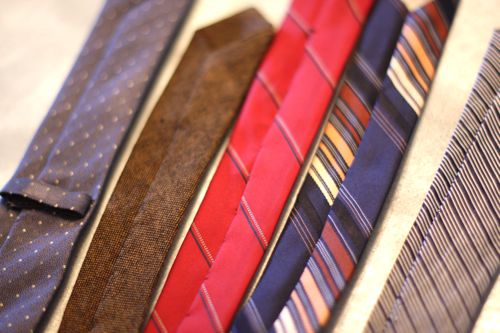
And that’s it! In case you’re curious, the first tie took me about 45 minutes. But the next 4 only took about 30 minutes each. I turned these:
Into these:
Other notes:
-Three of the ties I worked with were silk. One was wool. One was polyester. The silk ties were by far the easiest to work with.
-Ralph LOVES his new ties.
-Also, as I progressed, I got better at getting the new back seam centered. The navy and brown stripe tie was my last one and it’s the best as far as the back seam goes:
I hope you enjoyed the tutorial. Happy sewing!
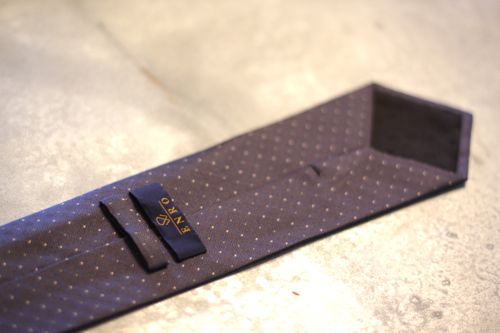
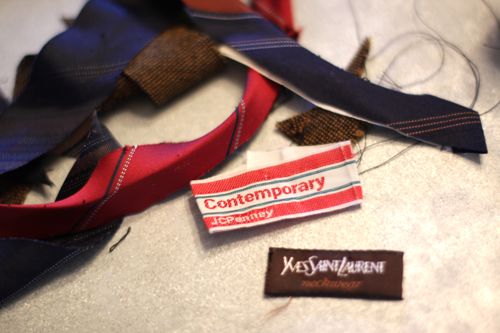
P.S. — I like this image because it shows two of the dated tags. They remind me of my Dad’s ties when I was growing up:






Very cool project and love the fact that Ralph wanted something so stylish for his BDay!!
I think this is such a great idea I listed it at the intro to my shop. Let me know if that was not ok. thanks Doti
ooooohhhh love my Rowenta too!
My boyfriend loves skinny ties, I’ll definitely try this! Thank you so much for sharing!!!
I love this idea! I will be posting a link to this from my blog, Craftosterone.com
Thanks for the information, idea, and great photos!
Oh, forgot to mention, the white stuff in the tie is called interfacing.
Brilliant! The project, the explanation, and most of all the caring. I hope Ralph knows these are made of love.
This is great! Thanks for sharing. I was looking at buying a few but with what I would spend on 1 could get a couple. Also, DIY is life!
Keep up the great work!
This is a godsend! My little brother is 13 and has been asking for skinny ties – they’re so expensive to buy for a 13 year old though! I love this! Thank you so much for sharing!
THANK YOU SO MUUUCH!!! Skinny ties are oddly difficult for me to find. This is much more efficient.
Thanks.
Wow, great job! Wonderful tutorial!!! Thanks – I will try this out.
Great post, awesome idea!
“Pull out the tie form fabric out of the lining (there is probably a real name for this, but I don’t know what it is)” …it’s actually sew-in interfacing.
Very good and simple tutorial. I am planning to make a tie for my brother. This tutorial will help me.
Thanks for step by step! I had some issues trimming the edges off, but the tie will work well for my boyfriend’s Don Draper costume!
Loved it!
Now I can continue to steal ties from my grandad. (He has pretty good tie-taste, who would have thought THAT?)
Love this! Great blog!
AH! This is so great! What a terrific tutorial!
My boyfriend just gave up 7 or so favorite ties because they were too wide for him. With a new job he’s in the market for new ties. Thanks for the great idea & the perfect congratulatory gift :)
Awesome! Amazing what a needle, thread, and a little love can do. Thanks for the tutorial.
Omg I loooove the striped tie and the YSL tie!!!! I love this project. I am a thrift store junkie and this idea is just dynamite! Good job. :D
God bless you woman. This is the most simple solution and it was right in front of me! Thank goodness you have the sense and the knowhow to do it!
I second what Erin said. An obvious tie fix, but I was too dumb to think of it. Good job.
awesome! my husband likes skinny ties but they are so hard to find. thanks for this great tutorial!!
Those are awesome! I’ve always loved skinny ties! Thanks for showing us how you made them. :O)
~ http://www.billiemonster.com ~
awesomeeeeee! i really enjoy this :)
nice work dude!!
c’est incroyable. merci
I love you. This is perfect!
You will never believe that this is exactly what I used with my dad’s old-out-of-fashion fat ties, to give them a new lease of life, a few decades ago, when I was about 13! Thank you for making me feel clever! ;-)
Wow, I am going to make some of these from old ties. Plus, I am going to shorten them a little for my 8 yr old grandson who loves ties. Also, Ross has bright Tommy Hilfiger ties for very little, that kids would love.
Thank you so much for this post! I just made one and it turned out great. Thanks again.
Nicole
**YAAAY** I made a tie from a tutorial for my hubs for our wedding – which he totally loved — but it was a thicker tie (like traditional) and he likes skinny ties for stuff like dates and wearing with sweaters and stuff, so I’m so glad I found this. making a tie from scratch only took me about an hour and 20 mins, but I can’t always find good fabric, so NOW I know what to do to save some time and heartache (at not finding a GREAT fabric)!! THANKS!
Oh! I meant to say also — a nice touch that my husband just thought was amazing was creating a new *unique* band on the back to hold the tail of the tie and on the inside (the part that shows out at the point). I just used a contrasting piece of satin ribbon for holding the tail and a similar (but patterned) piece of scrap fabric for the inside of the tie. His tie turned out black (satin) with an orange tie catch on the back and navy polka dot fabric lining. He raves about the little details every time I go to make a tie (“are you gonna do the same thing for the piece on the back??”)
I would love to skinny down some of my husbands fat ties so my boys (11 & 14) can wear them. I’m wondering though; does the length of a man’s tie not have to be shortened to fit a boy? I remember my son trying on one of my hubby’s ties, and you know the “tail” end of the tie that is tucked behind the FRONT of the tie when a man is wearing it? It hung down lower than the front of the tie. Maybe it just wasn’t tied right?
Awesome Tutorial, Thanks. Just made some for my husband’s birthday. He’ll be so happy that I made him something new (from his old ties) and didn’t spend any money.
Love those ties, think I will try to convert some of my old fat ones instead of always buying the skinny ones. Great tutorial thanks!
I threw an awful lot of large ties away yesterday. N I am seeing this tonight!!
For sure, I’ll be trying this.
Thanx for sharing
amazing job man. . . .!!!!!!!
I love these! They are so great. Skinny ties are so great, and like you said, so hard to find. I love that you have made these out of old ones. I had a hard time making a tie for my father, but this makes it look so easy. Great read.
This is amazing! Thank you for sharing!
I discovered your tutorial through Pinterest. It’s a great idea, not just for “skinny” ties, but also to narrow 4.5″ old ties to a more trend neutral 3″. Thanks a lot for this tutorial, it’s really well made and useful! Btw that tailor is a thief: mine would only charge 9$.
Hello, just wondering if there was an easier way to do this that would utilize the back end of a tie, which is already skinny most of the time anyway compared to the front end which is wider? Great tutorial!
Woo-hoo! Thank you for this awesome tutorial!!!! I recently tried it and blogged about it at http://www.becomingwhitney.com . My husband was SO happy to have some of his fat ties converted. And seeing him so happy made me overjoyed. Thank you again!
Great thanks! Any chance you could add a “pin it” button? My browser won’t let me add one so when I can’t find one on the site I can’t pin it…
This is such an awesome idea! I could not figure out what to get my bf. and this is the perfect gift!
This tutorial is lovely! I have one question, though… Where did you go to get a YSL tie for $1??
Great article. You helped me update my wordrobe
I’ve been looking to buy skinny ties, but I can never find, where did you buy the regular ones for a dollar?? That is an amazing price..
Re-made an old tie from recently deceased grandpa for grandson. Perfect way to wear a beautiful reminder of Gramps! Thanks for the easy-as-pie instructions!
Thanks, sweetie! My 15-year-old kiddo stumbled upon your tutorial–we’ve been accumulating clearanced Jerry Garcia ties, and he asked me to ‘skinny them down’ according to your directions. They’ll be unique, for sure: “Hey … where’d you find a SKINNY Garcia tie?” Our secret. :)
Your website is lovely, and good therapy. :D
*Laughs* Can I just send you all my fat ties and pay you to do it for me? ;)
I LOVE THIS IDEA! I have to wear ties to work and being a woman that is only 5’4″ tall most men’s ties are too long and too wide. I enjoy wearing the skinny ties, but you are right….they are hard to find. Especially ones that look right for my stature.
Best, clearest directions I’ve seen. You’re the Internet article for which I’ve been waiting to trim down some of my wide ties. The pictures totally make the site!
Thanks! Be blessed.
One of my long time dreams is to make ties. The idea came to me again (yesterday, March 18) and I mentioned it to a friend who encouraged me to go and purchase the material and unstitch an old tie and make a pattern from it. I did purchased the material and started to search the internet for instructions on “how to make ties”. I am glad that I found your site. Thanks for the ideas. You have inspired me. I will proceed with my project shortly