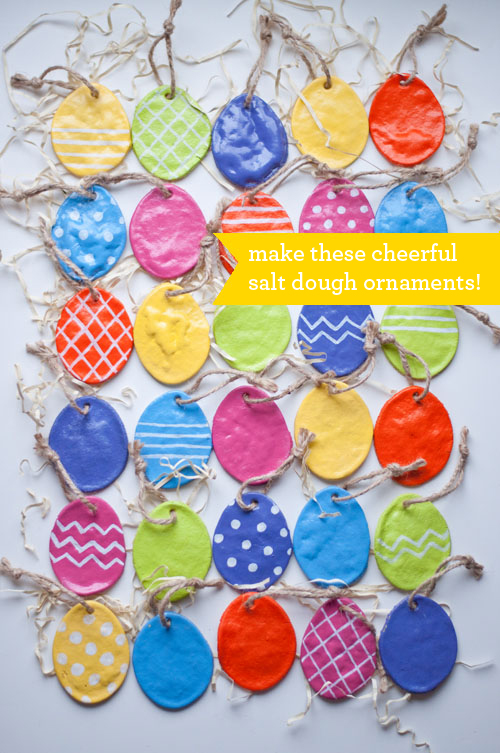
Easter is on its way and I am very much looking forward to it. I’m ready for the bright colors, the pastels, and anything with spring green. And I am helping it along with the bright tones of these Salt Dough Easter Egg Ornaments.
EASY DIY SALT DOUGH EASTER EGGS
Salt dough lends itself to all sorts of shape making. Once baked to thoroughly dry, the dough is hard and can last for years. The dough is also paintable which makes it all the more fun.
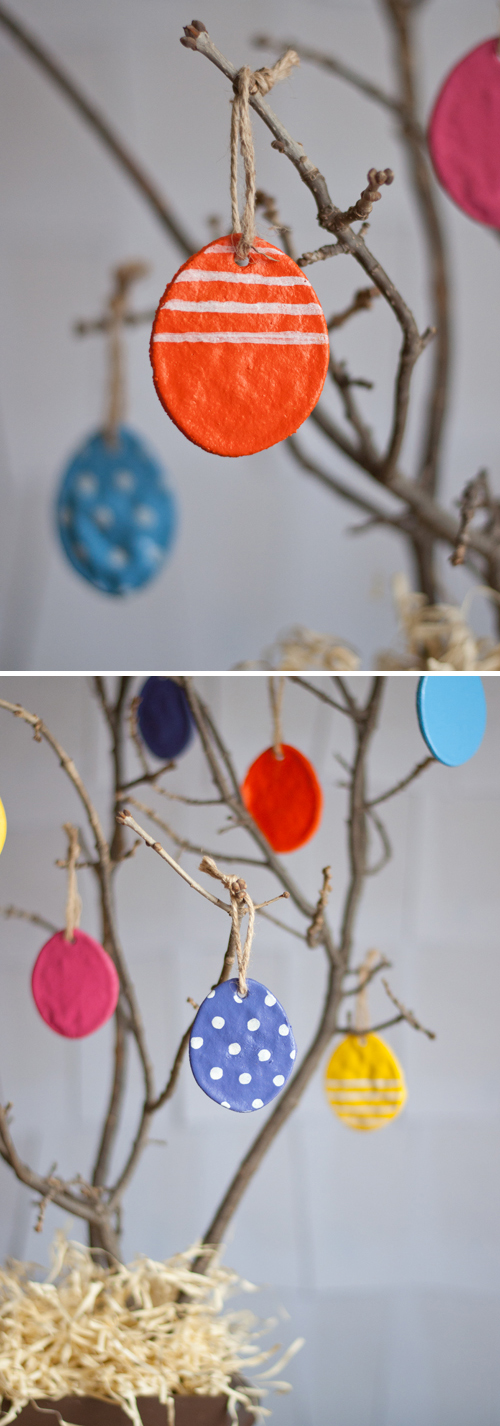
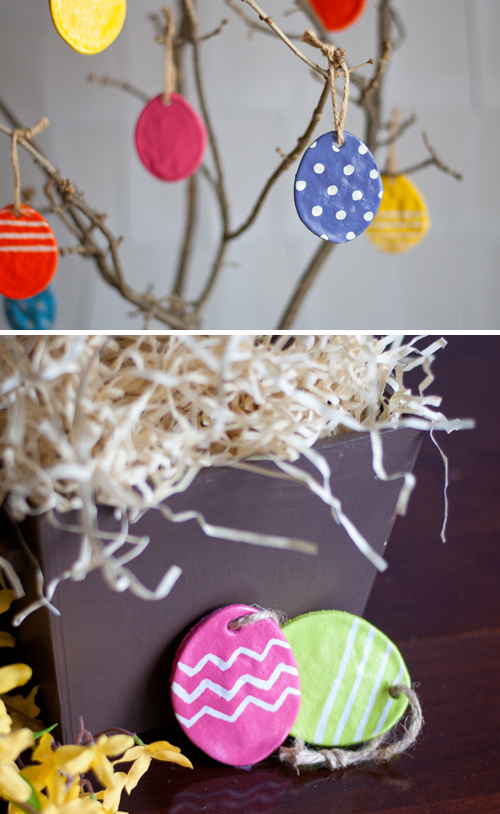
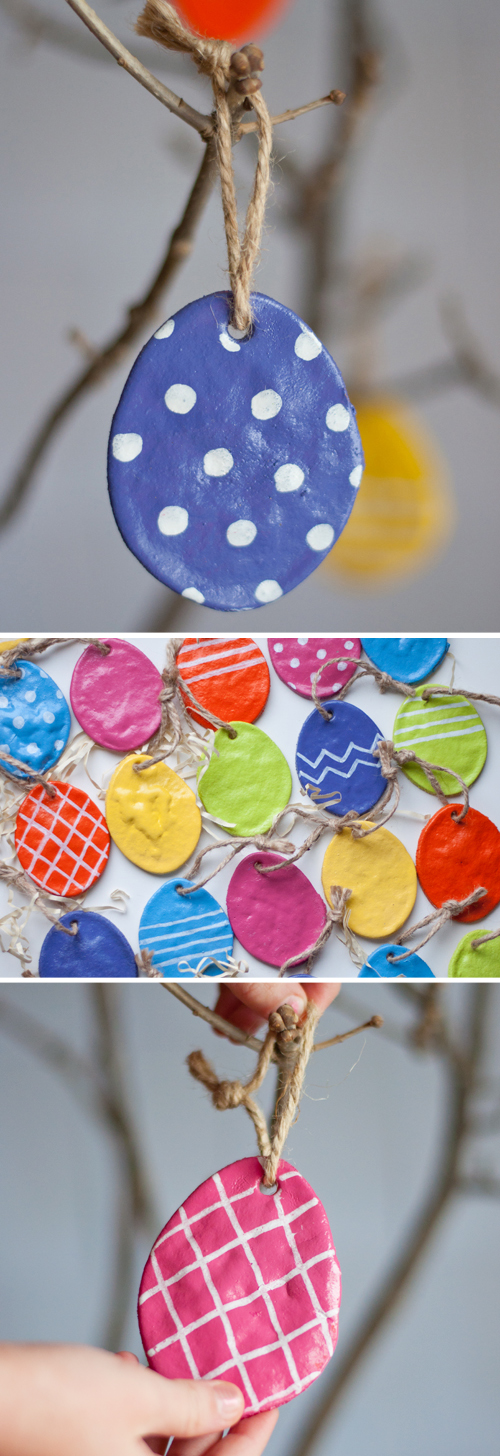
I love the tradition of an Easter Tree — a branch on which to hang eggs, bunnies and colorful bits. Part of this batch of Salt Dough Easter Eggs will hang on our tree but I hope to hang some outside too. You see, if a spray paint or clear spray paint sealer is used, these ornaments can hung outside and inside alike.
I think seeing bright bits of color amidst the early spring landscape would be lovely, don’t you? Let’s get started.
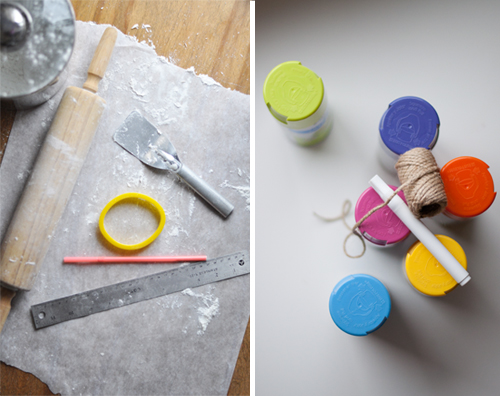
Salt Dough Easter Eggs – Supply List
– batch or two of salt dough (see below)
– rolling pin
– ruler, to measure dough thickness
– egg shape cutter
– spatula
– straw, for making holes
– parchment-paper covered baking sheets
– spray or acrylic paint
– paint pens, optional
– clear coat sealer, optional
– twine, ribbon
Recipe for Salt Dough Easter Eggs
Mix up your favorite salt dough recipe. For this project, I used the following recipe:
1 cup flour
1/2 cup salt
1/2 cup water
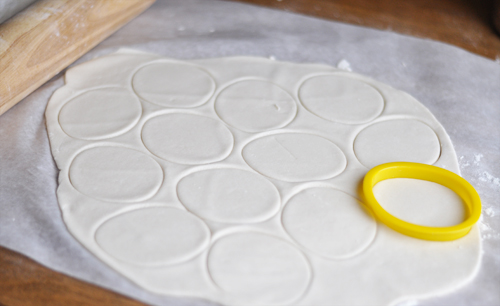
Stir together all three ingredients until a dough forms. Kneading the dough a couple times can help make it smoother.
Roll it out (I rolled mine to 1/4 inch thick) and cut out desired shapes.
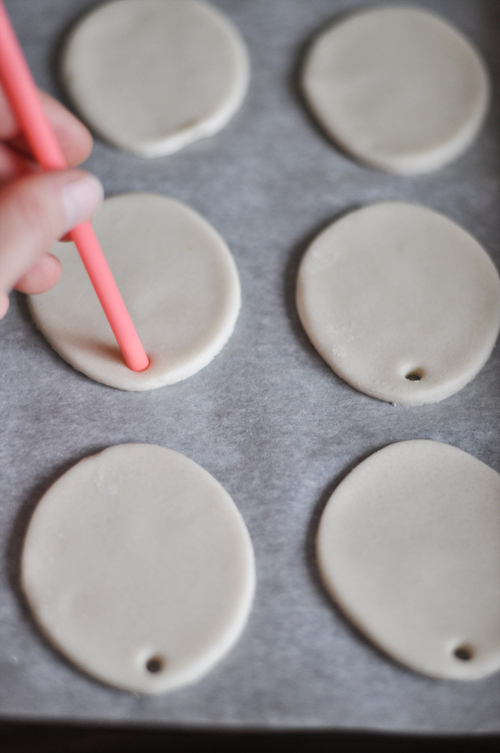
Place the salt dough Easter eggs on the parchment-covered baking sheets. Remember to make a hole so you can hang the ornaments — a straw works perfectly!
Bake at 250F for 2 hours.
Directions for Salt Dough Easter Eggs
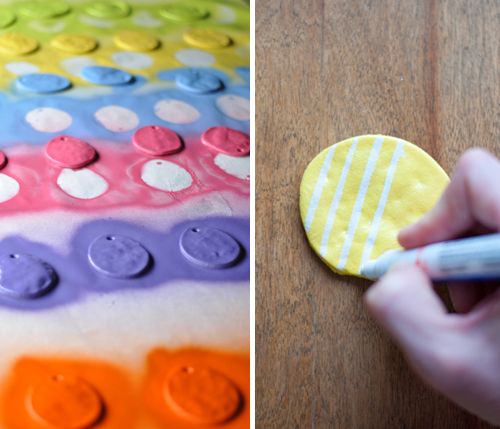
Once the shapes are adequately baked, dried and then thoroughly cooled, it’s painting time. I like using spray paint because it’s faster and easier but acrylics work just as well.
Allow the paint to thoroughly dry. Use paint pens to add polka dots or lines of decorations to the eggs. Optional: To further protect the color and design, add a clear coat sealer.
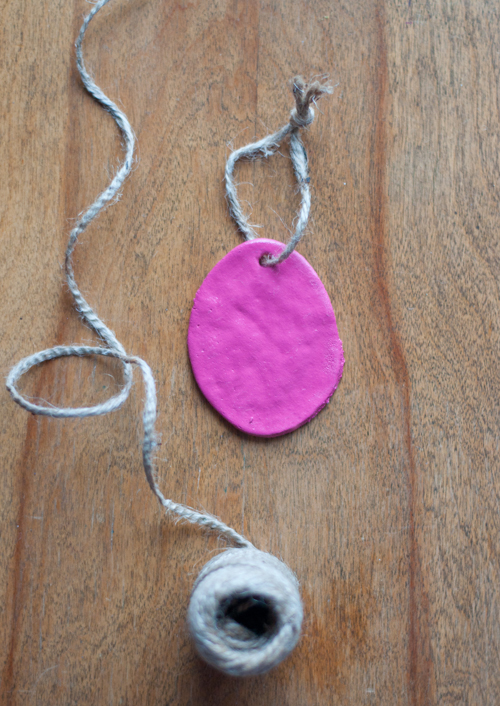
Loop twine or ribbon through the holes and hang.
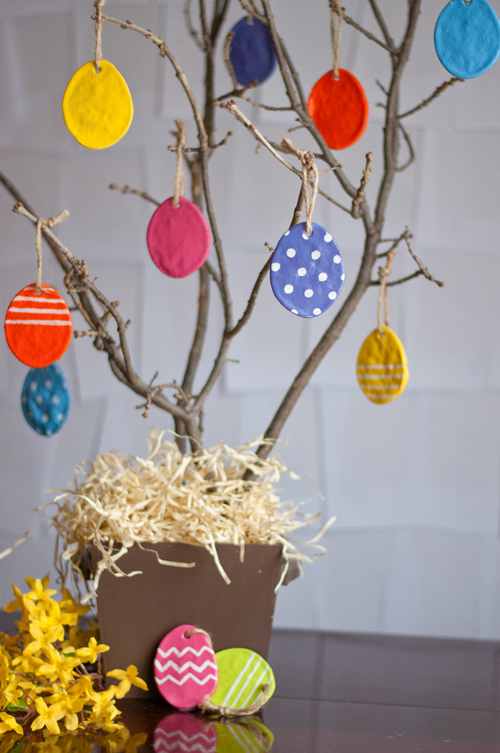
Hooray! Your Salt Dough Easter Eggs are finished. It’s feeling more spring like already!
P.S. — Adorable Painted Egg Cartons.
Credits: Photos by Amy Christie for Design Mom.
Pingback: Lavoretti di Pasqua facili per la scuola materna - Blogmamma.it
Pingback: DIY Salt Dough Eggs - Our Crafty PinsOur Crafty Pins
Pingback: 15 Easter Crafts Your Kids (and you) Will Love! | How Does She
Pingback: 20 Non-Chocolate DIY Easter Gifts - Simplify Create Inspire
Pingback: 15 Spring & Easter DIY and Craft Ideas {that you’ll love!} | Making Lemonade
Pingback: Easter Crafts: 15 Fun and Adorable Easter Tutorials - Artsy Craftsy Mom
Pingback: 20 crafty Easter Projects. - DIY Crafty Projects
Pingback: 15 Easy Easter DIY Ideas - Pretty My Party
Pingback: 5 Creative Ways to Decorate with Eggs - Christmas Tree Market Blog
Pingback: 20 Fabulous Easter Decoration Ideas for Your Photo Session
good idea but why did mine burn within an hour
Made these with my little brother for “Art Class” during home schooling. He has autism and LOVED making them. After painting and coating them, we hung them up around the house and a few around town! So much fun. Mine kinda bubbled up a little, but nothing paint can’t fix. So much fun.
Pingback: 5 cheep ways to make Easter egg-stra special | StepChange MoneyAware
Pingback: Easter Printable, Crafts, and More
Pingback: DIY: Salt Dough Eggs | weekend project with my fave… | linkoao.com
Pingback: L’albero di Pasqua - Mogli & Mamme per Vocazione
Pingback: Escuela Infantil GRANVIA » Archivo del weblog Manualidades infantiles, ¡huevos de Pascua divertidos! - Escuela Infantil GRANVIA
Pingback: Páscoa / Eu Amo Fazer Artesanato
This is great – please add a Pinterest button so I can pin it! I know it’s possible to do without a button but that’s beyond my current skillset :-)
Pingback: Húsvéti dekorációs ötletek gyerekekkel | Játsszunk együtt!
Pingback: Easy and Fun Easter Activities and Crafts | Poochie Baby
Pingback: Easter is coming! - a beautiful inspiration
Pingback: DIY: Κρεμαστά Διακοσμητικά Αυγά | Misswebbie.gr
Pingback: Salt Dough Easter Ornaments | Style Unearthed
Thank you! I’ve been reading everything trying to find out how many this makes! I have 5 grands every Monday and don’t beef too come up short💞
Pingback: 18 Simple Easter Crafts for Kids (she: Mariah) - Or so she says...
Pingback: Turn Your House Into Easter Haven | Portlight Spark
Pingback: Easter Crafts Pinterest Round-Up - Playing Parent
Pingback: DIY: easter crafts | baby blue bunnies
Pingback: RODZINNE ŚWIĘTA – Wielkanoc w domu | Kashtanky
Pingback: 10 manualitats amb ous | El Masnou
Pingback: 10 manualitats amb ous | Badalona
Pingback: 5 Easy Easter Crafts to do with Kids
Pingback: Easter Crafts.... -
Pingback: Fun Easter Crafts and Activities for Kids | TheWriteBalance.ca - One Mom's Quest For The Perfect Balance
Pingback: Easter Crafts for You and the Grandkids - Everything Zoomer
The recipe worked great in my case. For those who use C instead of F, baking the eggs at 120 C for 2 hours gave excellent results. If you do not want to have air pockets building up, you may try to make the dough thinner: 1/4 inch thickness did not do the trick for me, so I made them thinner. Once painted and thoroughly dried, they came out pretty sturdy.
Thanks for such a cute idea! My grandmother always had an Easter tree, and now I know just how to pass the tradition along to my son! Will be making these today!
Pingback: Tegos DesignDecorazioni fai da te | le uova di Pasqua | Tegos Design | Design per la casa
Salt dough Cat http://diy-100ideas.com/salt-dough-cat/
Hi there! These are so cute. How many eggs did you get out of one batch?
Wow, these look fabulous! Thanks.
Mobdro Apk is a Amazing application to watch latest movies of Hollywood.
What kind of flour? Plain or self rising or does it matter!
Really Superb. Just Kill it.
Wow, Awesome features to watch latest Hollywood Movies Online, All TV Shows with free of cost.
Excellent.
Keep visit this one:
Mobdro for iOS
Wow, Simpley Superb
This is such a cool and pretty DIY for easter. Totally sharing this one. <3
I love making DIY stuff and this one seems to be great to make indeed and love what you do gal!
keep ding it
Pingback: DIY Easter Crafts for Kids - Baby Doodadz