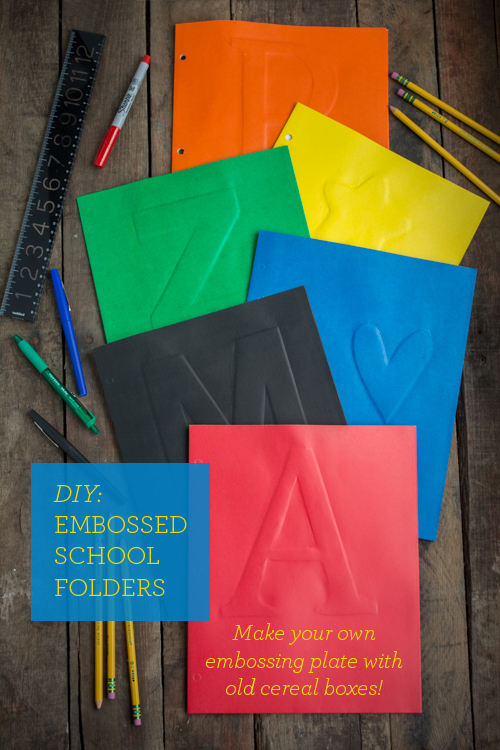
When I was in fifth grade, my name written in bubble letters was how I personalized my notebooks. When I was in high school, I covered my textbooks in plain paper and filled them in with doodles — favorite band names and not-so-secret crushes. At the start of the school year, the clean surfaces of brand new school supplies offer such an inviting blank slate. For a sleek, modern twist on notebook personalization, create a DIY embossing plate from recycled cardboard. It’s a lovely way to add your mark to your school supplies.
Making your own embossing plate out of cereal boxes offers so much variation and freedom. The sky is the limit on shapes and initials. And once the plate is made, you can emboss to your heart’s content — the cardboard form will last a long time!
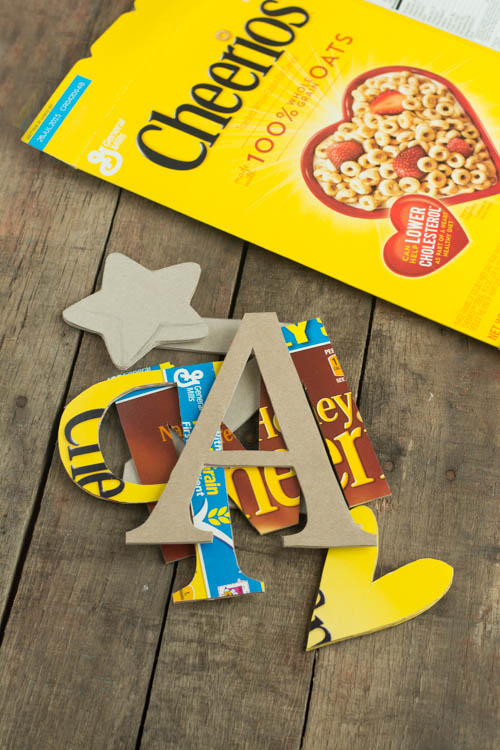
Chances are you have everything you need in your home already — just pull that cereal box out of your recycling bin and let’s get started!
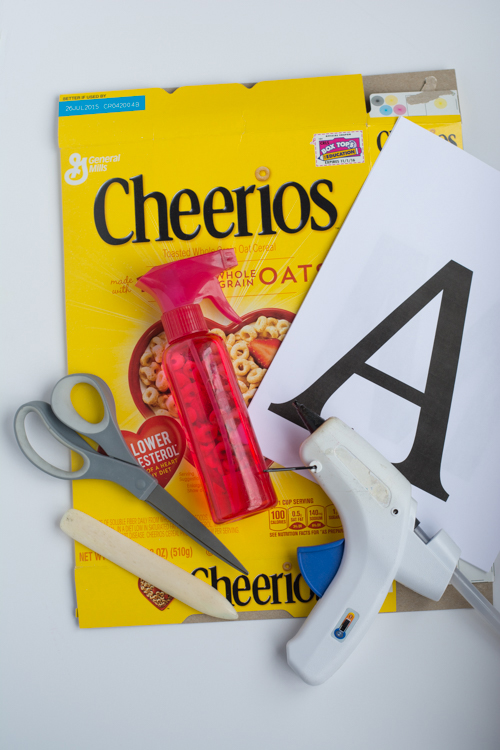
Supplies:
– empty cardboard cereal boxes
– scissors
– hot glue or white glue
– printouts of letters/shapes
– bone folder
– spray bottle
– colored paper, card stock weight or thicker
– folders, notebooks, date books, etc.
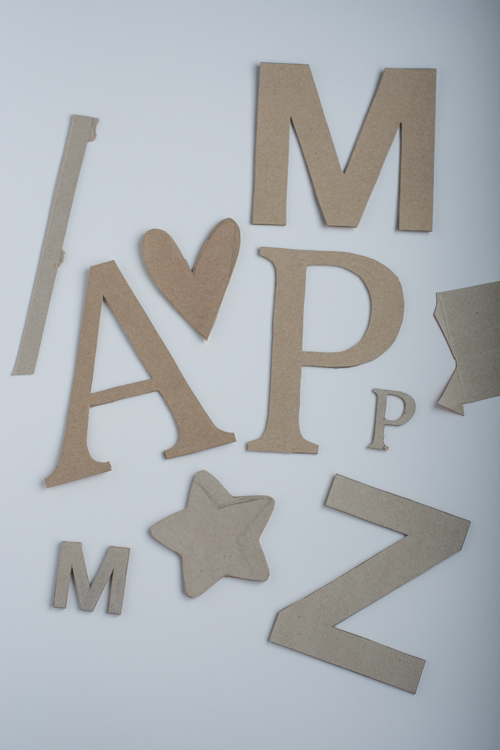
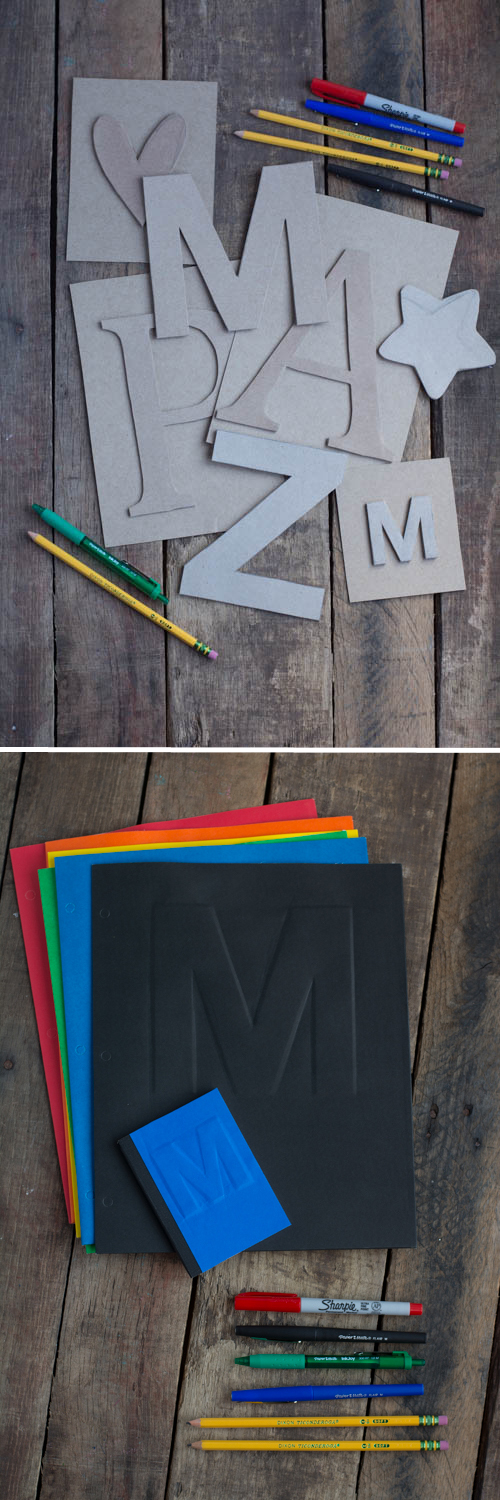
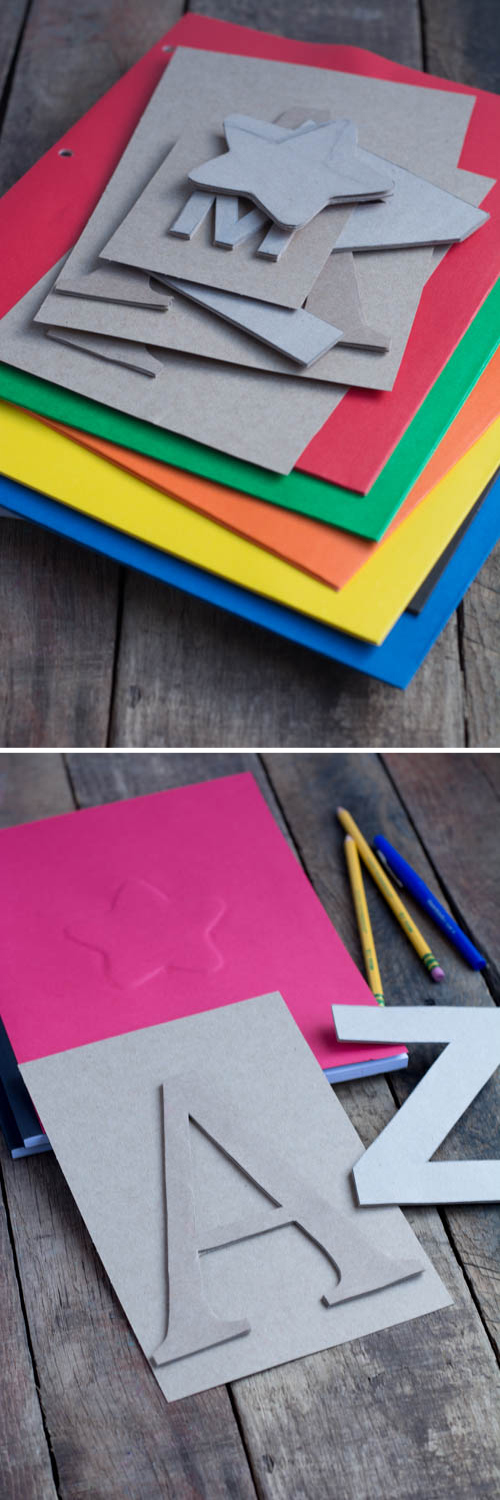
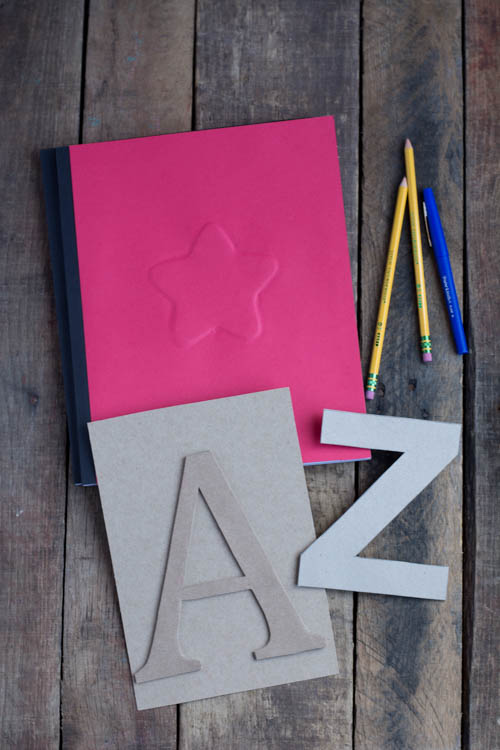
Decide what letters or shapes you’d like to recreate. I chose a few letters, both serif and sans serif, and a few simple shapes.
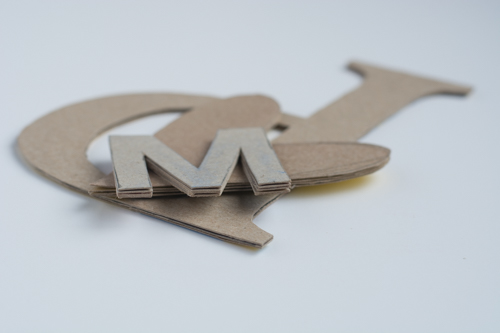
Cut them out of the cereal box cardboard. For these projects, you’ll need several layers of cardboard. Cut out the shape you want 3 or 4 times, then stick them together to make one form.
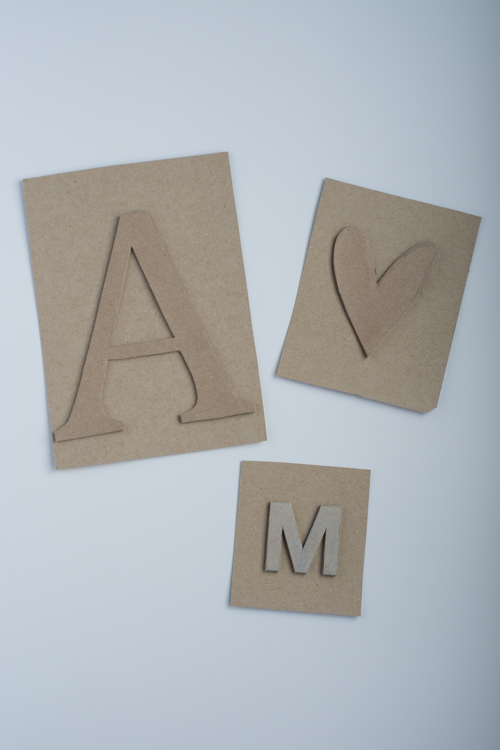
Once the letter and shape stack is thick, attach it to a larger piece of cardboard, a ‘plate’, and prepare to emboss.
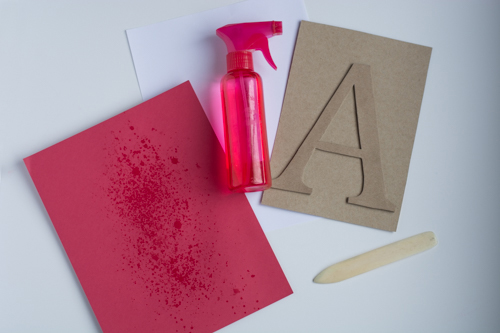
To emboss, lightly mist a piece of paper and lay over the embossing plate. Damp paper has more give and stretch.

Top the misted paper with a white piece of paper (printer paper will do) to protect it from the bone folder. Plain white paper is best so there is no color rub off. The white paper shields the paper below from getting shiny during embossing.
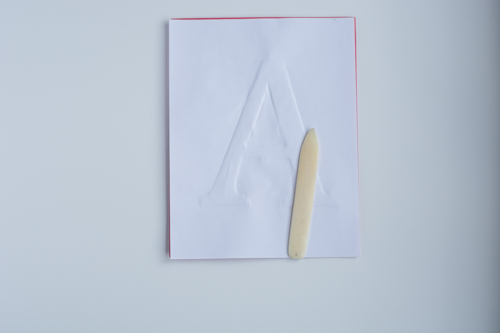
Rub steadily around the embossing plate, making sure to hold the paper in place. Think of this process as slowly coaxing the paper to bend to your will. It’s best to work slowly, taking extra time to gently work into corners, around text serifs, on the edges and in any openings.

When you feel like the paper is shaped well, remove the white paper and check. Some of the corners and edges might need a little more attention. Once the image looks good, remove the embossing plate and use the bone folder to smooth any wrinkles or crinkles around the shape.
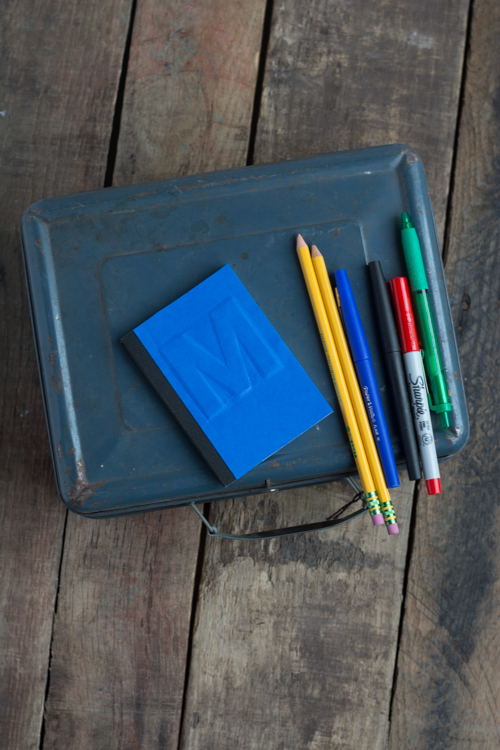
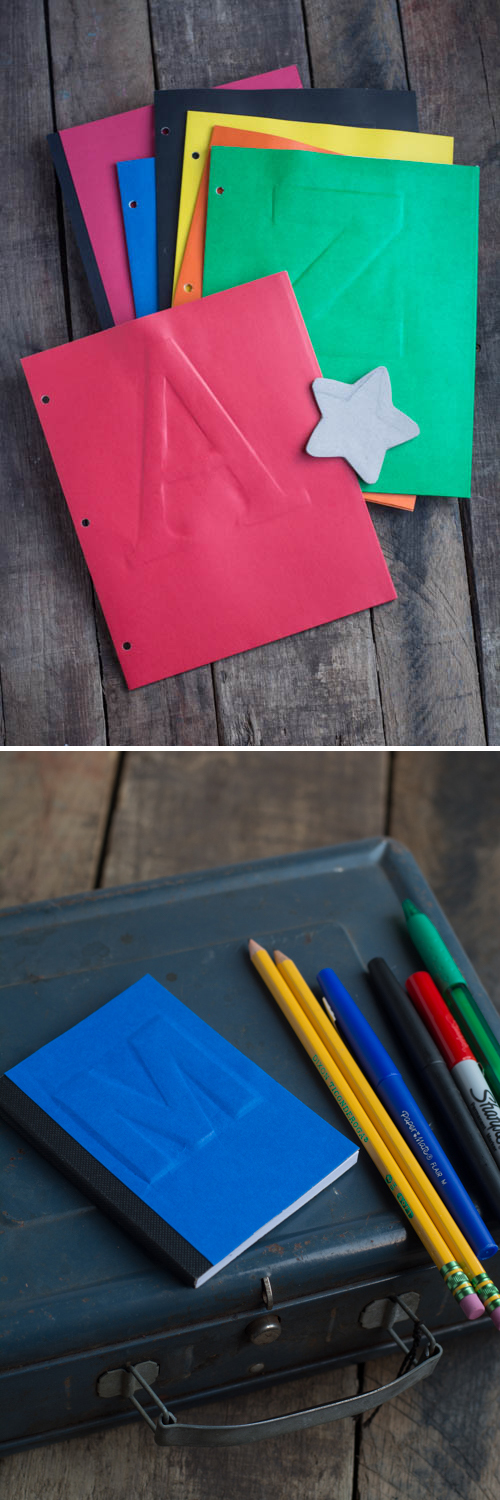
For folders, simply embossing the actual cover is all you need to do. But if you’d like to emboss the thicker cover of a composition book or date book, the technique is slightly different — emboss a blank sheet of card stock, then glue it to the thick cover of your notebook. Pictured above is a small date book with a blue piece of embossed cardstock glued to the cover.
When gluing it to another surface, add glue to all the areas outside the embossed shape (including openings in letters), then use the bone folder to smooth down the paper.
A few tips:
– Thicker paper worked best for this project. Card stock, thick cotton paper (artist paper) and the folders worked exceptionally well.
– When the paper is thick, like the folders, spritz the under side of the paper, the side of the paper that will lay on the embossing plate.
– Instead of trying to get the paper embossed in one pass around the shape, it’s better to make a few passes around the shape gently and firming reshaping the damp paper.
– The paper around the shape may get a little pinched during the embossing process. Most can be rubbed out with the bone folder.
Hooray for back to school! I hope you have fun with this cereal box project. If you come up with other fun ways to use these cardboard embossing plates, please share your ideas in the comments!
P.S. — Why we don’t stress out about choosing a school.
Created for Design Mom by Amy Christie.
This is genius! I absolutely LOVE craft or art projects involving cereal boxes. They’re such a great resource and have so many uses. I never would have thought of this one. I’m so going to try this for a myriad of different projects. Thanks for this! And who would have known that Cheerios were so environmentally conscience?! Respect.
I felt the same way learning about the history of Cheerios sustainability. Respect is right!
I LOVE LOVE LOVE this! It’s simple and elegant. Great idea! I’ll have to try this out with my kids.
Yay! I hope you do get a chance to try it. It made me want to monogram ALL THE THINGS. : )
This is amazing. You have done a fabulous job. This is definitely a weekend project. Thanks for sharing.
What a cute weekend idea, would make a great gift too! Thanks for sharing.
Wow, so cool. I never would have thought of this. Did you have any issues with the colors of the cardboard running or changing when you sprayed them?
I didn’t have any issues, but I imagine it depends on what type of paper/folder you’re using. Some papergoods seem to be more colorfast than others.
So Smart!
Wonderful Tutorial! Defiantly adding this to my craft list!
Cool project!
What a fun idea!
Love this. I can go so many places with this idea!
Pingback: Cereal Box Embossing with Design Mom - this heart of mine
What a great idea.
If you have a manual die cutting machine/embossing machine you can also feed these through like any other embossing plate. They will work fine :-)
When I cut out my letters, I also cut a slightly smaller one from fun foam.
I then glued this to a piece of cereal box, inked it up, and used it as a stamp on my embossed letter – looks good :)
Pingback: Pattern Blog
Pingback: 28 Things You Can Make With Cereal Boxes | DIY Kids Crafts
Pingback: Cereal Box Crafts DIY Projects | Do It Yourself Projects and Crafts