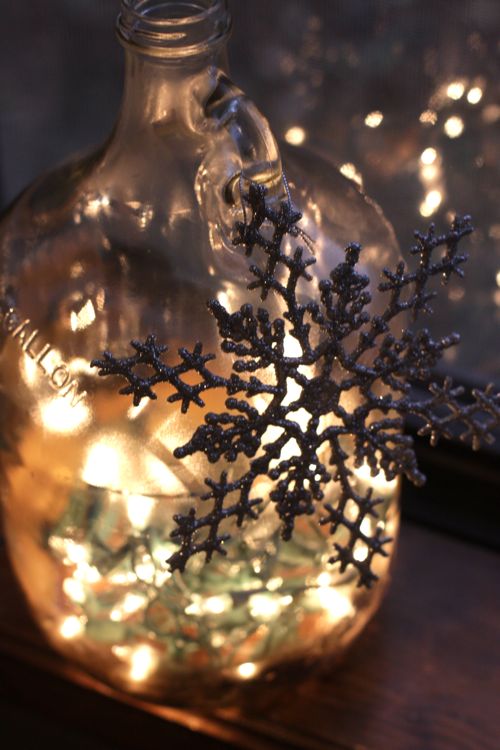
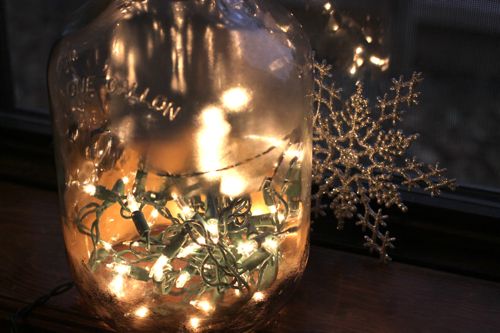
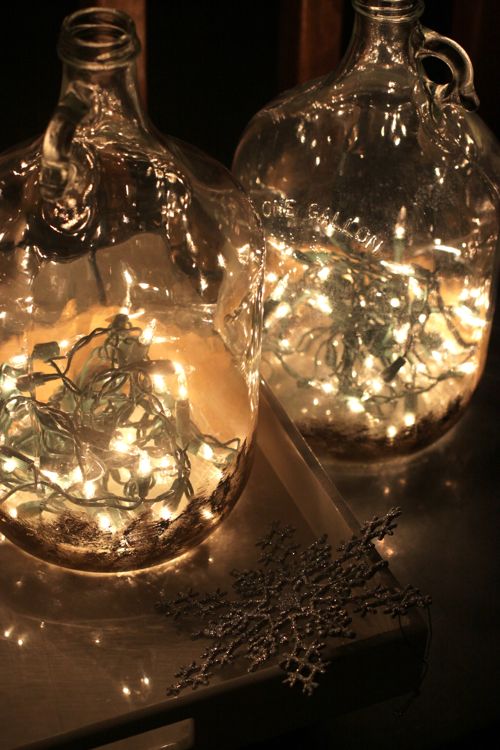
The other day, I wrote about attempting to drill through glass and I finished up the project this weekend. I think it turned out beautifully — I love the idea of bottled light thanks to Christmas Lights in a bottle!
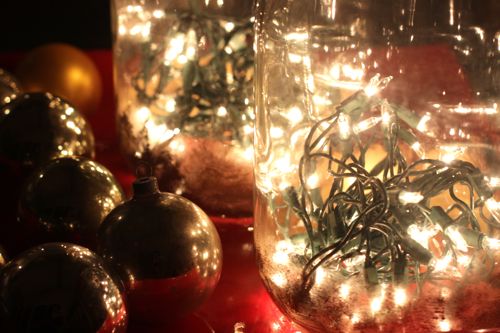
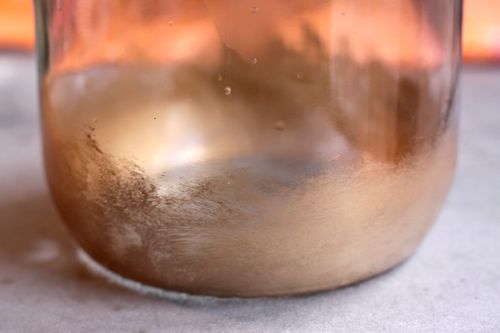
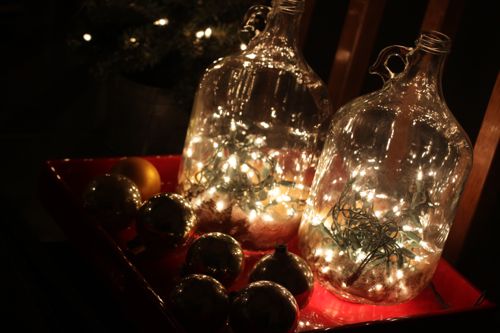
These would be pretty by a wintery window or under an entry table. I like the way the gold paint makes the bottom of the bottles look misty and glow-y, even during the daytime.
I’ve got a ton of images and DIY instructions below if you’d like to try this too.
CHRISTMAS LIGHTS IN A BOTTLE TUTORIAL
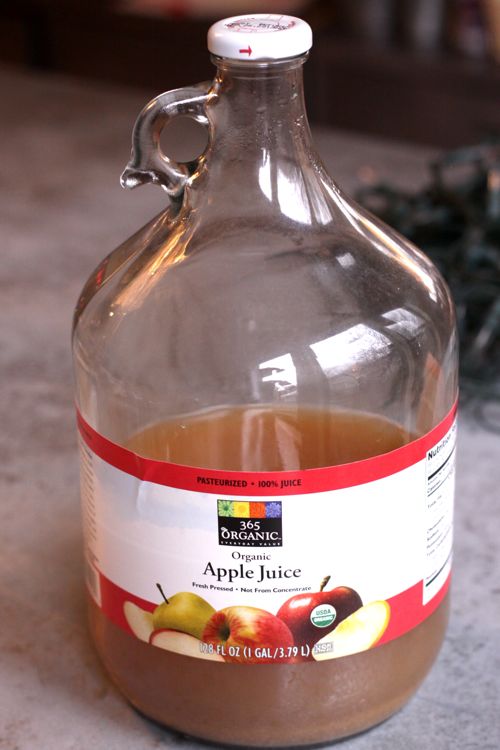
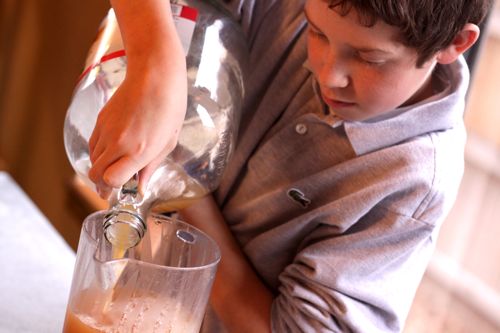
I started with these apple juice bottles. I have long admired these bottles — I love the contrast of the big round barrel and the teeny little handle — and was glad to finally come up with a project where I could use them. The juice is good too! I got impatient waiting for the family to finish up the contents, so I had my oldest son pour what was left into another pitcher, then I washed out the inside.
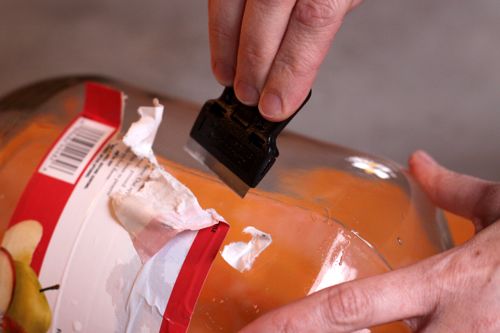
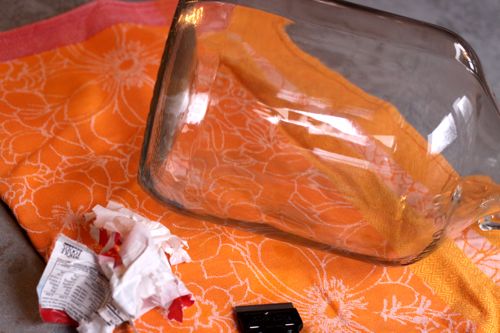
Next, for my Christmas lights in a bottle project, I used my handy mini scraper tool to take off the label. This tool is basically a straight edge razor blade with a handle. When you’re done using it, you can flip the blade upside down so the sharp part is hidden in the handle. Such a useful tool! I use it to take sticky things off windows and other glass — no chemicals required.
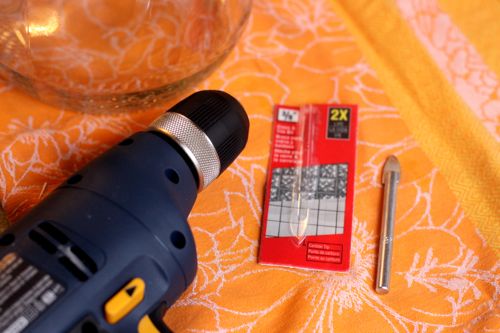
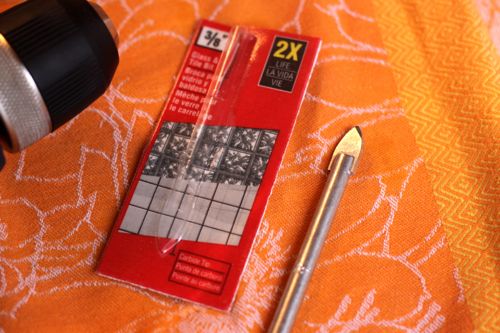
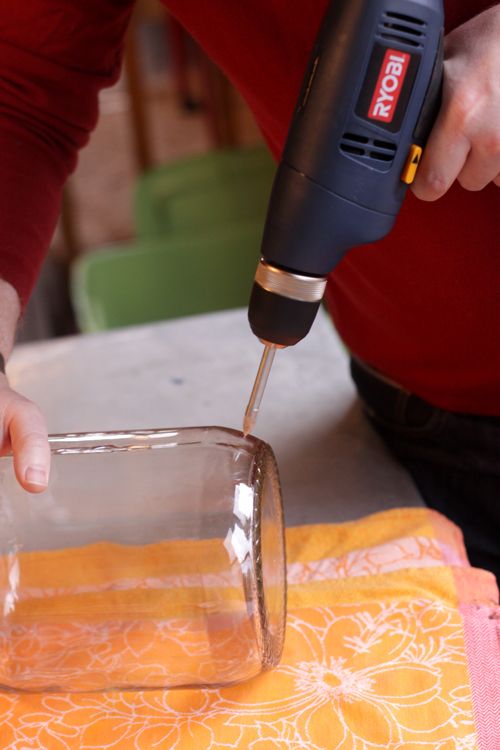
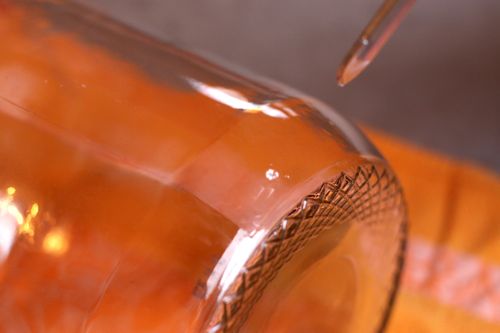
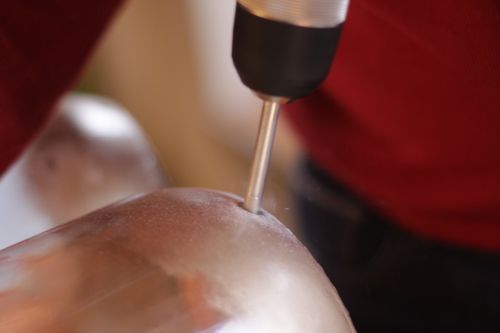
Once the bottle was clean and label free, it was time to drill through the glass. We used a 3/8″ drill bit designed for glass and tile. The drilling takes a little while — maybe 20 minutes — because you can’t go too fast. The drilling will create white dust (I guess it’s technically sand) and as the hole gets bigger, it will smoke a bit from the heat.
[UPDATE: Hah! Apparently I did it all wrong. Lots of readers are chiming in with suggestions for safer and easier and faster ways to do this. Among other things, suggestions include wearing a mask, drilling while using water to cool the bit, and using other tools entirely.]
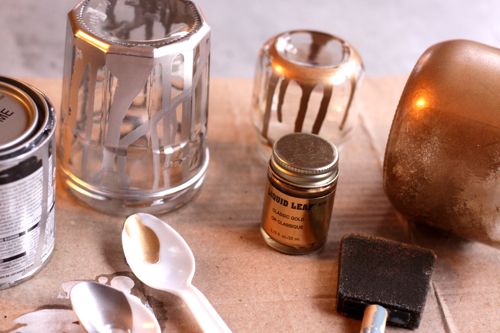
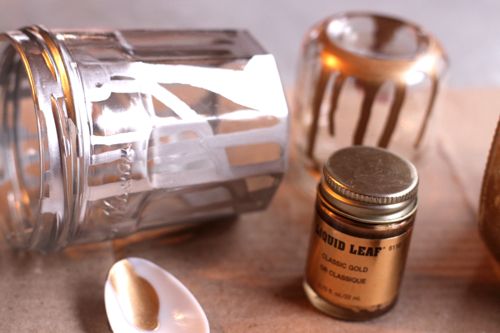
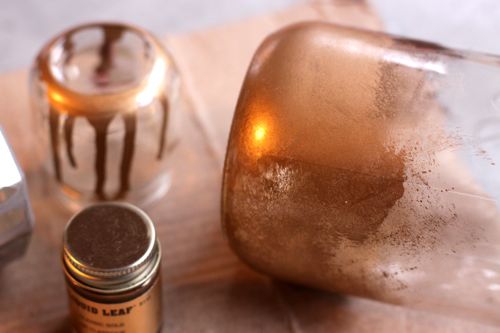
Next we painted. I experimented with some old jam jars and baby food jars first to try different techniques — like paint dripped from plastic spoons. But the kids voted and liked the sponged look best, so that’s what we did for the final project.
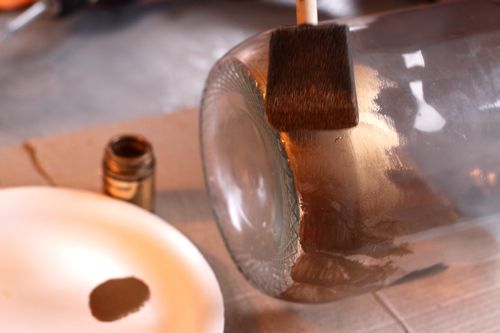
I used a disposable sponge brush and Liquid Leaf paint — but any metallic enamel paint should work. The paint is not water-cleanup, so a disposable brush is great for this project. I only needed a little bit of paint to get the coverage I wanted. Instead of brushing the paint on, I was mostly “patting” into place.
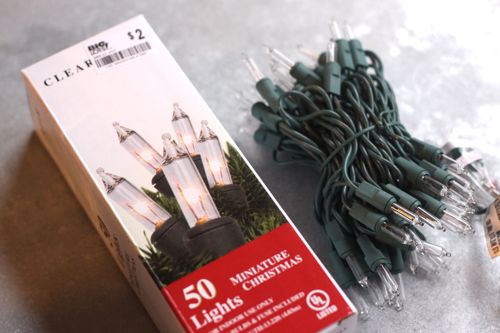
Once the paint was dry (it dries very quickly), we started stuffing our Christmas lights in the bottle. You’ll need a 50 light string that is not made to connect end-to-end. We had the hardest time finding lights like this. We went to 4 stores, but they all carried only end-to-end lights (which are the kind I prefer for my Christmas tree). Finally, I tried to think of who might carry old-school Christmas lights and Big Lots came to mind — because they often carry items from last season. Hooray! They had just what we needed.
The lights fit through one at a time, but it was a bit tight — I would recommend using a slightly larger drill bit and the light stuffing would go much faster. Oscar and Maude loved this part the best. Stuff every light on the string in, and the plug will dangle out the back, ready to find an outlet.
And that’s it! The Christmas lights in a bottle are a very satisfying project and a fun addition to our holiday decor. Though really, these don’t have to be holiday at all. We could use these for any sort of event where we want a little glow-y light happening. Maybe we need to have a party where bottled light is the theme. : )


Did you/is it possible to drill a large hole in the bottom of a glass vase without it breaking.
Interesting! I just saw the same thing at a craft show.
They were selling the bottles for $25.00 each – CRAZY!!!.
Of course I right away thought I could do it myself and was wondering how to drill the hole. Thanks for sharing the steps. I’ll be sure to try this weekend.
J’adore! I absolutely love this! What if you sprayed the lights with some sort of paint, maybe spray paint with a white or maybe gold paint! Give the lights and jar more of a glowing effect?! Just a thought!
These are incredibly gorgeous, and I had no idea that was how they were done until now! Thanks for the tutorial.
Something I picked up about cutting / drilling glass, though, is that I really don’t want to inhale that dust, on account of it being glass and all – what kind of mask for mouth and nose should be worn for this project?
The “sand” that you get from drilling through the glass is GLASS!! Ground up small , pieces of glass that would be extremely dangerous to inhale or ingest.
ok–for those of you who have done this…I drilled a 1/2 in hole (bigger than DesignMom) but still have trouble getting the lights in…maybe I need more mini-lights but what is the trick?? Know it takes awhile to push in but but between the width of the cord plus the width of the light, it is still too big. Maybe my lights are too big??!
those are fantastic… when I saw a tutorial for drilling glass I cringed… but then saw the bit…
I love this idea and what would finish off the glow of the lights would be fiberglass angel hair in the bottle or large container as well. or perhaps drop very small ornaments (slide down at an angle) in with the lights. Perfect idea as entry lighting to greet your guests……Thanks for posting your instructions .
I’ve made this project before, but with potpourri added, and as the lights warm up, its lets out the lovely scent. I kept mine in the bathroom, but I never liked the cord coming out the top, but drilling through the bottom of the container is genius! Thanks for sharing.
I too wondered how to cut a hole thru glass without it breaking!…This was a great step-by-step!…Thank You!
go online, look up diamond drill bits, they look like a whole saw, drill under water, takes less than a minute, depending on thickness of bottle
I have found the bit you used does not work as well as a diamond coated bit. I use a drill press to put holes in dishes or canning jars, keep the glass wet and you want get the dust or heat. When I saw you photo I was wondering how many people had trouble drilling like you showed, easier with a drill press , not everyone has one but they probably have a friend that does. A lot safer.
You’ve got the right idea. My husband always uses his drill press. The oil used while drilling holds down the dust and cools the bit. This is a project that could be dangerous, and if the jug or bottle breaks while drilling, one could be cut severely. Not something children should be around while attempting this.
I have tried this but when the lights have been turned on for awhile..it causes the bottle to collect sweat inside which makes it wet..Does anyone know how this happens or a way I could fix it. PLEASE HELP!!!! Im using wine bottles..does that make a difference????
I wash the bottles with soap and hot water to remove all the residue left in the wine bottles. Then I rinse the bottles with hot water to remove all soap. I then pour in about 3 tsp. of rubbing alcohol to complete the cleaning of the inside of the wine bottle and shake vigorously. After the hole is drilled, I rinse the bottle again with just hot water and then with the rubbing alcohol. The alcohol allows the bottle to dry without any spots lingering. Allow the bottle to completely dry, standing upside down away from heat or cold. “No sweat ” !!
oh what a brilliant idea!! thanks for sharing the DIY tips:)
hi! great project! been looking for a cool solstice type decoration, i’m not a big decorator fan… but the kids are!! this looks great!
i didn’t read all the comments so i don’t know if someone told you this already, i’ve worked with glass a lot, (i technically have a glass degree! imagine that…) anyway the dust you get from drilling glass is silica dust, if you breathe enough of it over time you can get silicosis, silica dust never clears from your lungs so it will build up over time. you should use water when drilling to keep it down you can even set it up in the sink and make a slow drip. if you find you are getting lots of dust from glass or you find yourself spending a really long time on lots of glass drilling or sanding projects, you should get a good quality particulate respirator to wear, for the kids too, these have to fit really well so that is seals all else out and should be stored in a ziplock plastic bag so it’s not filtering when you’re not wearing it.
good luck and thanks!!
Hi, Tara With A Glass Degree :)…How do I keep the drill bit from ‘dancing around’ on the glass. I tried this yesterday, but couldn’t keep the drill bit in one spot due to the smooth glass. Any suggestions?
the easiest way to stop the drill bit dancing around is use a bit of masking tape (not sticky tape) and drill through that
An acquaintance gave me one of these a few years ago as a gift. She painted her’s with a frosted look paint and also used some stencils such as holly leaves. Was very beautiful with the clear lights.
Really like this idea. I like your scraping tool – planning to look for one.
I have a question, do you know what I can use to get the screen-printing off plastic yogurt and butter containers?
I used to use nail polish remover. Works on sharpies too, but only on non porous surfaces.
25 years ago my Mother was going through a sad time in her life and put little lights in a glass jar on the kitchen counter like your picture and called them her “Happy Lights”… They became a family tradition and we all have them…
My thoughts on the commenter who thought it was a fire hazard…it is in a jar… so probably would be difficult for the fire to get out of control before it went out from lack of oxygen, if that happened. Or you noticed it was smoking, ha. Beautiful!! Love it! Great tutorial! :)
went to whole food and bought the cider. consumed the cider. bored hole in glass and *poof* broke bottom off jar in the process. going back to whole foods…
Reply to Cara above. place a piece of masking tape on bottle then x mark the spot and go slowly at first to ‘start’ a divot to be your guide.
Thank you, Linda :)
I agree !! Masking tape helps prevent breakage as well. !!
have you seen the beautiful olive jars at Costco?
Look soon, i think they are discontinuing them.
i like your idea of light in a bottle.
Joanne
Adding potpourri will make the room smell great! I have one with pinecones and potpourri in a vase, sits on my dresser for that warm glow and nice aroma. I like the gold paint idea. Thanks!
Drilling hole…..Place bottle in shallow pan fill to about 1/4 of an inch above the bottle when submerged, fill bottle with water put drill bit an an angle and start to drill then move the drill over the bottle so it is perpendicular to the bottle level.
NO, Dust…… bottle will not break……Joe
Joe! What are you doing awake at 4.41am? Try to sleep, or maybe get a soothing bottle of Happy Lights!
I’m in the UK and I’m not certain we can get hold of these bottles, but maybe a demijohn will do it. I’ll be keeping my eyes peeled for something that will do. I’m very broke so anything I can make as presents for friends and family works for me.
I can’t remember who was saying that her lights were creating moisture in the wine bottle, but I’d definitely try a bigger bottle with led lights – I think her lights might be making too much heat, and in too small a space?
Keep on trucking everyone, the ideas are inspiring! x
That’s exactly what we did, with the added step of putting an aluminum foil ‘rope’ molded around the bottom of the bottle to hold it in place. Ground glass was all contained by the water, no problems, hole drilled in under two minutes.
It’s a Penderyn whisky bottle, with a ragged golden lightning bottle screened on the side already (we have a Welsh corgi named Penderyn). Going to look cool when we get the lights and some glass beads in there.
This is fun project thanks for sharing! A friend gave me a glass block done in a similar way. She used a glass block left over from a project done in her home and she “frosted” it with some kind of spray, which gave it a beautiful look and then added a bow around the outside. I really love mine, but reusing the glass jugs is a wonderful idea and much less expensive. Thank you!
I love this Idea My son is getting married in July and I have been looking for a table Idea , they are getting married at our lake and I’m putting on the Grooms supper,I think this would really dress up the tables. Thanks for the wonderful Idea.
It is so much easier to drill a hole in glass with a dremel
It is so much easier to drill a hole with a Dremel drill. Hold the bottle under the faucet and let the water just dribble over the bottle where you want the hole. Don’t let the water hit anything on the drill but the bit. This keeps it cool. I use a 1/4 glass and tile bit. If the hole needs to be bigger, I use a bigger bit with a normal drill because that is the biggest bit that I can find for the Dremel! It easier to start it with the Dremel because it is a fast little drill. The whole process takes me less than 5 minutes!
I love this! I was wondering, what do you do when the light strand goes out & you need to replace it? Can you get the old ones out??
yes, just pull them out the same way you put them in.
If the strand does not light, just cut the cord and remove the lights from the top of the bottle, not the hole you inserted them through.
Loved this – Had another idea for you – have you seen how to make the mercury glass using the Krylon Mirror spray paint? That project + your project = Brilliance! Thanks for posting!
If you can’t find the lights without the plug at the other end you can cut the plug off. When it you cut it you just need to be careful to not let the wires touch after you cut them. Keep them separated and tape the ends with electrical tape.
Make sure you get the (cheap at Target) 2-strand lights. Then just cutting them off works great. The 3-strand ones might require some fiddling…
Were you at the ROT last week?
Mike, were you at the ROT rally last week?
I am going to start this tomorrow. I have decided that it will make a super cute night light in my daughters room. I will post pictures when completed!!
You can use wine bottles too. I have a green one with colored lights in it. Then it has a decorative wine bottle beads over the glass and an inexpensive bottle stopper on the top. I keep it on all year in my bar. It is so pretty. Thanks for the tips on how to cut the glass.
When drilling a hole in glass use a cordless drill and put the glass under a slow running fawcet to keep the glass cool, if the glass doesn’t stay cool it will break, this is much faster than the 20 minutes recommended. I can usually drill a hole in glass in about 5 min.
One thing I don’t see mentioned in this How-To is that you should always wear breathing (and eye) protection. Once glass dust gets in your lungs it can only be removed through surgery.
A good dust mask and some safetly glasses will protect you and you can drill away without worry.
I love this idea and I’m pinning it. Cool!
First of all this is a nice idea BUT by drilling like you are putting the drillers and any other person in proximity of the drilling in DANGER! Silica sand is cancerous it not as simple as you make it out to be! Furthermore, anyone with glass knowledge will tell you Silica sand is life threatening and that any glass that is drilled is supposed to be in water….which unless you are a PROFESSIONAL you are putting them in danger of being shocked by electricity and water combo. I just hope you don’t get sued over this being on Pinterest and connecting to your site!
Yes people need to use COMMON SENSE & use a mask. Also, about the remark on being sued for her putting this how-to on pinterest in relation to the dangers…when did people quit being responsible for their OWN actions! Too many people these days look to blame someone else for their own mistakes & mishaps!! We have turned into a country of frivolous lawsuits because nobody thinks they are at fault for anything…buck up people and quit blaming everyone else! If you are looking for different project ideas and choose to do them, YOU are responsible for what happens when you do it, NOT the person who was kind enough to share info. Do your homework and think things through BEFORE you start. I’m grateful to have all these wonderful ideas on Pinterest and don’t want others to ruin it for us!
Amen! There a people that sit at the courthouse thinking of who they want to sue that day and make a living at it. It’s such a shame that someone would even bring that up when someone is kind enough to show us step by step. You haven’t even looked at the comments before you or you had a brain fart! I’m not sure which one because if you had you would see the comments on the dangers of drilling glass. Oh, by the way it would be nice in the future to read ALL the comments before you reply. That person didn’t deserve that.
Amen, It’s such a shame that someone would even bring that up when OTHERS is kind enough to show us ideas step by step. if you had followed and read the other comments you would of seen the danger of drilling glass they couldn’t express it enough.
Couldn’t you just use battery powered lights and avoid drilling the hole in the glass? Love this look!
Melanie,
That is the best idea that I have seen so far!!!
Or solar ones
TIP for drilling glass. Submerg the drilling area in water. This will keep the glass cool while drilling. No smoking and it will keep the shards of glass confined in the water. Use a sink size tub for small projects or for larger projects let water run over the drilling area with a hose.
Love this idea. I have a very old glass jug simular to the one your using. Been wondering what to do with it. PERFECT
Hi great minds think alike! i use wine bottles for a project similar to this….i decorate them with stones and grape leaves or i paint on them….game some away for Christmas!:)
Thanks for this tutorial, I did my first bottle this morning. I’ve been doing lots of tissue paper + jar lanterns with the kids, and I think the effect will look really sweet on a bottle full of lights.
I’ve drilled wine bottles and glass blocks. I got a diamond drill bit and used water to keep the bit lubricated. Of course wet glass dust collected in the blocks. I rinsed them out with water then rinsed them with rubbing alcohol, which will evaporate.
Your mental imagery of chipping away at the glass rather than drilling straight through is exactly the advice I received following several less than perfect tries on vintage glass when I was first getting started. Like you, I found that visual to be very helpful! Slowing down and a patient approach were the other helpful bits I received, since at that time I was almost always on “hurry while they nap” speed! ;)
Kit’s tip of using alcohol to prevent interior water spots is also great. Dishwasher rinse agent in your rinse water is another trick if you don’t happen to have alcohol or want to avoid the odor.
Oops–thought I was commenting on the “How to Drill a Hole in Glass” post. Sorry! I started reading here, however. This is such a pretty project!
Hi there! Sherrie (above comment) is correct – get a tub of water that is large enough to submerse your jug (room temperature water is best – too cold and it will break from the contrast of the heat while drilling). I use a dremel and a diamond coated drill bit. You can get a variety pack of 50 diamond coated drill bits for dremel tools at Harbor Freight Tools, for under $20.00!!! yes, 50 drill bits!!!! http://www.harborfreight.com/catalogsearch/result?q=diamond+drill+bit
Just make sure not to get your dremel tool in the water above the drill bit! :)
The water naturally collects the glass dust with no worries of inhalation.
Drill the glass under running water, using a drill press to hold the glass down is also good. I use the glass bathroom blocks. By using the glass under running water is is cooling down the blade as it works as it can overheat and cause the glass to break thus having glass all over. The drill bit needs that cooling down effect, takes only 3 minutes to cut through that thick bathroom glass blocks.
My senior citizen Mom’s craft class entwined the lights with potpourri in the jars/bottles. Pretty lights and nice aroma, too.
The technique: FOR DRILLING HOLES IN GLASS.
Submerging your bottle in water does work, but you could also set up a drip system.
Above your drill, hang a bottle full of water with a pin hole in it, that lets the water out at a steady regular drip, onto the area being drilled. You’ll have to decide for yourself: where you want the water to drip, the rate of the water flow, and the height of the drip bottle.
This keeps the focus on one spot and it is not distorted.
When you are finished drilling, simply turn the bottle up-side down. Save that water for the next project.
Namaste
Created, tried and proven true by a master stained-glass artist in Baltimore MD.
so you dont have to put tape on the glass to keep it from spliting?
Use a diamond drill bit, corded drill and running water and save yourself 19 minutes.
I do this same thing with old wine bottles. You can cut a piece of the cork out and pull the plug right through that to plug it in. They look so pretty. I leave the labels on the wine, always looking for bottles with interesting labels. I’ve made them for friends at Christmas and they love them.
so wonderful! very creative!