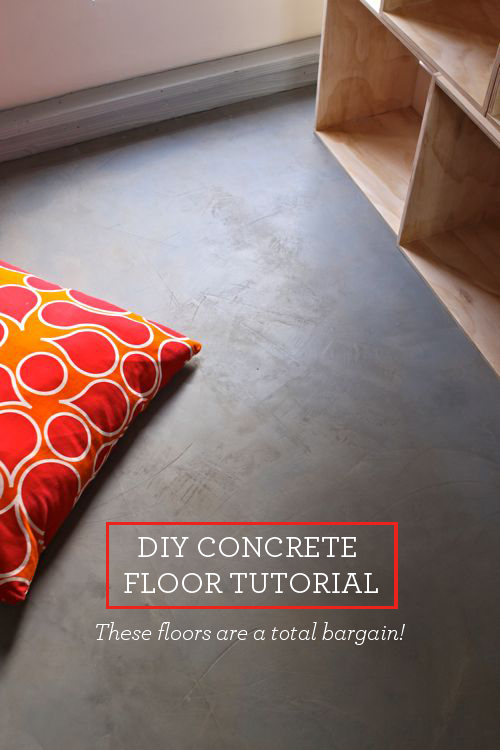
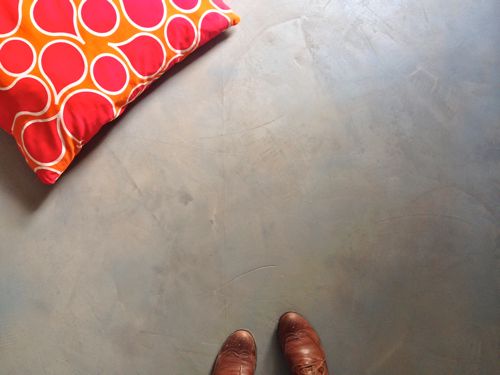
I’m pleased as punch to tell you about the DIY concrete floor experiment that we tried in the reading loft of The Treehouse. I love how it turned out! The texture is wonderful. The floor looks layered and feels like it has depth — but the whole surface is barely 1/8″ deep! It’s easy to clean and maintain. It has the industrial look I am every drawn to. Plus, it was inexpensive and totally DIY-doable.
I originally thought we would put carpet in the loft, but then I changed my mind and thought I would rather install a sweepable surface with an area rug on top. I made some inquiries about concrete floors and was told the weight of true concrete would be too heavy for this area, so I shifted my attention to tiles. But about that time, I read a blog post about resurfacing a laundry room counter with a thin layer of concrete and I wondered if I could try the same method on the reading loft floor to achieve a concrete look without the heavy weight.
I finally concluded: why not try? The space is small and a low-traffic area. The materials are a bargain, so if it failed it wasn’t too great of a loss. Plus, if our DIY concrete floor was a disaster, I could cover it with tile or hardwood and hide the evidence. So I gathered the materials and went for it!
Would you like to see how this DIY concrete floor came together?
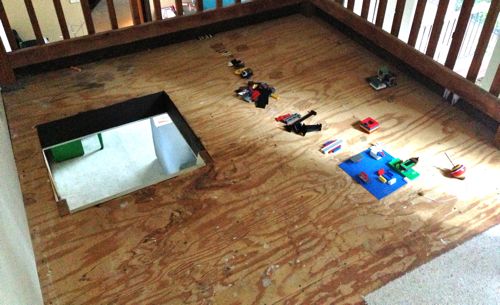
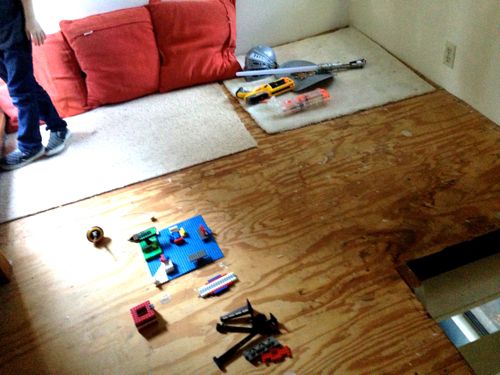
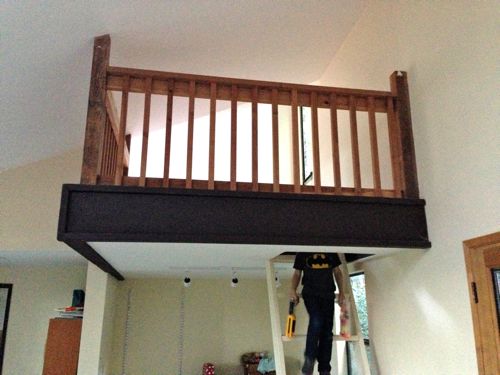
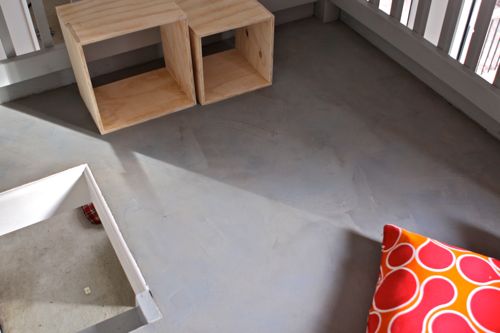
Let’s start with a few before shots. As you can see, the loft is a small raised area above the family room. The whole area is about 7 x 10 feet, and can be accessed by a ladder. The floor was unfinished — a simple plywood subfloor ready for carpet, tile, hardwood, or in our case: concrete!
DIY CONCRETE FLOOR – MATERIALS NEEDED
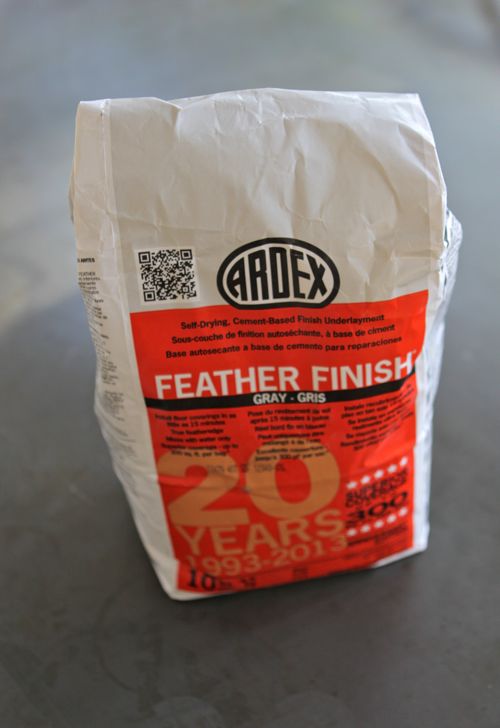
Next, let’s talk materials. The magic ingredient is Ardex Feather Finish. This stuff is simply a delight to work with! You can apply it in thin, thin, layers and then build it up to a beautiful finish.
It used to be hard to find, but now it’s available online!
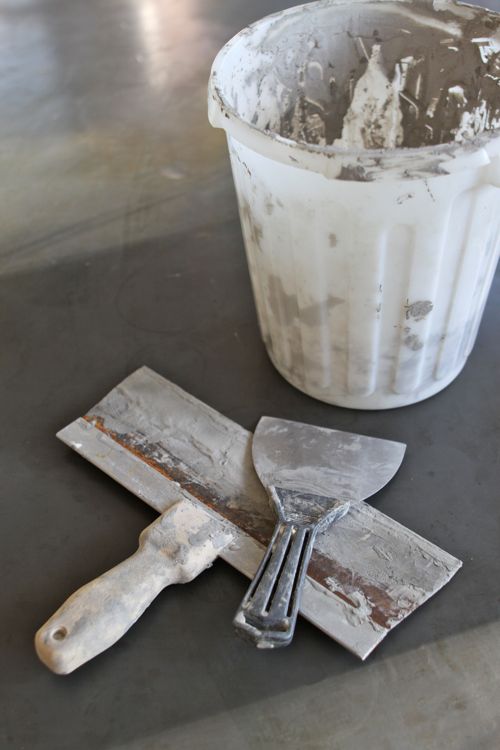
You’ll also need a trowel or spreader — I liked using a couple of different sizes — plus an old bucket and spoon for mixing the Feather Finish.
DIY CONCRETE FLOOR – STEP BY STEP
Once I had the appropriate supplies, I reviewed directions for a DIY concrete floor found here and here. Essentially, you pour some Ardex Feather Finish (it’s a powder) into your bucket and add some water, then stir. You’re going for the texture of a thin pancake batter. I never measured the Feather Finish or the water. I would just add a little of each till the texture was right. I also worked in small batches — because this stuff dries really fast!
After it’s mixed, I let it sit for 1 minute in the bucket to achieve a sort of “soft set”, then I would pour it out onto the floor and use the trowel to spread it. The first layer went directly on the plywood. (I swept and dusted it really well beforehand.)
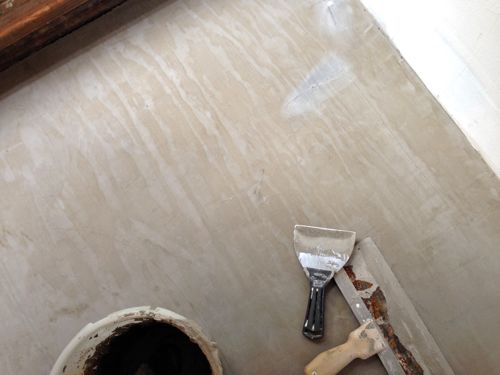
I worked in very thin layers for our DIY concrete floor. In fact, I could see the plywood through the concrete for the first few layers. I was working on this late at night, so I would do a layer, then head to bed and then let it dry over night. Which means the project dragged out for days! But the layers actually dry quite quickly, so you could truly tackle this on Saturday and finish the whole thing.
Before I added each new layer, I would take a putty knife and scrape off any bits of dried concrete that were protruding too much, and I would give the entire floor a very light sanding. Then I would sweep up the dust and add another layer of Feather Finish.
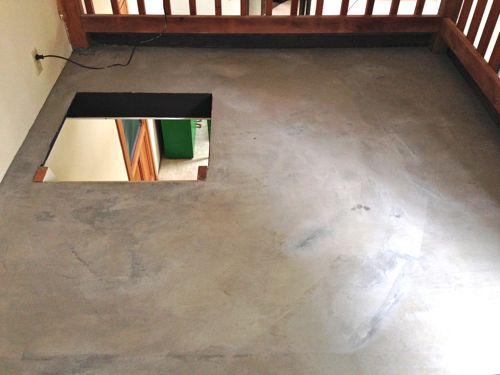
Ultimately, I built up 6 thin layers and then topped it with a thicker layer. But the whole DIY concrete floor is quite thin — maybe 1/8″ thick max.
DIY CONCRETE FLOOR – THINGS TO KNOW
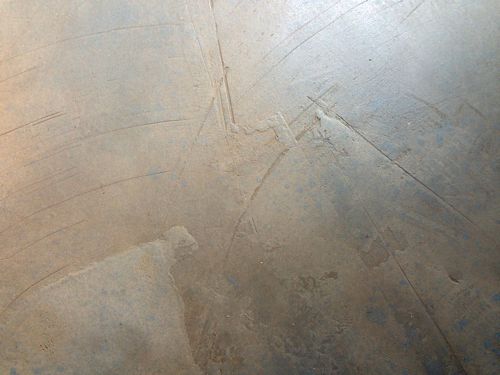
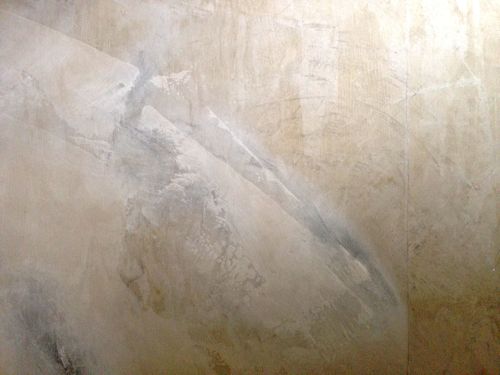
One thing I learned: You can still see the seams of the subfloor (notice the vertical line on the right hand side of the photo above). In the case of the loft floor, having seams showing is fine with me because I knew it was an experiment and I had low expectations — plus, I’ll be adding an area rug which will cover the major seam anyway.
But if I were doing it again, I would put down a layer of burlap cloth first. Apparently, applying the concrete over the burlap will hide the subfloor seams and prevent cracking. (I learned that little tip the day the floor was finished — I haven’t tried it yet, but I’m dying to!)
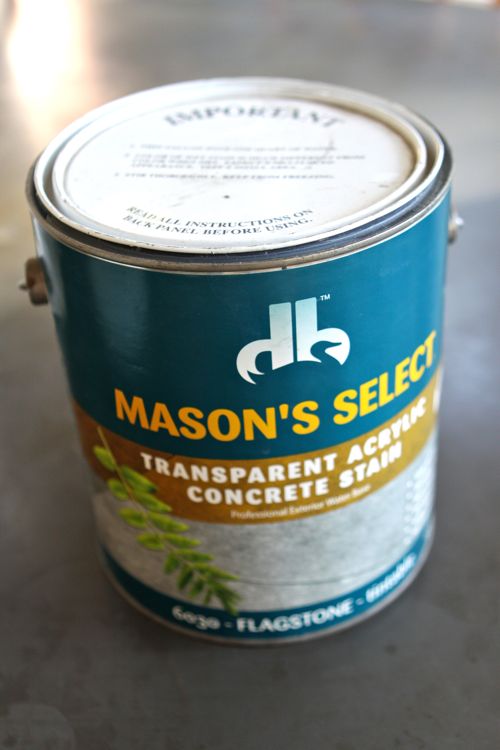
At this point, I departed from the tutorials I linked to above and tried concrete stain, instead of the recommended sealant. This was a tip from sculptor who has worked with concrete before and knew this would add depth. And it totally did.
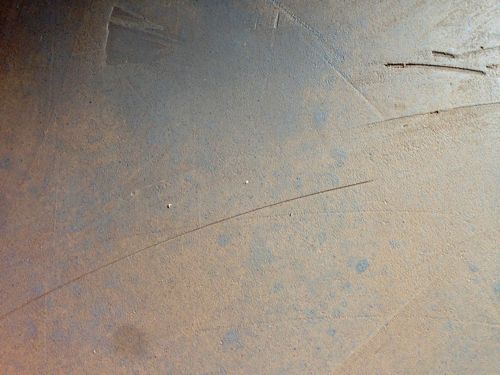
The stain definitely created depth and also left bluish areas that look really cool! I really like how the stain affected the overall look.
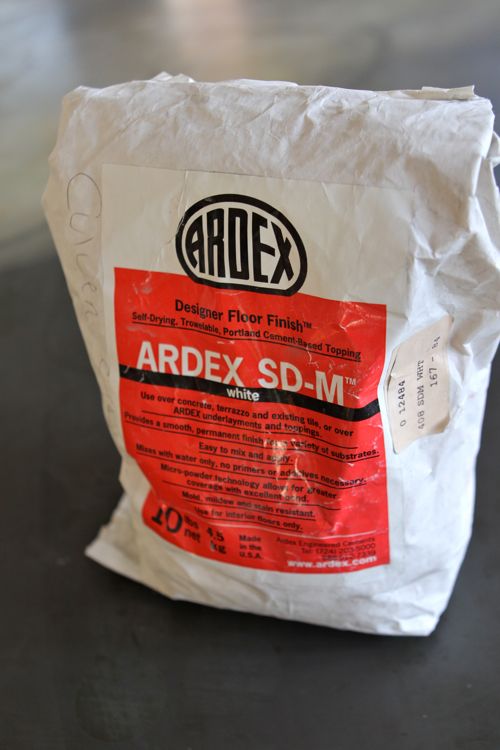
One other thing I learned: In addition to the Ardex Feather Finish, I also bought a bag of Ardex SD-M. The Feather Finish only comes in gray, but the SD-M comes in either gray or white. I chose white. I’d read that you can add a layer of SD-M on top of the Feather Finish if you want a whitish floor instead of a gray one — and that you can even tint or dye the SD-M if you want colored concrete.
Since the floors downstairs were white-washed, I thought it might cool to keep the concrete white as well. So for layer number 5, I used SD-M instead of Feather Finish. Turns out, I didn’t like the look of the white at all! I much preferred the gray. And it might have been my imagination, but I felt like the SD-M wasn’t as easy to work with as the Feather Finish. Anyway, for layer 6, plus the finish layer, I went back to using Feather Finish.
And that’s it. Pretty darn easy. Plus economical too! A bag of Feather Finish costs about $15 (in our case, the loft needed one full bag), and then you’ll need some concrete stain. A whole new floor for about $30 in materials! The reading loft is really coming together.
One last note: as I mentioned above, the reading loft is low-traffic area. The concrete is doing great, but I really have no idea how this would hold up in a hallway or kitchen. That said, I think we might try it in another space — possibly the boys bedroom, or even the family room! If we do, I’ll be sure to share anything new we learn.
I’d love to hear what you think about our DIY concrete floor! Do you like the look of concrete floors or are they too industrial feeling for you? And would you ever try this sort of project/experiment yourself? Or do you prefer to stick to more proven methods?
Credits: Photos and text by Gabrielle Blair.
Would you recommend the stain/sealant you used if on were to do this on a kitchen floor? Would it hold up?
Thanks!
have you tried it on another area yet? I am seriously considering ripping up the carpet in my girls’ room and doing this. The floor beneath the carpet is already concrete so I’d probably just have to remove the glue, sand it a bit, stain it hen put a clear coat on. It just seems so much easier to maintain and cheaper than any other surface!
If you did it in your son’s room please show pictures and let me know how it turned out!
I am planning to redo my concrete slabs kitchen flooring, but how can this possible by myself. I don’t have any idea about the maintenance things. Kitchen is most tough one to maintain. This is the place where staining sauces, juices, and condiments can splatter and spill in every direction and naturally ending up down on the flooring. So I am considering a professional polishing service from Floortex in Canada. I looking forward to get a more glossy and finished look on those concrete slabs.
Hey! Thanks for this awesome post. I live in SF and wanted to get some of that feather finish concrete. Did you order it online? Or were you able to find it in the Bay Area? Please let me know! Have a good one.
Can you give us an update on how this floor is doing? I am considering putting it in our guest bathroom. Thanks!
Hey, I absolutely loved reading this!
We live in the UK and I’m desperate to get some concrete flooring in our new home/project, but at the moment we can’t afford the pricetag. Perhaps your way of achieving the look is the answer!
How do you think it would hold up in a bathroom? Perhaps I’d need to seal it to make it withstand water spilling on it?
Any advice would be great. Thanks.
i have had the idea in my head for a while. i want to do my living room. the room is already concrete so i’m hoping i can clean it very good and stain it. i will also use an area rug afterwards. do you think this is a good idea? please help!!!!!
Thank you so much for detailing your experience. I’d love to give this a try in my kitchen. Like you say if it didn’t hold up then it can be covered over!
Also I wanted to add a suggestion for people wanting to try this. Oxide powders mixed into cement can add beautiful tones and depth. They come in a variety of colours. I love the effect you achieved with the stain I may be tempted to use both oxides and the stain if I do manage to do this myself.
Very well done!
Hi did you end up doing this in your kitchen. I’m thinking the same but worried it wont hold the traffic
Hi Jodie,
I haven’t quite brought myself to try this yet but am thinking of giving it a go this week on a smaller area (the toilet room floor) while hubby is away! If I do go ahead with it I’ll let you know how it goes. Am a bit nervous, may also use burlap I believe.
Thank you very much for the guide.
All the way from the UK I’ve decided to give this a go in our bathroom! I also took to tip of using burlap cloth (also read somewhere else) – my advice to all is to invest in the cloth as it stops the Ardex from cracking and also seems to provide a softer touch to the foot once all the layers are down.
I was wondering if any UK people had tracked down a suitable stain? I really like the look of the Masons Select but the cost is near £100! as the product is American. Can anyone suggest any similar solutions available and affordable in the UK?
thanks for posting this. i’m wondering how those hairline cracks are doing and also if you know of anyone has tried this with the burlap and how it held up?
Hi,
I’m wondering how you think this would hold up in a wet area? I’m looking for a industrial solution for my bathroom floor and shower recess. Any advice would be greatly appreciated!
Lee
hey, this is awesome, where can i find the burlap you speak of, seems like that really kinda ups the price and do you adhere the burlap to the surface or you just plop it on, is it possible to caulk or spackle the lines between the plywood?
Hello,
After some years does the floor still perfect (just some smaller cracks)? Does it happen that you have experience of larger and more busy areas also since then?
Many thanks.
Hey, I am wondering about you comment “low traffic area”. I would really love to apply this method to a kitchen floor , but, as its a “high traffic area” is it likely to crack a lot? Thanks for the post.
Hi,
I was wondering as well if this would be ok as a kitchen floor. With the burlap cloth stapled on top of the plywood and extra layers of the Ardex Feather Smooth, do you think it would hold up? Maybe a concrete sealant could be applied in the end.
Thank you so much!
Dear Gabrielle,
Wow! This is SO what I needed!! I’ll be inheriting my parent’s house shortly and I know I won’t be able to afford any “real” flooring. …but that’s cool, cuz I really like the concrete finish. I recently took an art class at someone’s home and his floors were concrete – – there were some cracks in the cement (which I am fully anticipating finding when I get the carpet up at my parent’s house), so he used extra-bright colors and wrote along the cracks things like “Warning: Elevation Change” and my favorite, “This is NOT my fault!” Ya work with what you’ve got, right?
Hello, Thanks you so much for your post, it’s incredibly helpful. Would you explain how you applied the sealant?
Thanks,
Victoria
Hello, I want to thank you for the post, all my house is pure concrete and I was so undecided what to do. Where I’m from in Texas its usually windy and really hot year round so carpet is a big no, no for me. Anyways, I love what you did here and reallllyyyy love those imperfections most of all, that I’m going to give it a try on my master bedroom first then we’ll see from there. Again thank you so much for the post.
I dont think the seams are noticeable at all- it looks awesome and much better than any other option in the price range… you have so much natural variation in the finish, how did you do this? ive used ardex feather finish on several projects in my house and the finished color is very uniform.
Hi Anne Thies,
How has your projects held up? I want to use this in a retail store as my point of sale counter and really need to know the durability expectations. Maybe more sealant if needed? Are you finding yourself reworking an area? I would appreciate any additional information
I am curious how this has held up over time… I am looking at a complete basement reno and considering concrete for some of my floors. ALso: how long did 6 layers take you?
Pingback: Spring Project Update! – designpetproject
would this work to cover the old cement floor of my garage. Im making it into an art studio, and the old cement floor is cracked and oil stained.
Pingback: The Pros & Cons of Flooring Types & How to Choose | Designer Trapped
I would love to do it in my hall bathroom, but it’s the children’s bathroom as well so high traffic and lots of water. I fear the durability. Have you spilled anything up there? Results?
How has the floor held up 3ish years later? I am building a house and would love for the upstairs to be concrete floors like the downstairs!
I second this I would like to know how it held up!
I love to try this DIY concrete floor to my son’s playroom. I think that it will gonna be perfect for it. Thanks for sharing this.
Thanks for sharing, really like it. <3
Hi, I bought this product and put it on my floor last night. It looks very brown😬 looking at the packet it says mortar at the end. Did I buy the wrong stuff? Any advice greatly appreciated.
Thank you for the DIY! Since the product is sold as an “underlayment” – how has it held up as a finish layer after all these years?
Thanks for sharing!
Being that it’s 7 yrs after you did this project, was there ever any cracking?
I three dogs and cats in the house, and they have destroyed our carpet floors. I wanted to do the concrete floors in all affected areas. The floors below the carpet and padding is just concrete. How would I do this is the floor is already concrete, i.e., patch any of the cracks on the foundation and do the decorative finish?
I did this in my dining room and kitchen over 2 layers of vinyl flooring. It was great for the first 3-4 years. The downfall was getting a dog. His nails and the vinyl underneath caused the cement to flake off.
I loved it so much, I am considering ripping out all the vinyl and doing it again over the subfloor.
Valerie, I have sheet vinyl flooring in my 1950s kitchen and was wondering how this would hold up on top of the vinyl so I guess I have my answer! How thick of a coat of the feather finish did you apply?
In hindsight, are there any things you would do differently or recommend to someone who’s considering this as a kitchen flooring option? The burlap underlay idea sounds like it might be a smart one, but wonder if it’s necessary. TIA!
Pingback: 6 Creative Ideas for Concrete Flooring in Your Home - Breaking News Today
For someone considering a DIY concrete floor, having readily available materials like Ardex Feather Finish is a big advantage. However, were there any unexpected challenges you encountered during the installation process that you’d recommend DIYers be aware of?
I’m excited to share our DIY concrete floor experiment in The Treehouse reading loft! The texture is amazing, and it has a layered, industrial look, all at just 1/8″ thick. It’s easy to clean, maintain, and was incredibly cost-effective. Using Ardex Feather Finish and concrete stain, we achieved a stunning result. For just about $30, we transformed the space with a beautiful, durable floor. Perfect for any DIY enthusiast!
Ten years later I found this and it inspired me to try something similar. I now have a beautiful painted Ardex floor. Saved a ton of money and looks great. Just wanted to say thanks.